PLEASE follow my instructions and recommendations. Do not go crazy making random changes and improvising, especially if you don’t know what you’re doing. A badly made wheel could gravely injure or kill your glider(s).
If you think this tutorial is not good, then feel free to contact me to improve it. (tsugielove@gmail.com)
There are people out there who want to make their own wheels and if you think the wheel made from this tutorial, even though it follows the Fast Track design, is unsafe and you’re all about safety, then act on it.
I am very open to a discussion. I do not believe I know it all (as evidenced by all the updates I have made and the comments I have added as the time has passed).
I made a video tutorial as well. However, it is not as comprehensive as the written version. I highly recommend you check out both. https://youtu.be/O8DA3QFJFA8
I also made a breakdown of the cost to make them here: DIY Wheel Cost Breakdown
*I have made various updates to this tutorial so there will be some older photos that don’t show exactly how the wheel will look with the new instructions (like missing binding posts). I left them because I did not take step-by-step photos with all the new changes and the old photos still represent what I am instructing you to do. I hope that makes sense and doesn’t cause any confusions. :)*
DIY Sugar Glider Wheel
I decided to make this tutorial because of people outside the US who can’t afford to have safe wheels shipped to their country and because I kept seeing numerous people attempting to make their own wheels. They all made terribly unsafe ones and I thought a tutorial could only benefit people like that and anyone wanting to make their own.
Of course, people can still make an unsafe wheel even after seeing my tutorial if they decide to not follow my recommendations. But that’s true for any and all tutorials out there.
Like it or not, the reality is that there not being a tutorial will not stop people from trying to make their own. It sure didn’t stop me when I made my first one. And it sure didn’t stop people before me, either.
I did the best tutorial I could make with accessible and relatively inexpensive materials and tools. (I know you can make more perfect/aesthetically pleasing wheels with more expensive materials and tools.) And I’m continually updating it with more options and comments about safety and precautions to take.
Even if you end up deciding to not make one or various wheels using this tutorial, please consider buying safe wheels for your sugar gliders. (I actually suggest buying at least one safe wheel before venturing on making your own so that you can get a better feel for them.)
Wheels with bars/axles in the center, like the Wodent Wheel, have been known to injure backs and tails. Also, wheels with a solid track will get soiled very quickly with pee and poop. And your glider will be stepping on all of it.
In addition, sugar gliders often use the same wheel together, which increases the dangers of a center bar. Even the manufacturer of the often recommended Wodent Wheel strongly recommends against letting more than one glider use their wheel at the same time without supervision because of the potential dangers.
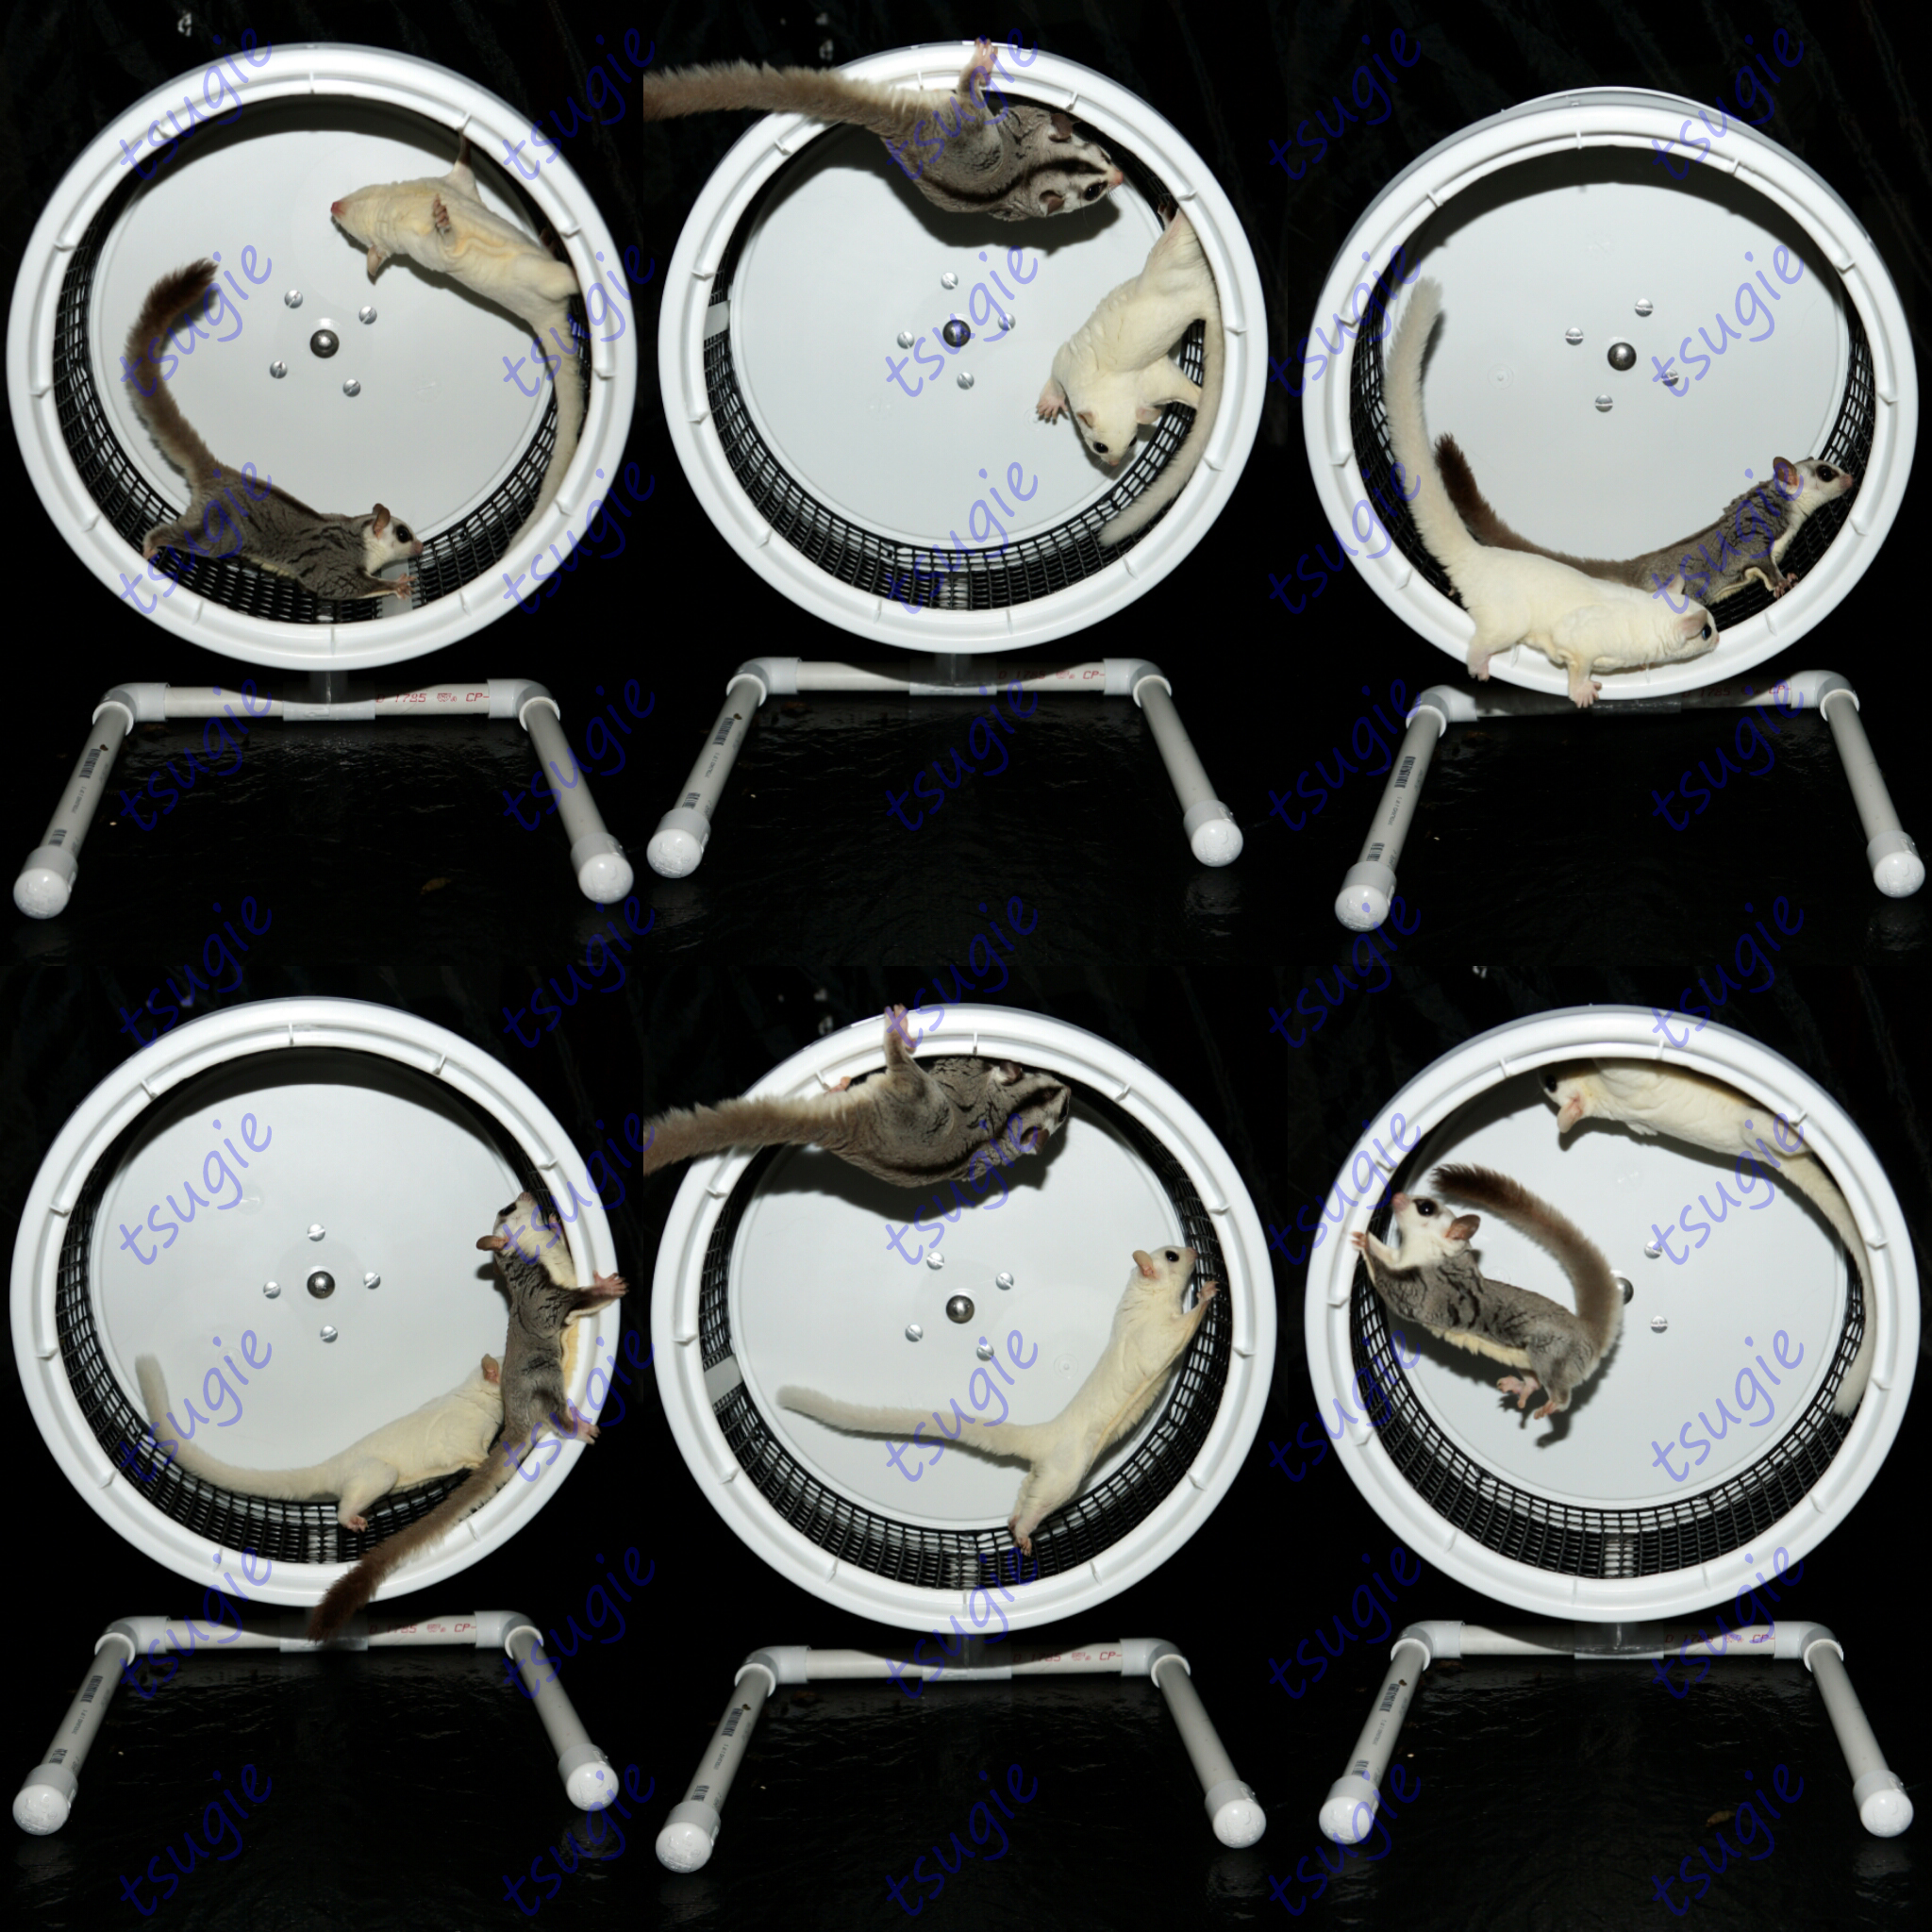
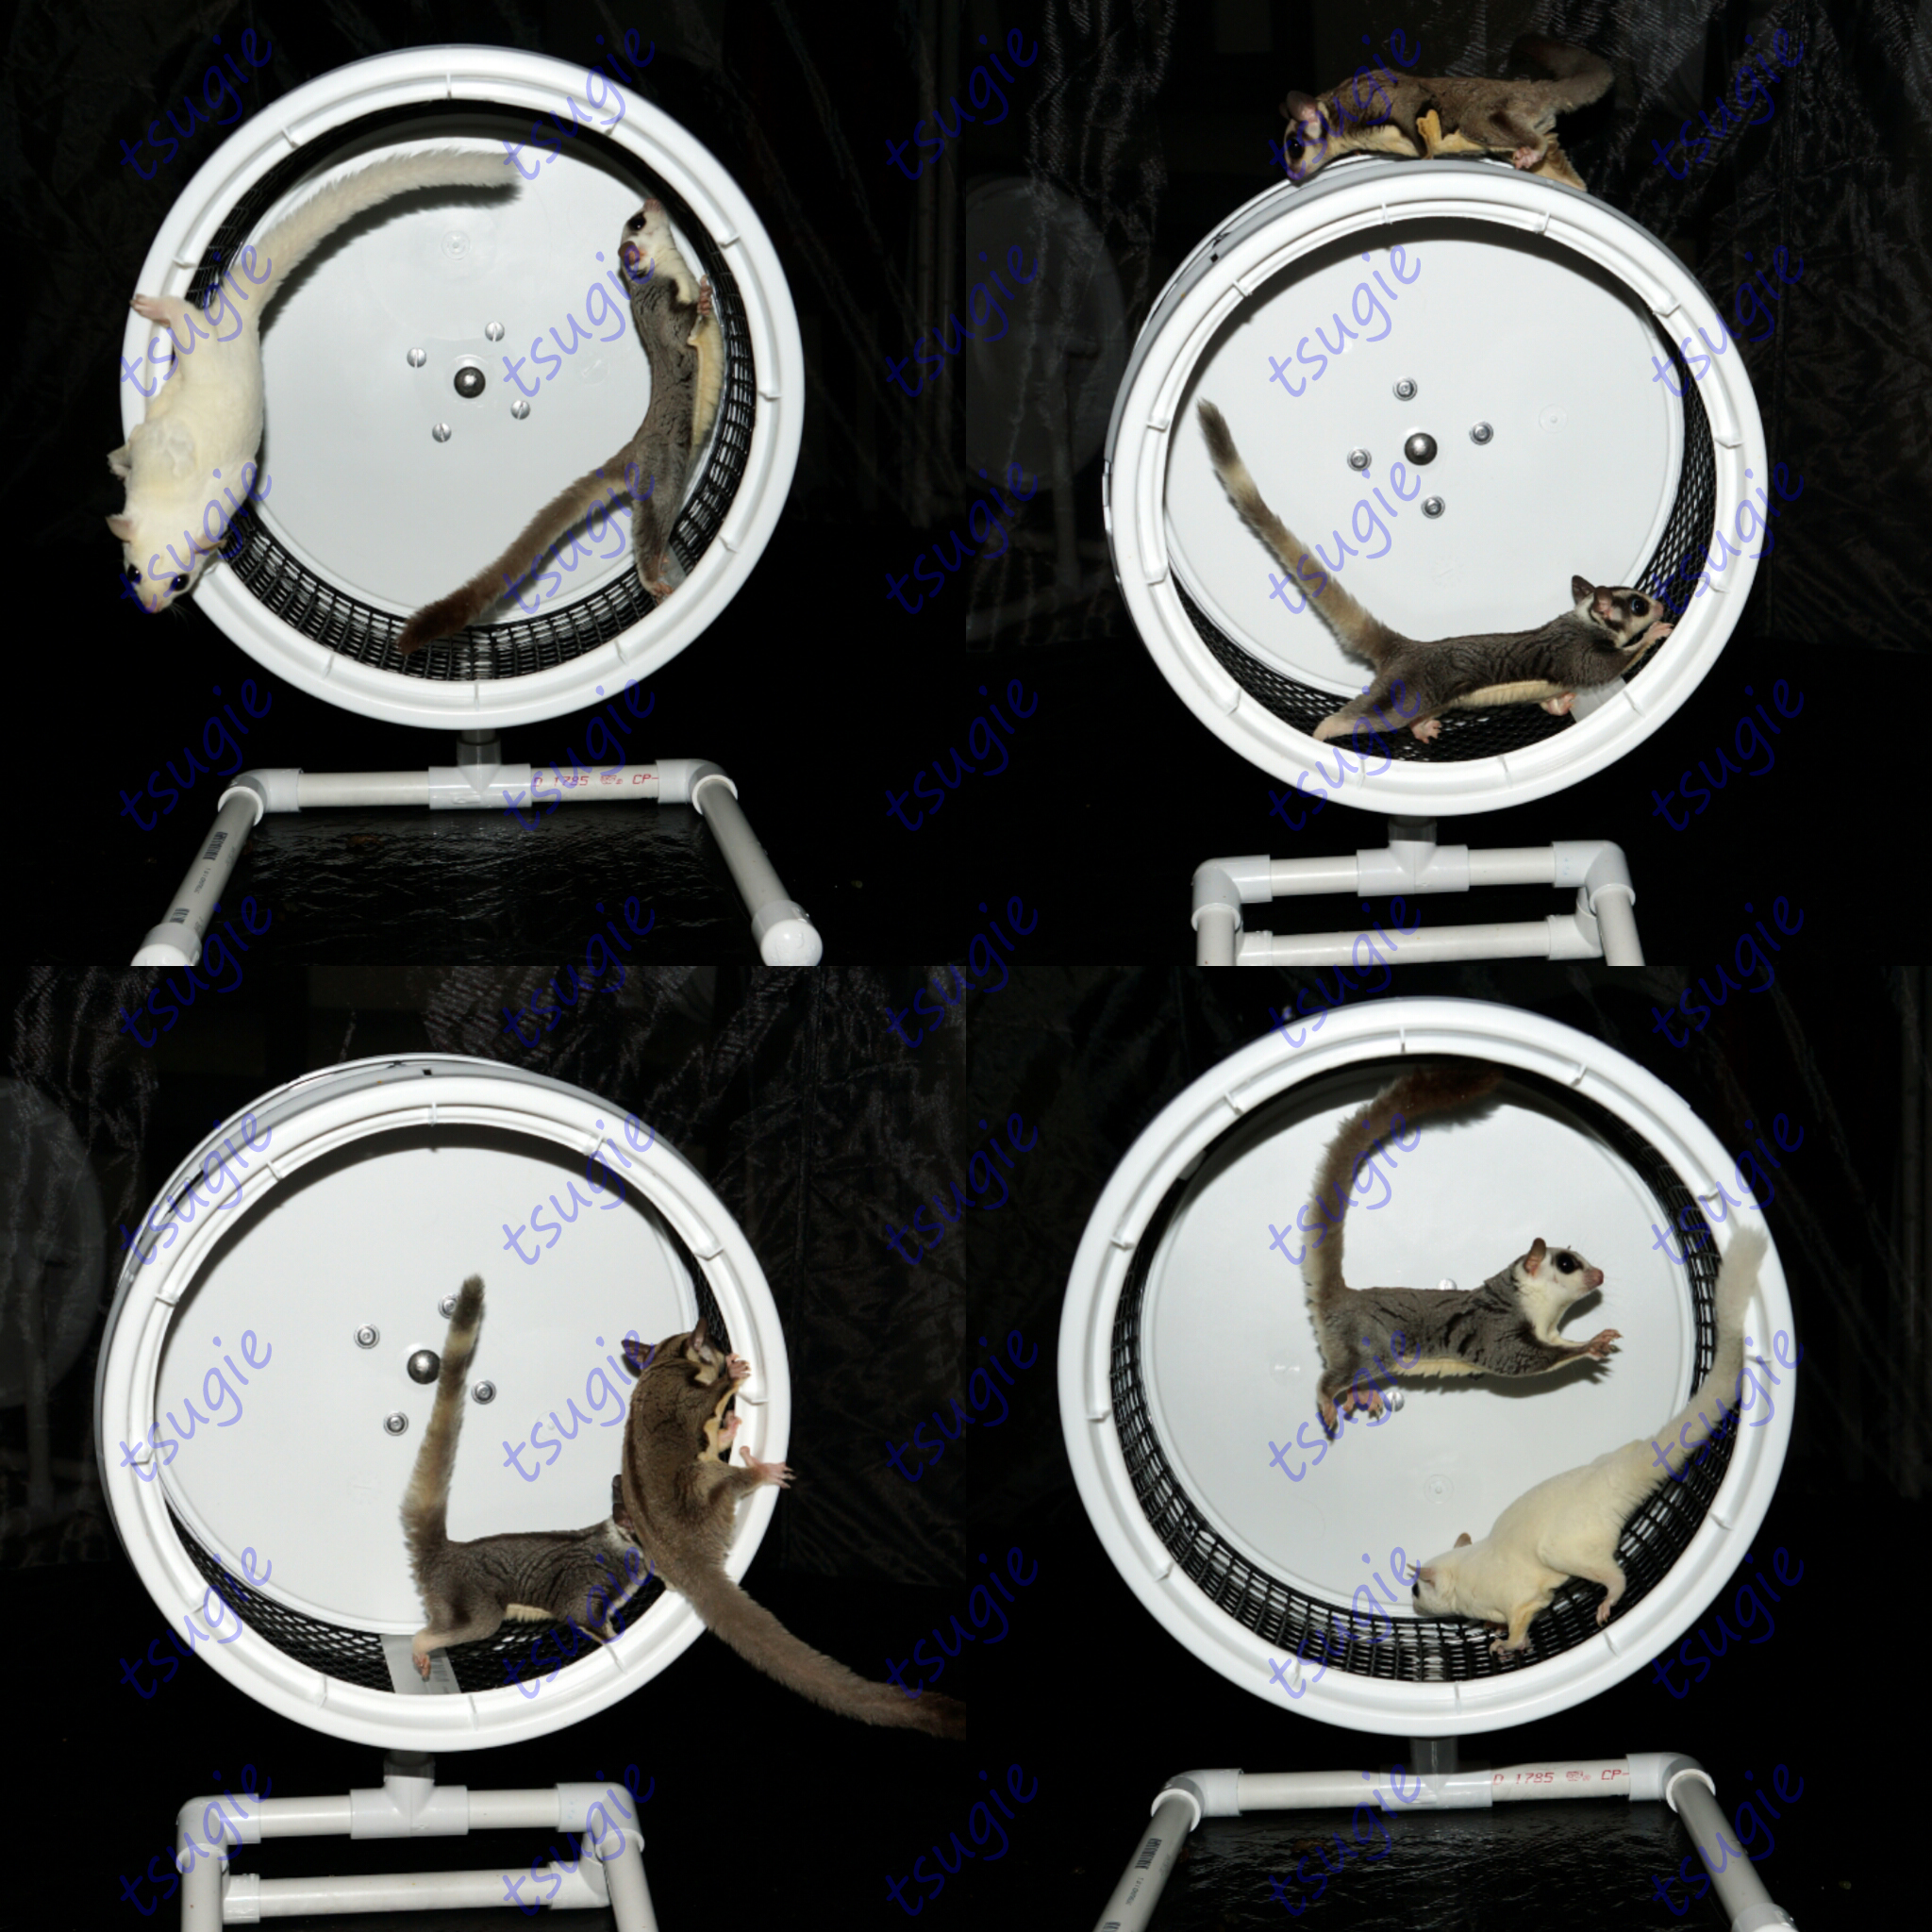
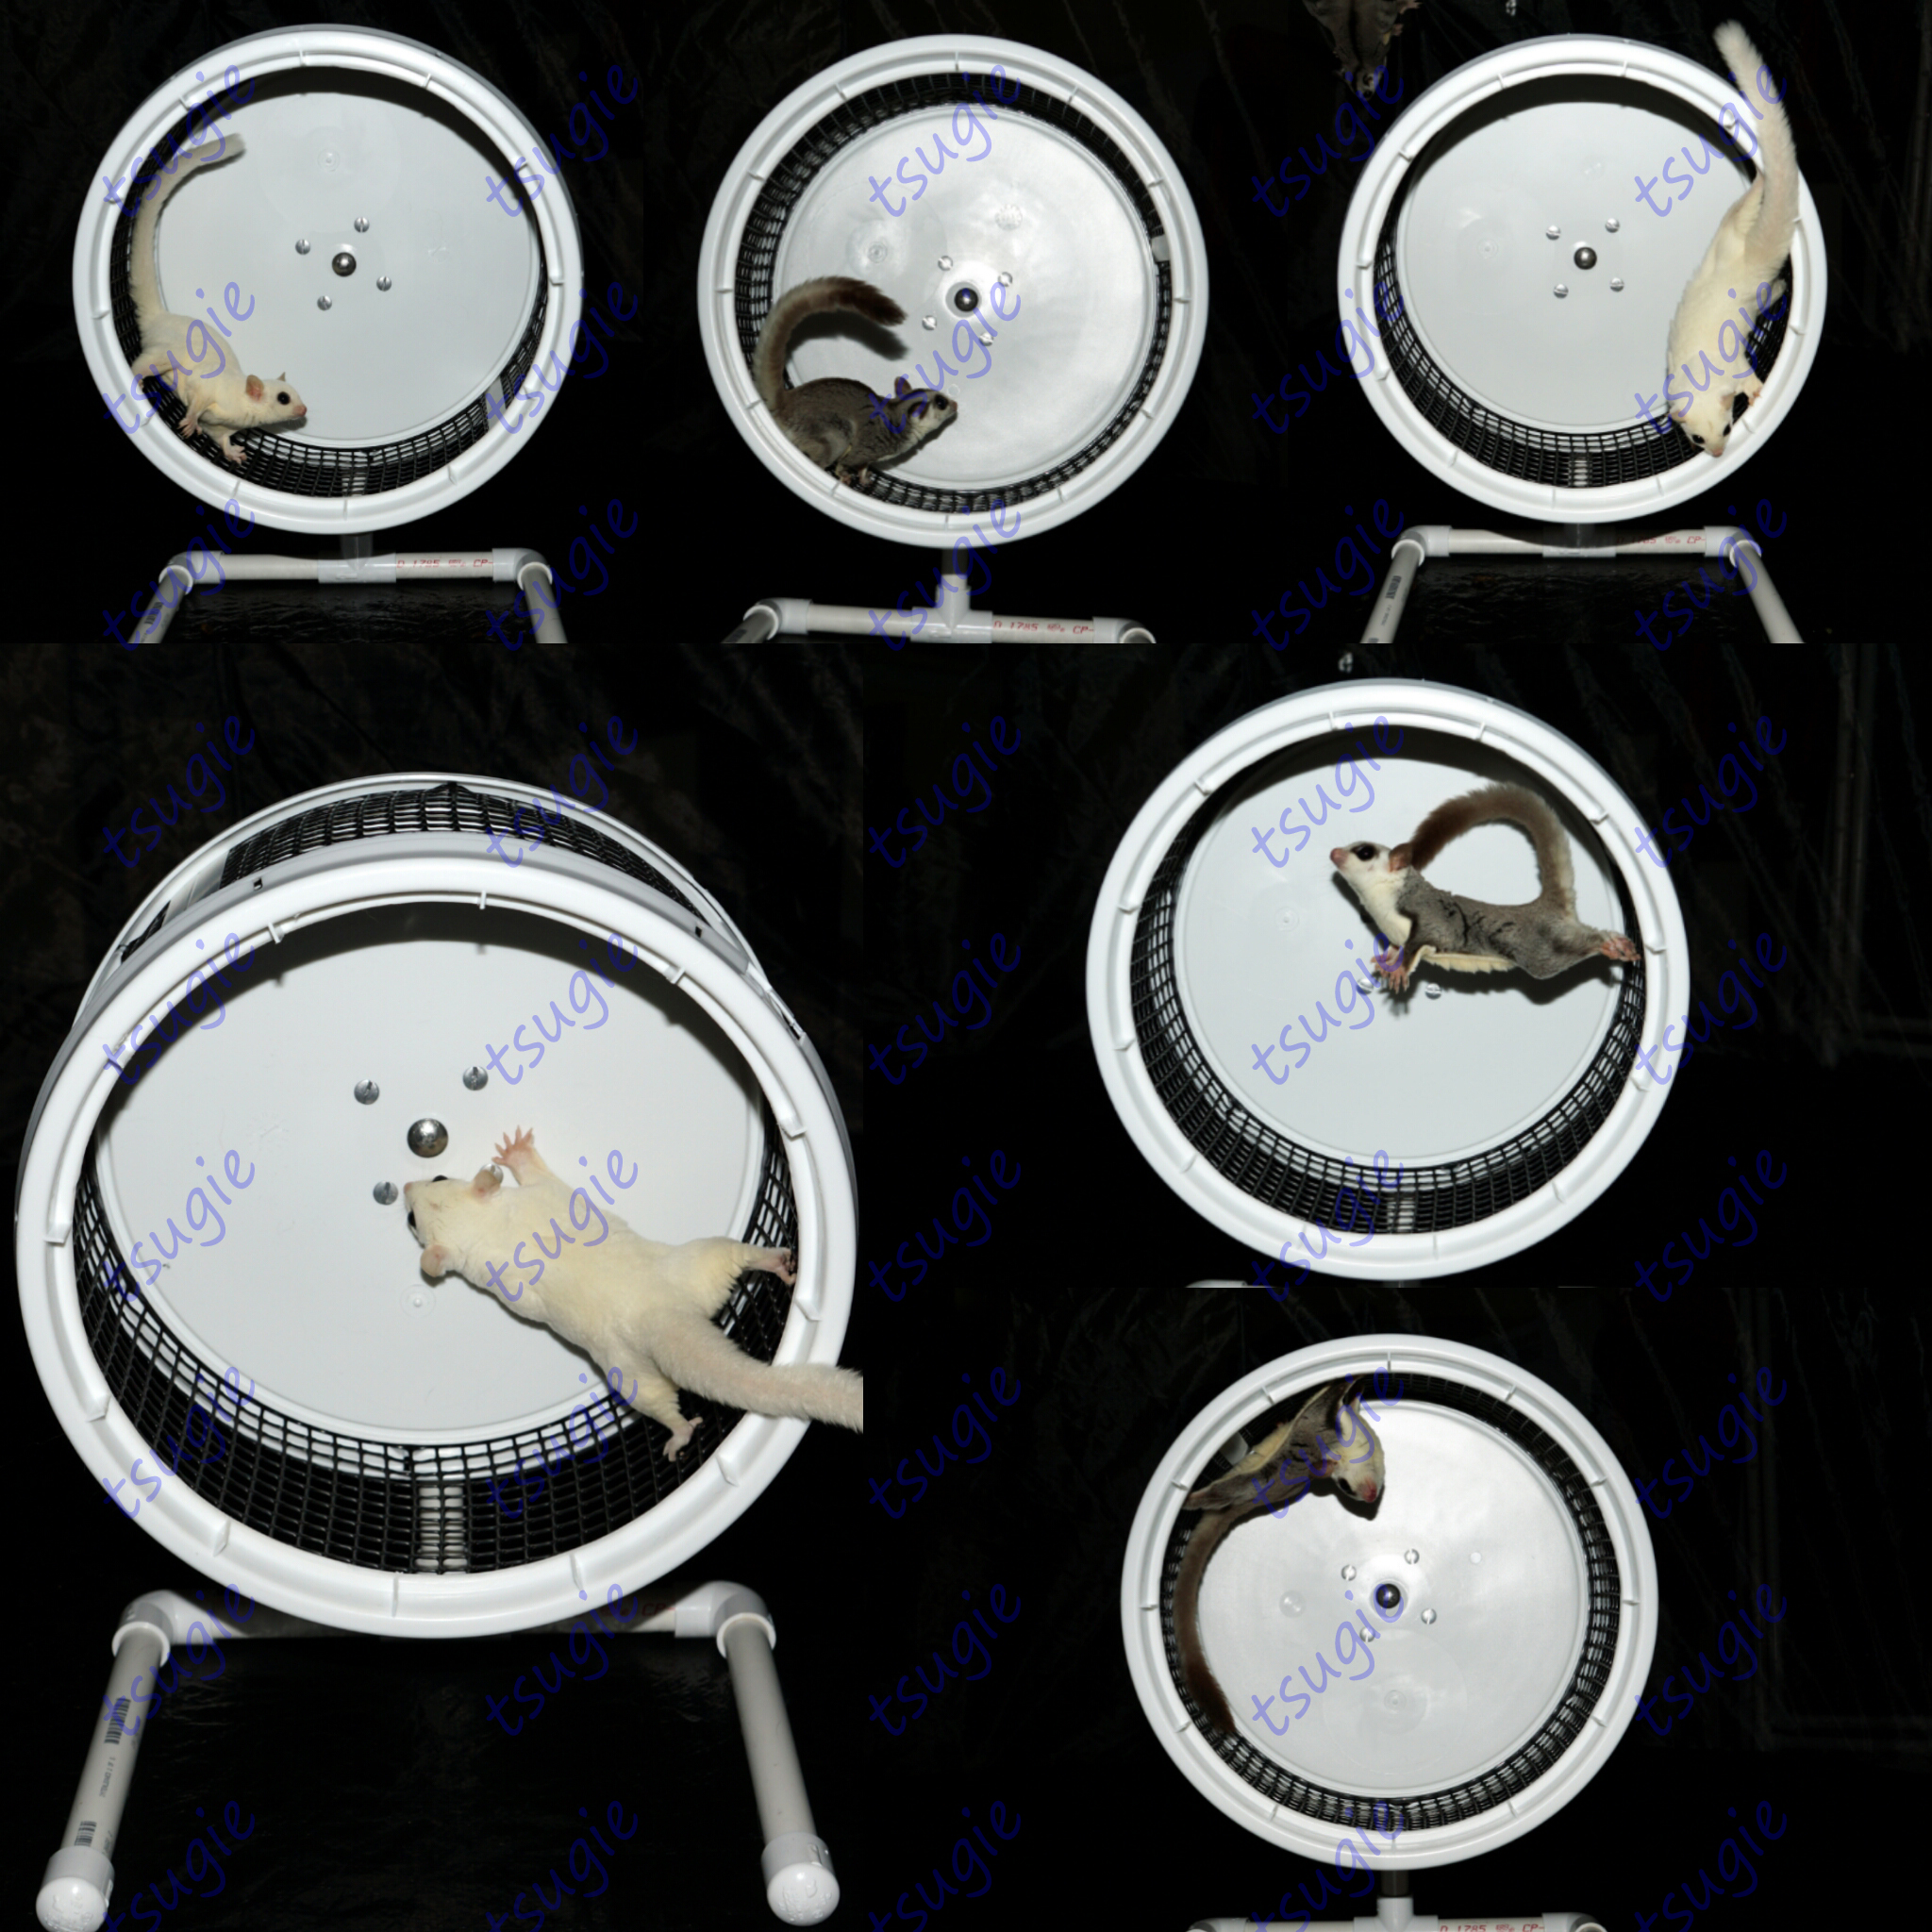
Here are photos of my gliders using wheels I’ve made.

Here are links to some of the safe wheels you can buy:
Stealth Wheels
http://atticworx.com/1Stealth%20Wheels.htm
Raptor Wheels
http://www.mygliderwheelsandmore.com/
Fast Track Wheels
http://www.spinzoneglobal.com/
Custom Choice Cruisers
http://www.cccruiser.com
Before I get into the details I have to clarify something: I am not liable for anything that could possibly happen to your glider with this wheel. Especially if you don’t follow my instructions. I provide the tutorial but YOU are making it.
YOU are responsible for the safety of your pets. Which is why, if you do not know how to properly use tools, don’t have the proper tools, can’t or won’t follow my instructions and/or don’t have the proper materials, PLEASE DO NOT make a wheel. If you are not comfortable in your ability to make it, ask somebody who is to make it for you or buy one, or however many you need, of the safe wheels.
If you decide to make wheels and sell them, please do NOT use the 1/2″ plastic hardware cloth for the track. The holes are bigger and may be dangerous for very young joeys.
Now onto the tutorial!
*I tried to make it very specific. Please read the full tutorial before committing and buying the materials.*
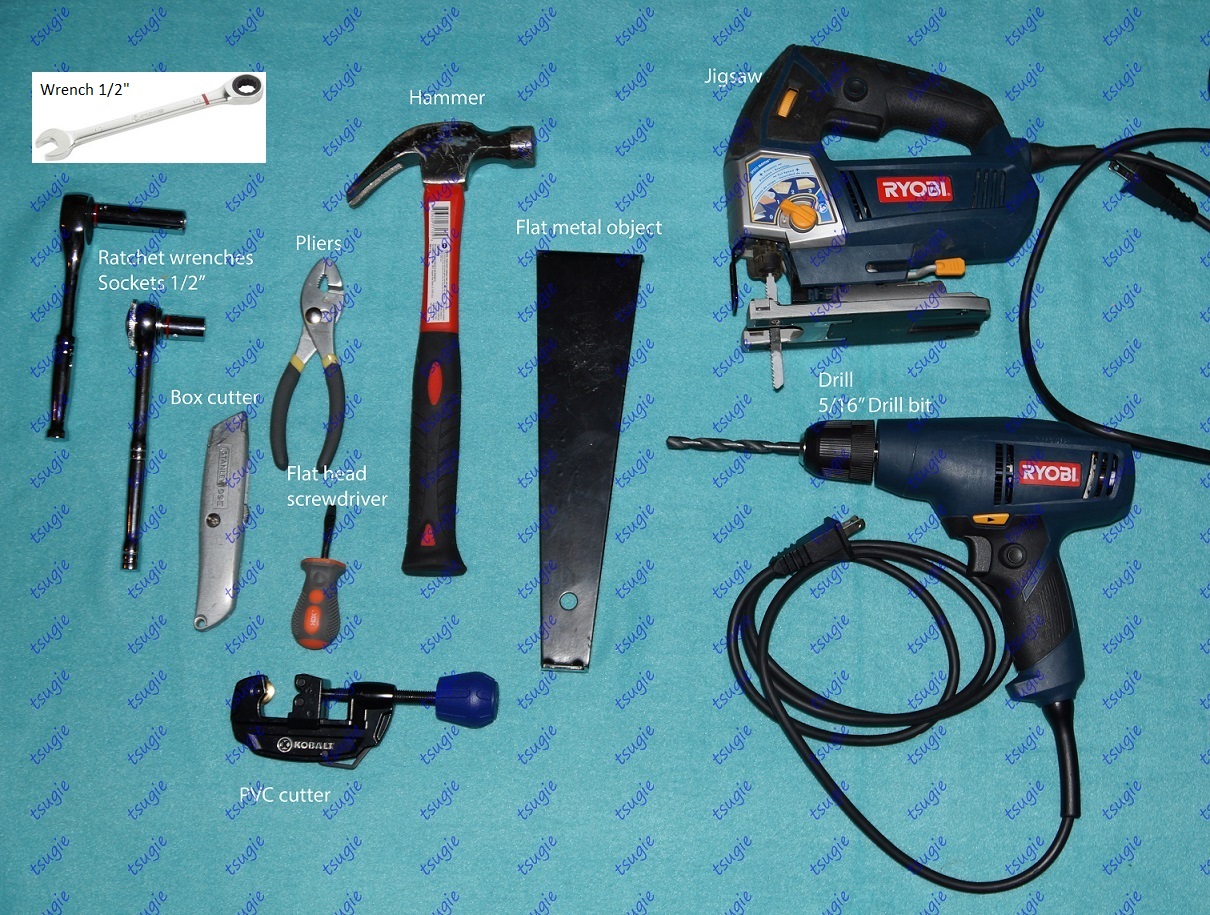
Tools:
- 2 Ratchet wrenches http://tinyurl.com/p6vgv7z and http://tinyurl.com/nourc2g
- 2 Sockets 1/2″ (1.27cm) http://tinyurl.com/p6vgv7z
- 1 Box cutter (or blade)
- 1 Pliers
- 1 Hammer
- 1 Flat metal object
- 1 Butter knife or flat head screw driver
- 1 PVC cutter http://tinyurl.com/puzcgdk or http://tinyurl.com/oxss9rz
- 1 Pair of scissors (not pictured)
- 1 Jigsaw http://tinyurl.com/nhguxd3 or dremel (not pictured) http://tinyurl.com/o35lsnu
- 1 Drill http://tinyurl.com/mtx9ft8
- 1 Drill bit 5/16” (~.79cm)
- 1 Drill bit 7/32″ (~.555cm) (not pictured)
- Ratcheting wrench or regular wrench 1/2″ (1.27cm) http://tinyurl.com/oawukwz
- Measuring tape (not pictured)
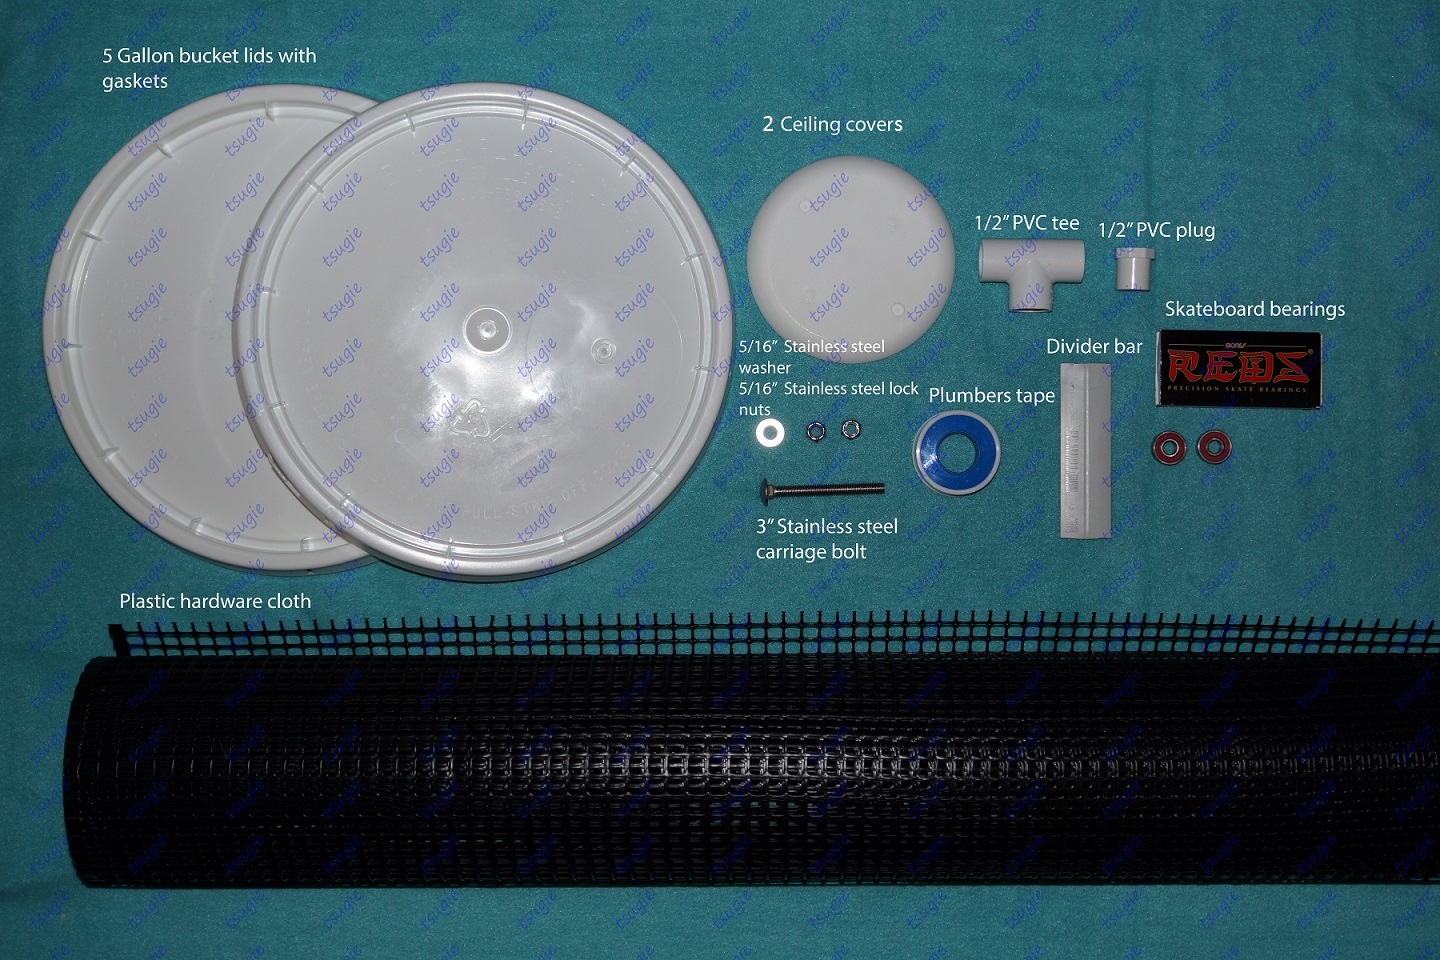
MATERIALS:
*Results may vary if you use a different product (by choice or because you couldn’t find the same one) for certain things.
If you can’t find the same lids I use, please look for equivalent ones with gaskets. Do not use zip ties to hold the mesh. Can’t find the backings I suggest? Ok. Look for an equivalent: A hard non-brittle plastic that has a diameter of 3 or more inches.*
**IMPORTANT** Make sure you get PVC pipes and fittings, not CPVC.
- 2 – 5 gallon bucket lids with gaskets (Make sure the lids have the proper space/groove for a gasket/tubing. Not all bucket lids are the same. More about this at the end.) (12-1/2” dia., 31.75cm dia.) http://tinyurl.com/nvzmt47
- 2 Plastic ceiling covers (Carlon) http://tinyurl.com/nljb89v , 1 circular cut acrylic sheet, 1 plastic wall shield http://tinyurl.com/zuo9rf2 or 1 Plastic Round Blank Cover http://tinyurl.com/hdjwngr
- 4 Binding posts (Lengths depend on backing used. Ceiling covers require 5/8″ ones, the acrylic sheet requires 1/4″ ones, and both the wall shield and the Plastic Round Blank Cover require 3/16″ ones.) (not pictured) http://tinyurl.com/oqlcpnj
- 1 Stainless steel washer 18-8 – 5/16” (~.79cm) http://tinyurl.com/nkqy6yp (the link is to a 5-count but you can buy singles in store for around a quarter each)
- 2 Stainless steel lock nuts 5/16” (~.79cm) http://tinyurl.com/nvu9rug
- 1 Stainless steel carriage bolt 5/16” x 3” (~.79cm x 7.62cm) http://tinyurl.com/opnjt95
- 1 Plumber’s tape http://tinyurl.com/o2plsoa
- 1 PVC tee 1/2″ (1.27cm) http://tinyurl.com/o8os98y
- 1 PVC plug 1/2″ (1.27cm) http://tinyurl.com/q9sojtv
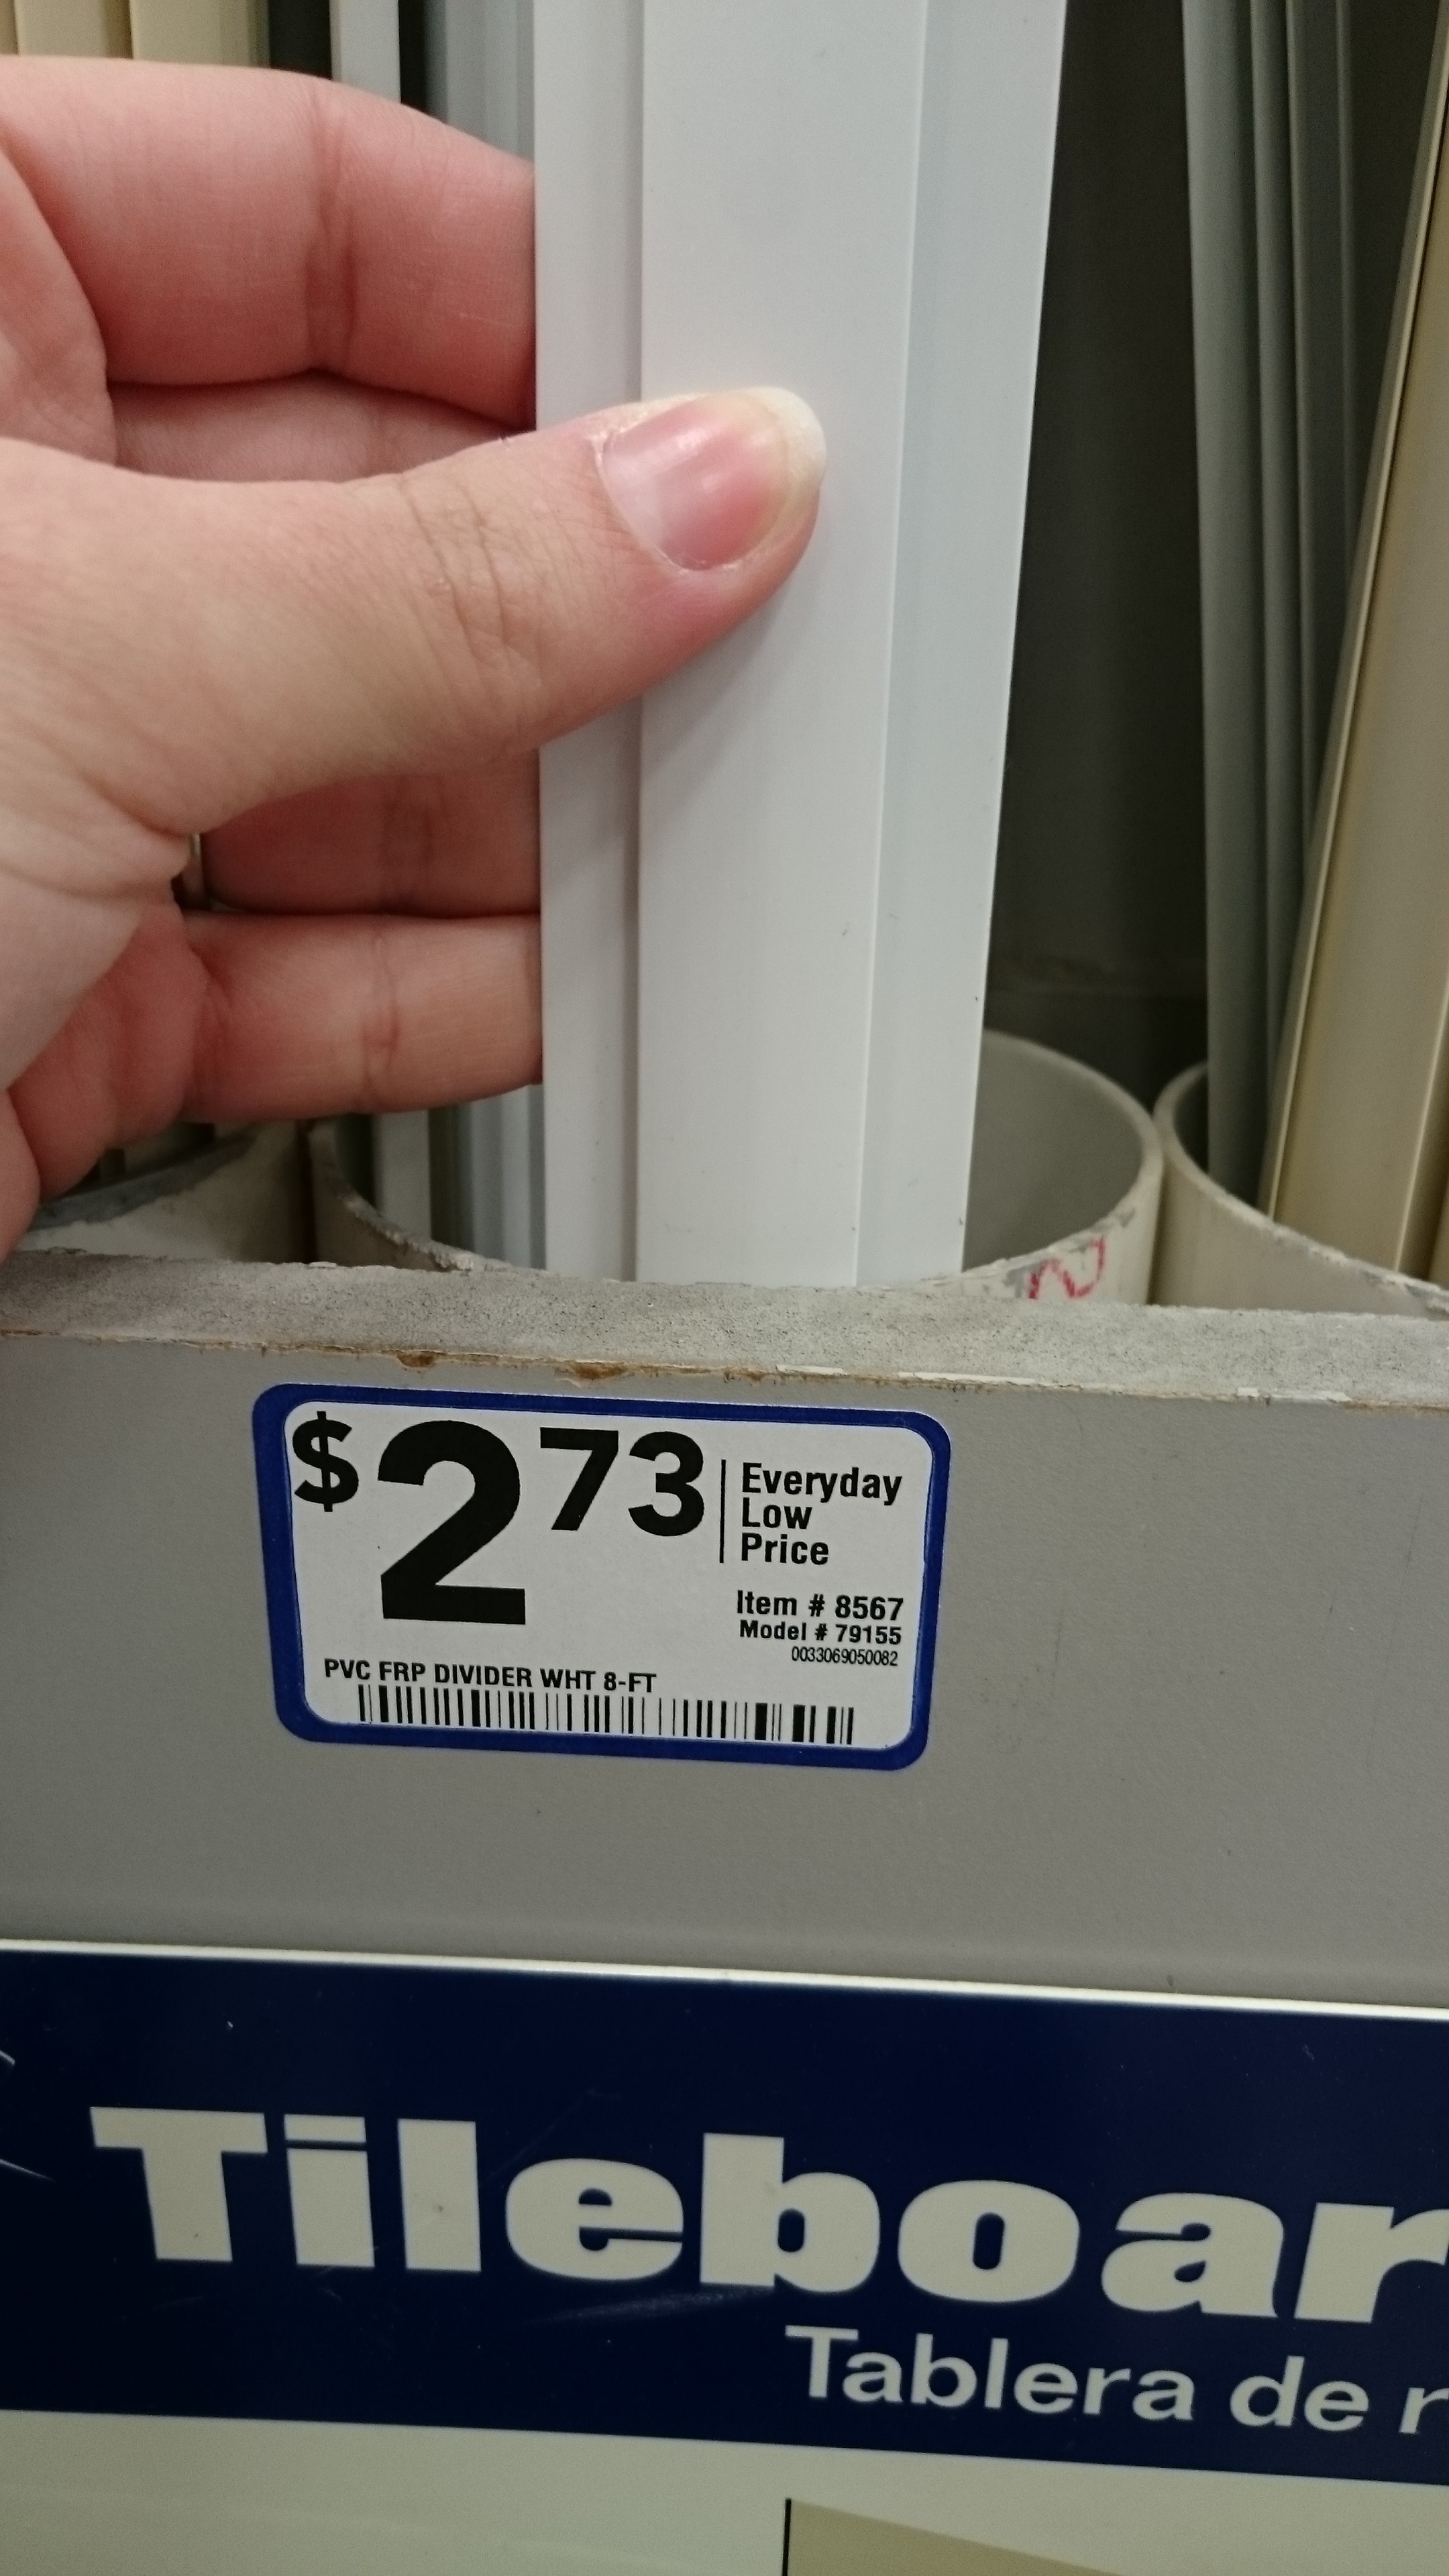
- 1 Divider bar/Divider molding http://tinyurl.com/kms2gou http://tinyurl.com/zafrtn9
- 2 Skateboard bearings http://tinyurl.com/nwqafn5 (The bearings are 8mm inner diameter bearings) (If you don’t want to worry about rusting, use ceramic bearings. I use these ones: https://tinyurl.com/y9lbg8fj )
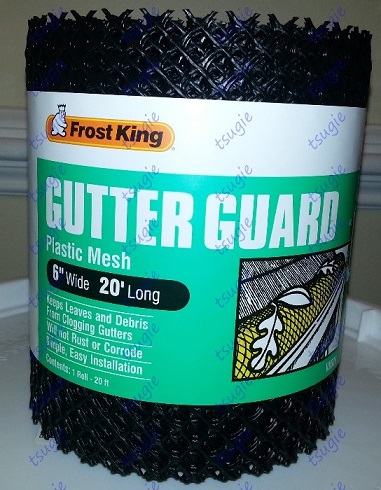
- 1 Plastic hardware cloth/mesh 1/2″ (1.27cm) http://tinyurl.com/lxc4qof or plastic gutter guard http://tinyurl.com/pkzoo7g
- 1 Nut 5/16” (~.79cm) (not pictured) (optional) (stainless steel not necessary) http://tinyurl.com/pl57b8p
- 1 Fully threaded hex bolt 3” (7.62cm) (not pictured) (will need to be stainless steel if using on cage mount) http://tinyurl.com/n2q4zq3
- Sand paper (grit 50 and/or 100) (not pictured)
- 5/16″ Nylon spacer, 1/4″ thick (I found them at Ace Hardware)
Materials for stand/mounts:
What you will need for this part will depend on the number and type of stands/mounts you make.
Floor stand:
- 1 PVC pipe 1/2″ (1.27cm) (5’ or 10’ long) (152.4cm or 304.8cm)
- 2 PVC 90 degree elbows 1/2″ (1.27cm)
- 2 PVC caps 1/2″ (1.27cm)
- 1 PVC tee 1/2″ (1.27cm)
- PVC cutter
Cage mount – Horizontal:
- 1 PVC pipe 1/2″ (1.27cm) (2′, 5’ or 10’ long) (60.96cm, 152.4cm or 304.8cm)
- 2 PVC 90 degree elbows 1/2″ (1.27cm)
- 1 PVC tee 1/2″ (1.27cm)
- 2 PVC plugs 1/2″ (1.27cm)
- 2 Stainless steel hex bolts, 5/16” x 3” (~.79cm x 7.62cm)
- 2 Stainless steel wing nuts 5/16” (~.79cm)
- 2 Stainless steel washers 1-5/8” x 5/16” (4.127cm x ~.79cm) (might not need them depending on the cage) (If you can get bigger washers, get them.) You can also improvise and use something else.
- PVC cutter
Cage mount – Vertical:
- 1 PVC pipe 1/2″ (2′, 5’ or 10’ long) (60.96cm, 152.4cm or 304.8cm)
- 1 PVC 90 degree elbow 1/2″ (1.27cm)
- 1 PVC Tee 1/2″ (1.27cm)
- 2 PVC Plugs 1/2″ (1.27cm)
- 2 Stainless steel hex bolts 5/16” x 3” (~.79cm x 7.62cm)
- 2 Stainless steel wing nuts 5/16″ (~.79cm)
- 2 Stainless steel washers 1-5/8” x 5/16” (4.127cm x ~.79cm) (might not need them depending on the cage) (If you can get bigger washers, get them.) You can also improvise and use something else.
- PVC cutter
Procedure:
1. Assemble the bearing system.
These are the things you will need:
- 2 Ratchet wrenches
- 2 Sockets 1/2″ (1.27cm) (two long ones or one long and one short one)
- 1 PVC tee 1/2″ (1.27cm)
- 2 Skateboard bearings
- 1 Nut 5/16” (~.79cm)
- 1 Hex bolt 3” (7.62cm) (doesn’t have to be stainless steel unless you plan on using it on the mount)
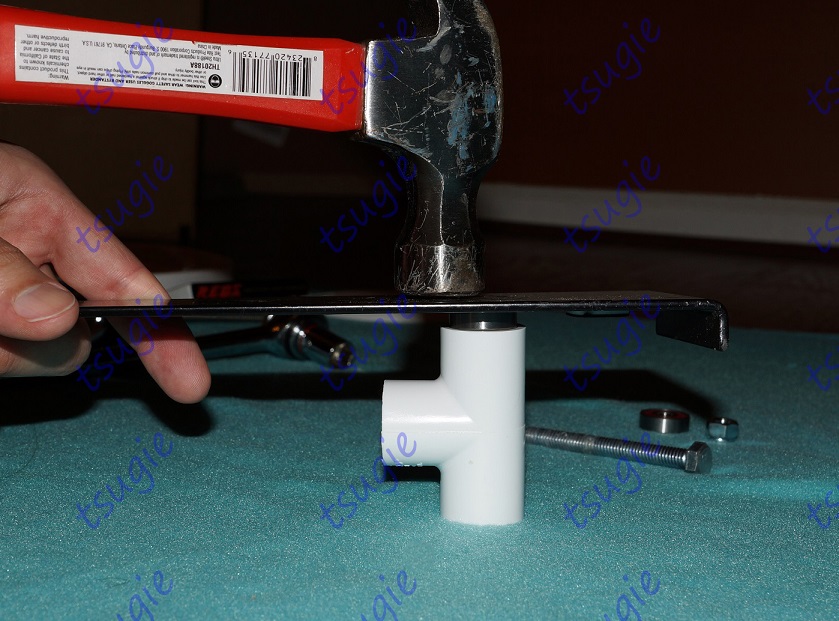
- 1 Hammer
- 1 Flat metal object
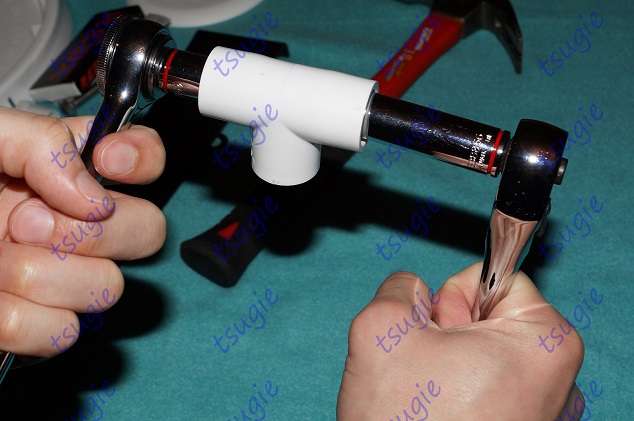
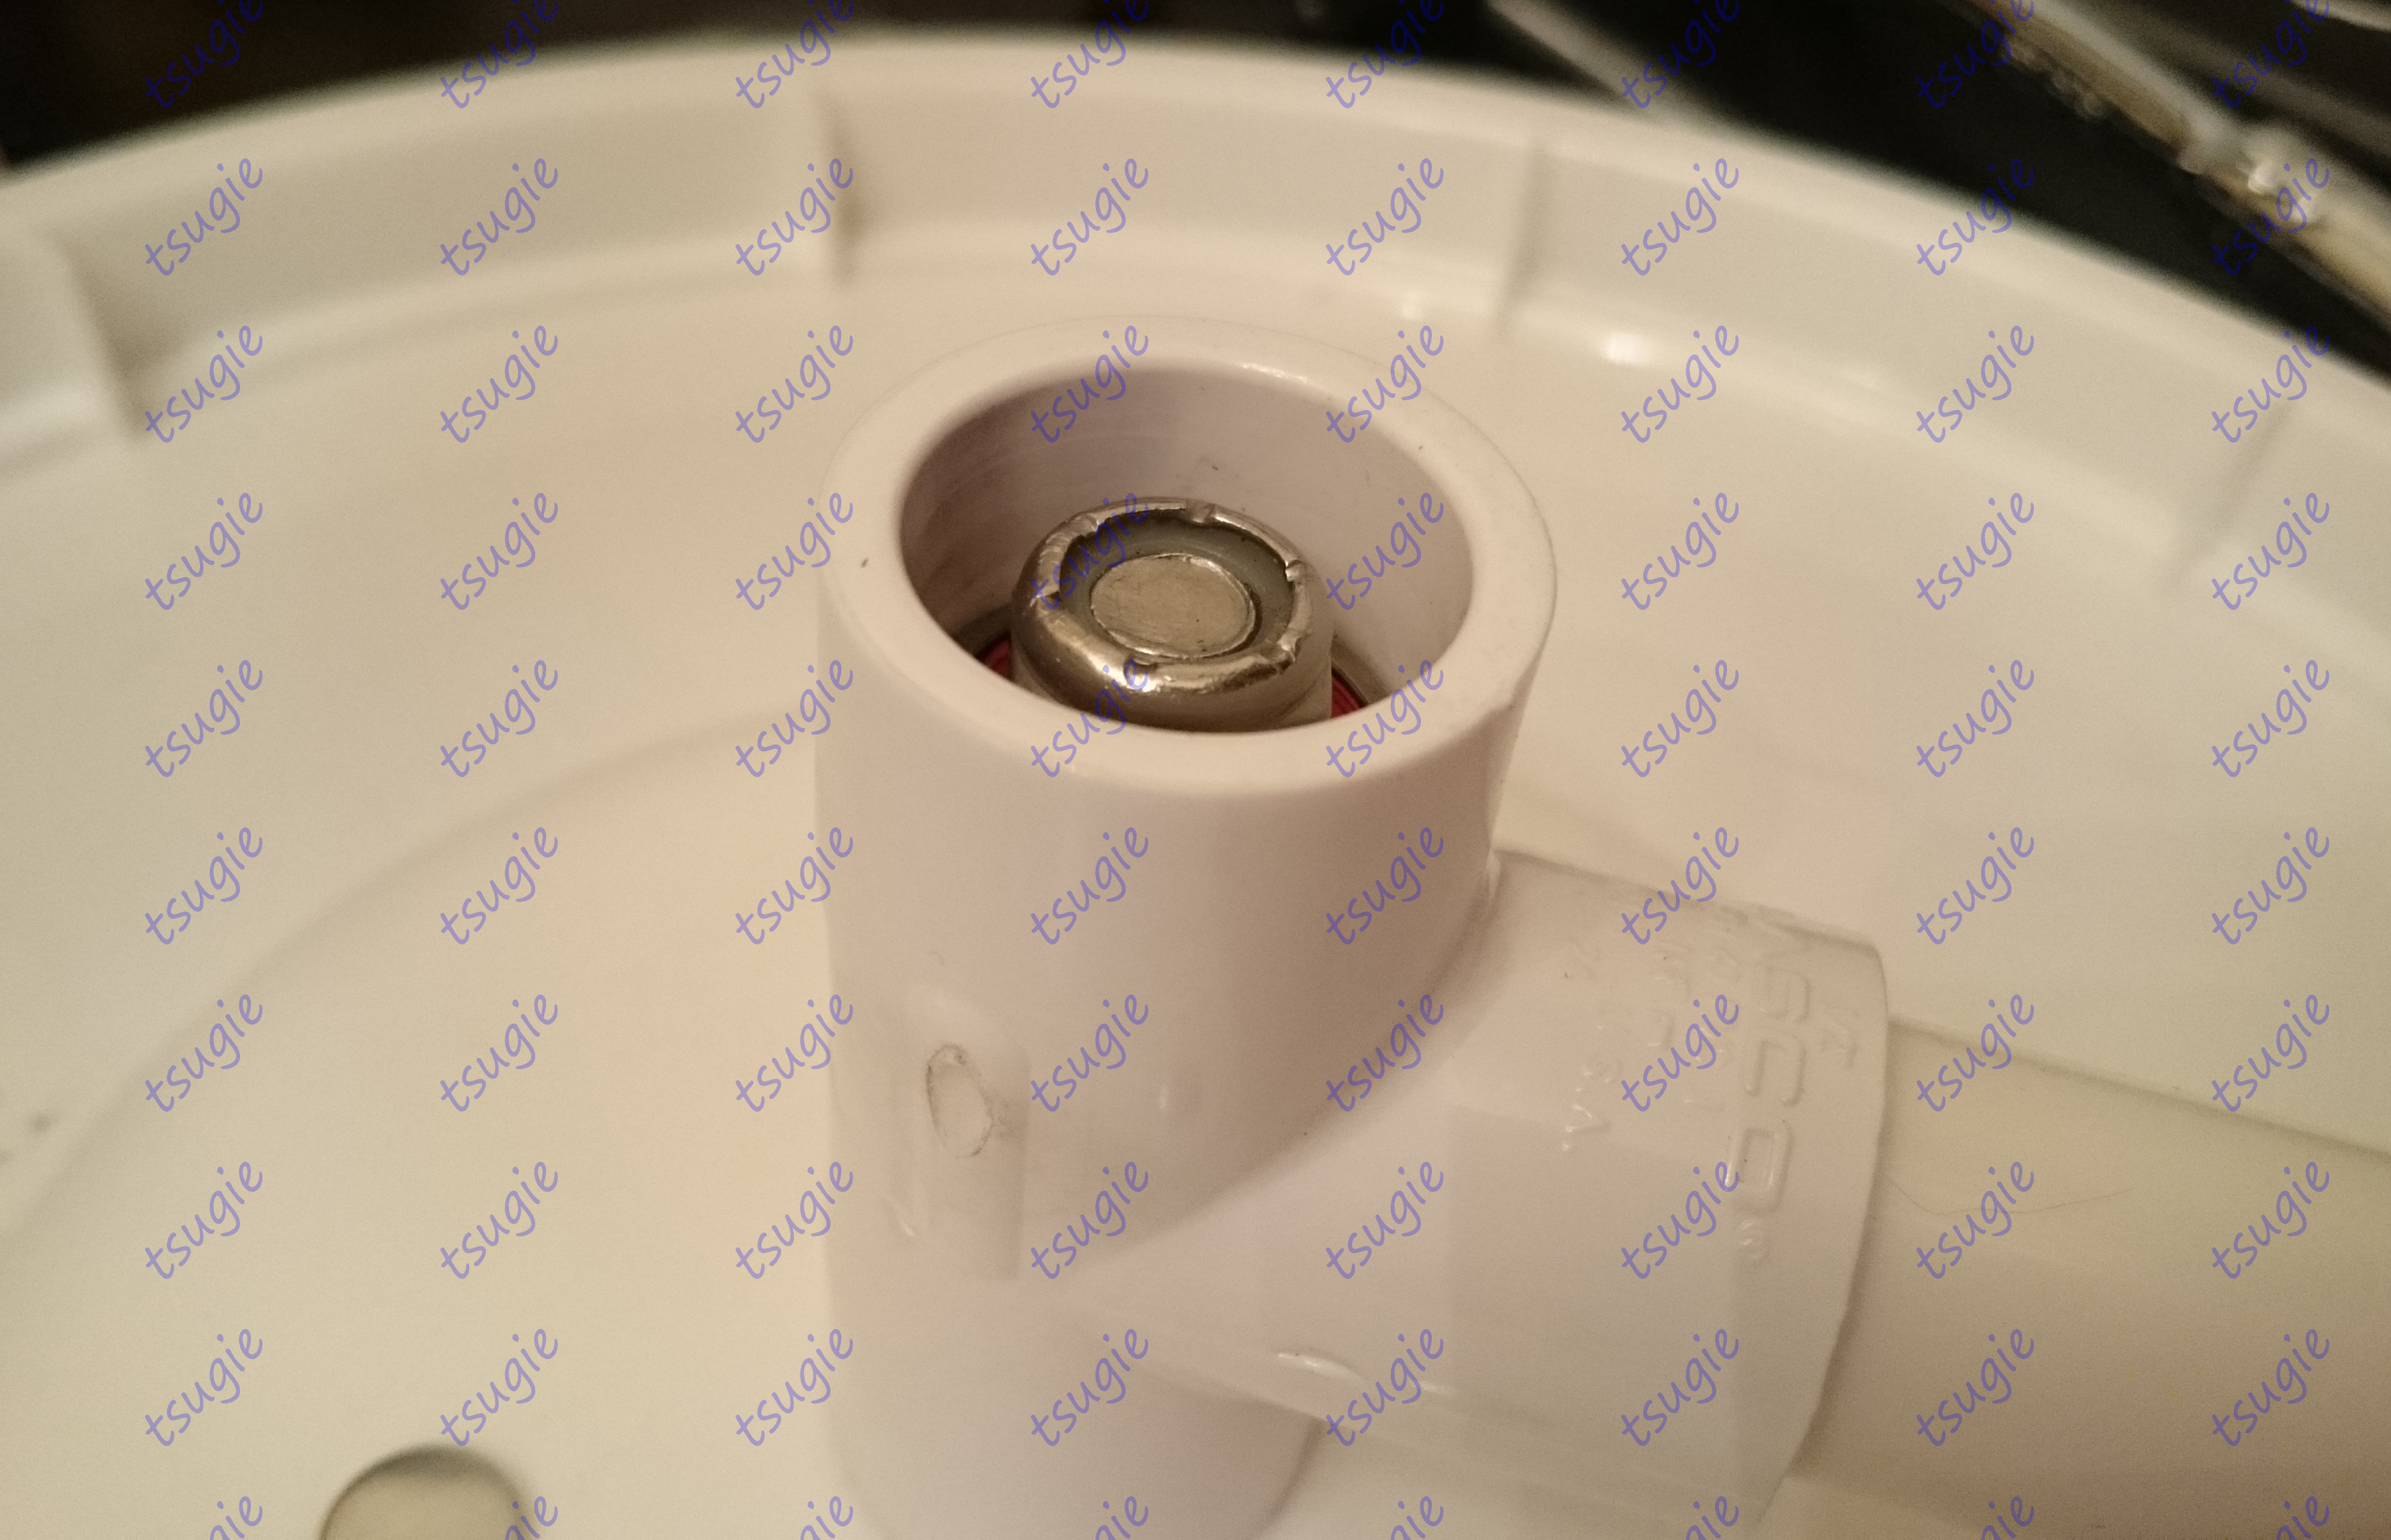
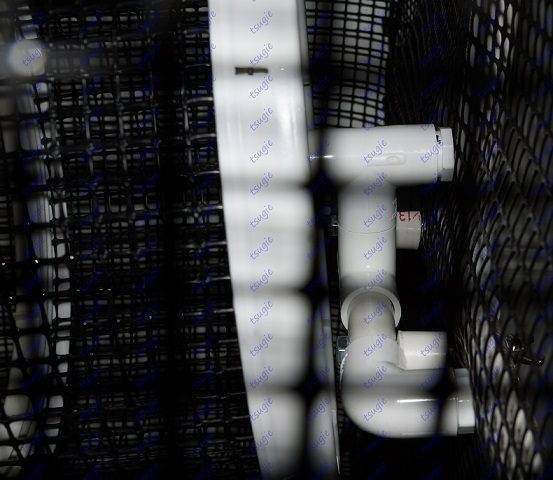
2. Place the bearing on top of one of the opening of the PVC tee as shown in the photo.
Then place the flat metal object on top of the bearing and hammer it in until it is flush against the edge. Do the same thing on the opposite end.
Also, as one commentator suggested, you can use a bench vice to push the bearings in, instead of a hammer.
*Alternatively, you can sand down the fitting enough so that the bearings slides in easier. You can sand down enough so that the bearings slide in completely and easily or you can only sand down enough so that you don’t have to hammer the bearings in. That means that you would still need to tighten them with the ratchet wrenches. But that way the bearings will stay in place.
If you do sand it down, you will not be able to use a PVC plug to close off the end but a Nylon Hole Plug will work (the size should be 7/8” (2.22cm)). You may be able to skip to step 5 depending on the amount of sanding down that you did.*
The metal object is used so that the bearing is not hit directly and it’s not damaged when it’s hammered in. The bearing might go flying out when hammering so press the metal object down hard to prevent it.
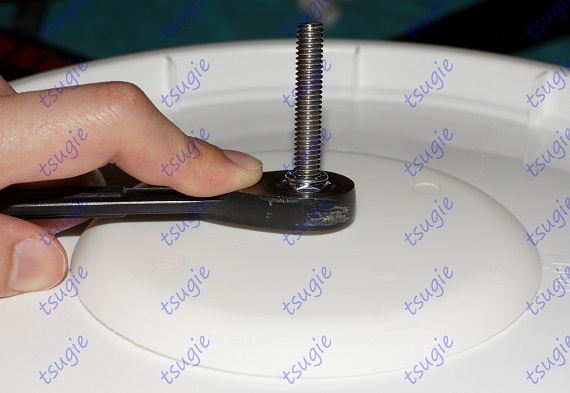
3. Now, insert the hex bolt into the PVC tee and thread the nut.
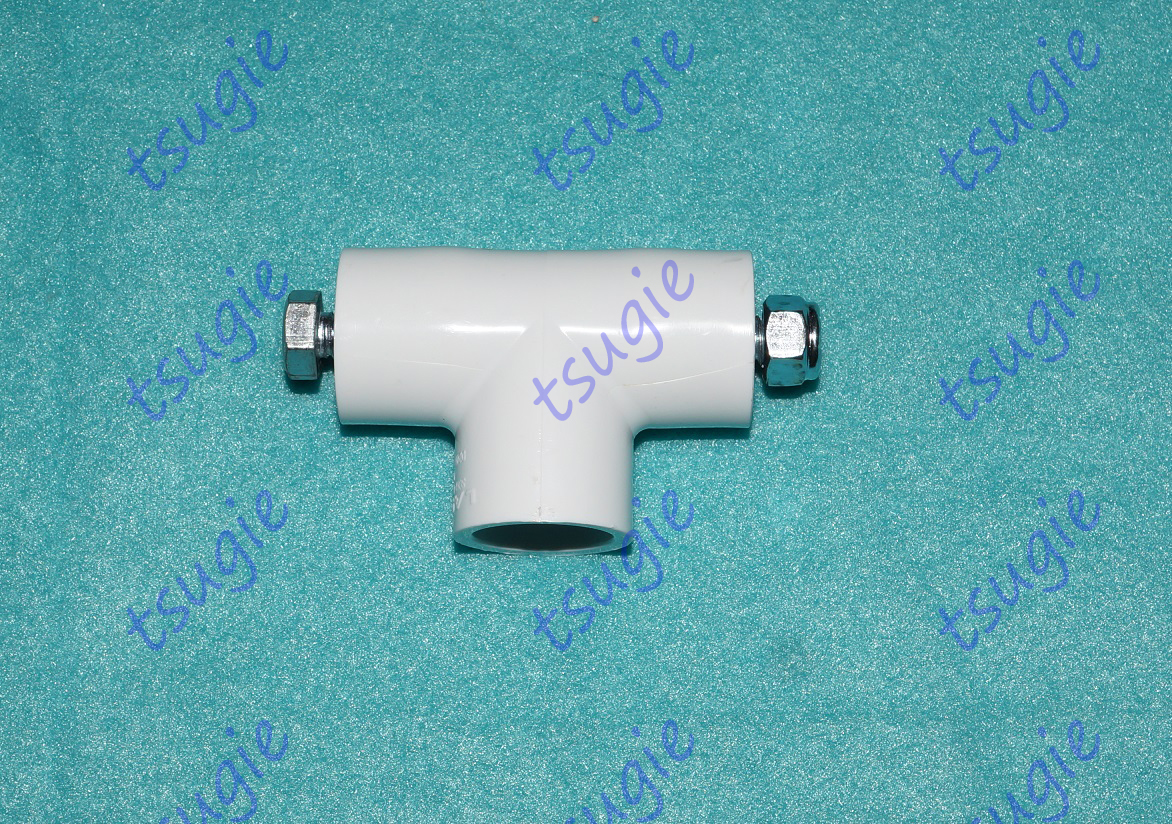
4. Tighten the nut using the ratchet wrenches and sockets. Do it until both bearings have reached the end and can’t go any further. Then, remove the nut and bolt.
*The PVC will expand, especially where the bearings are. This is normal.*
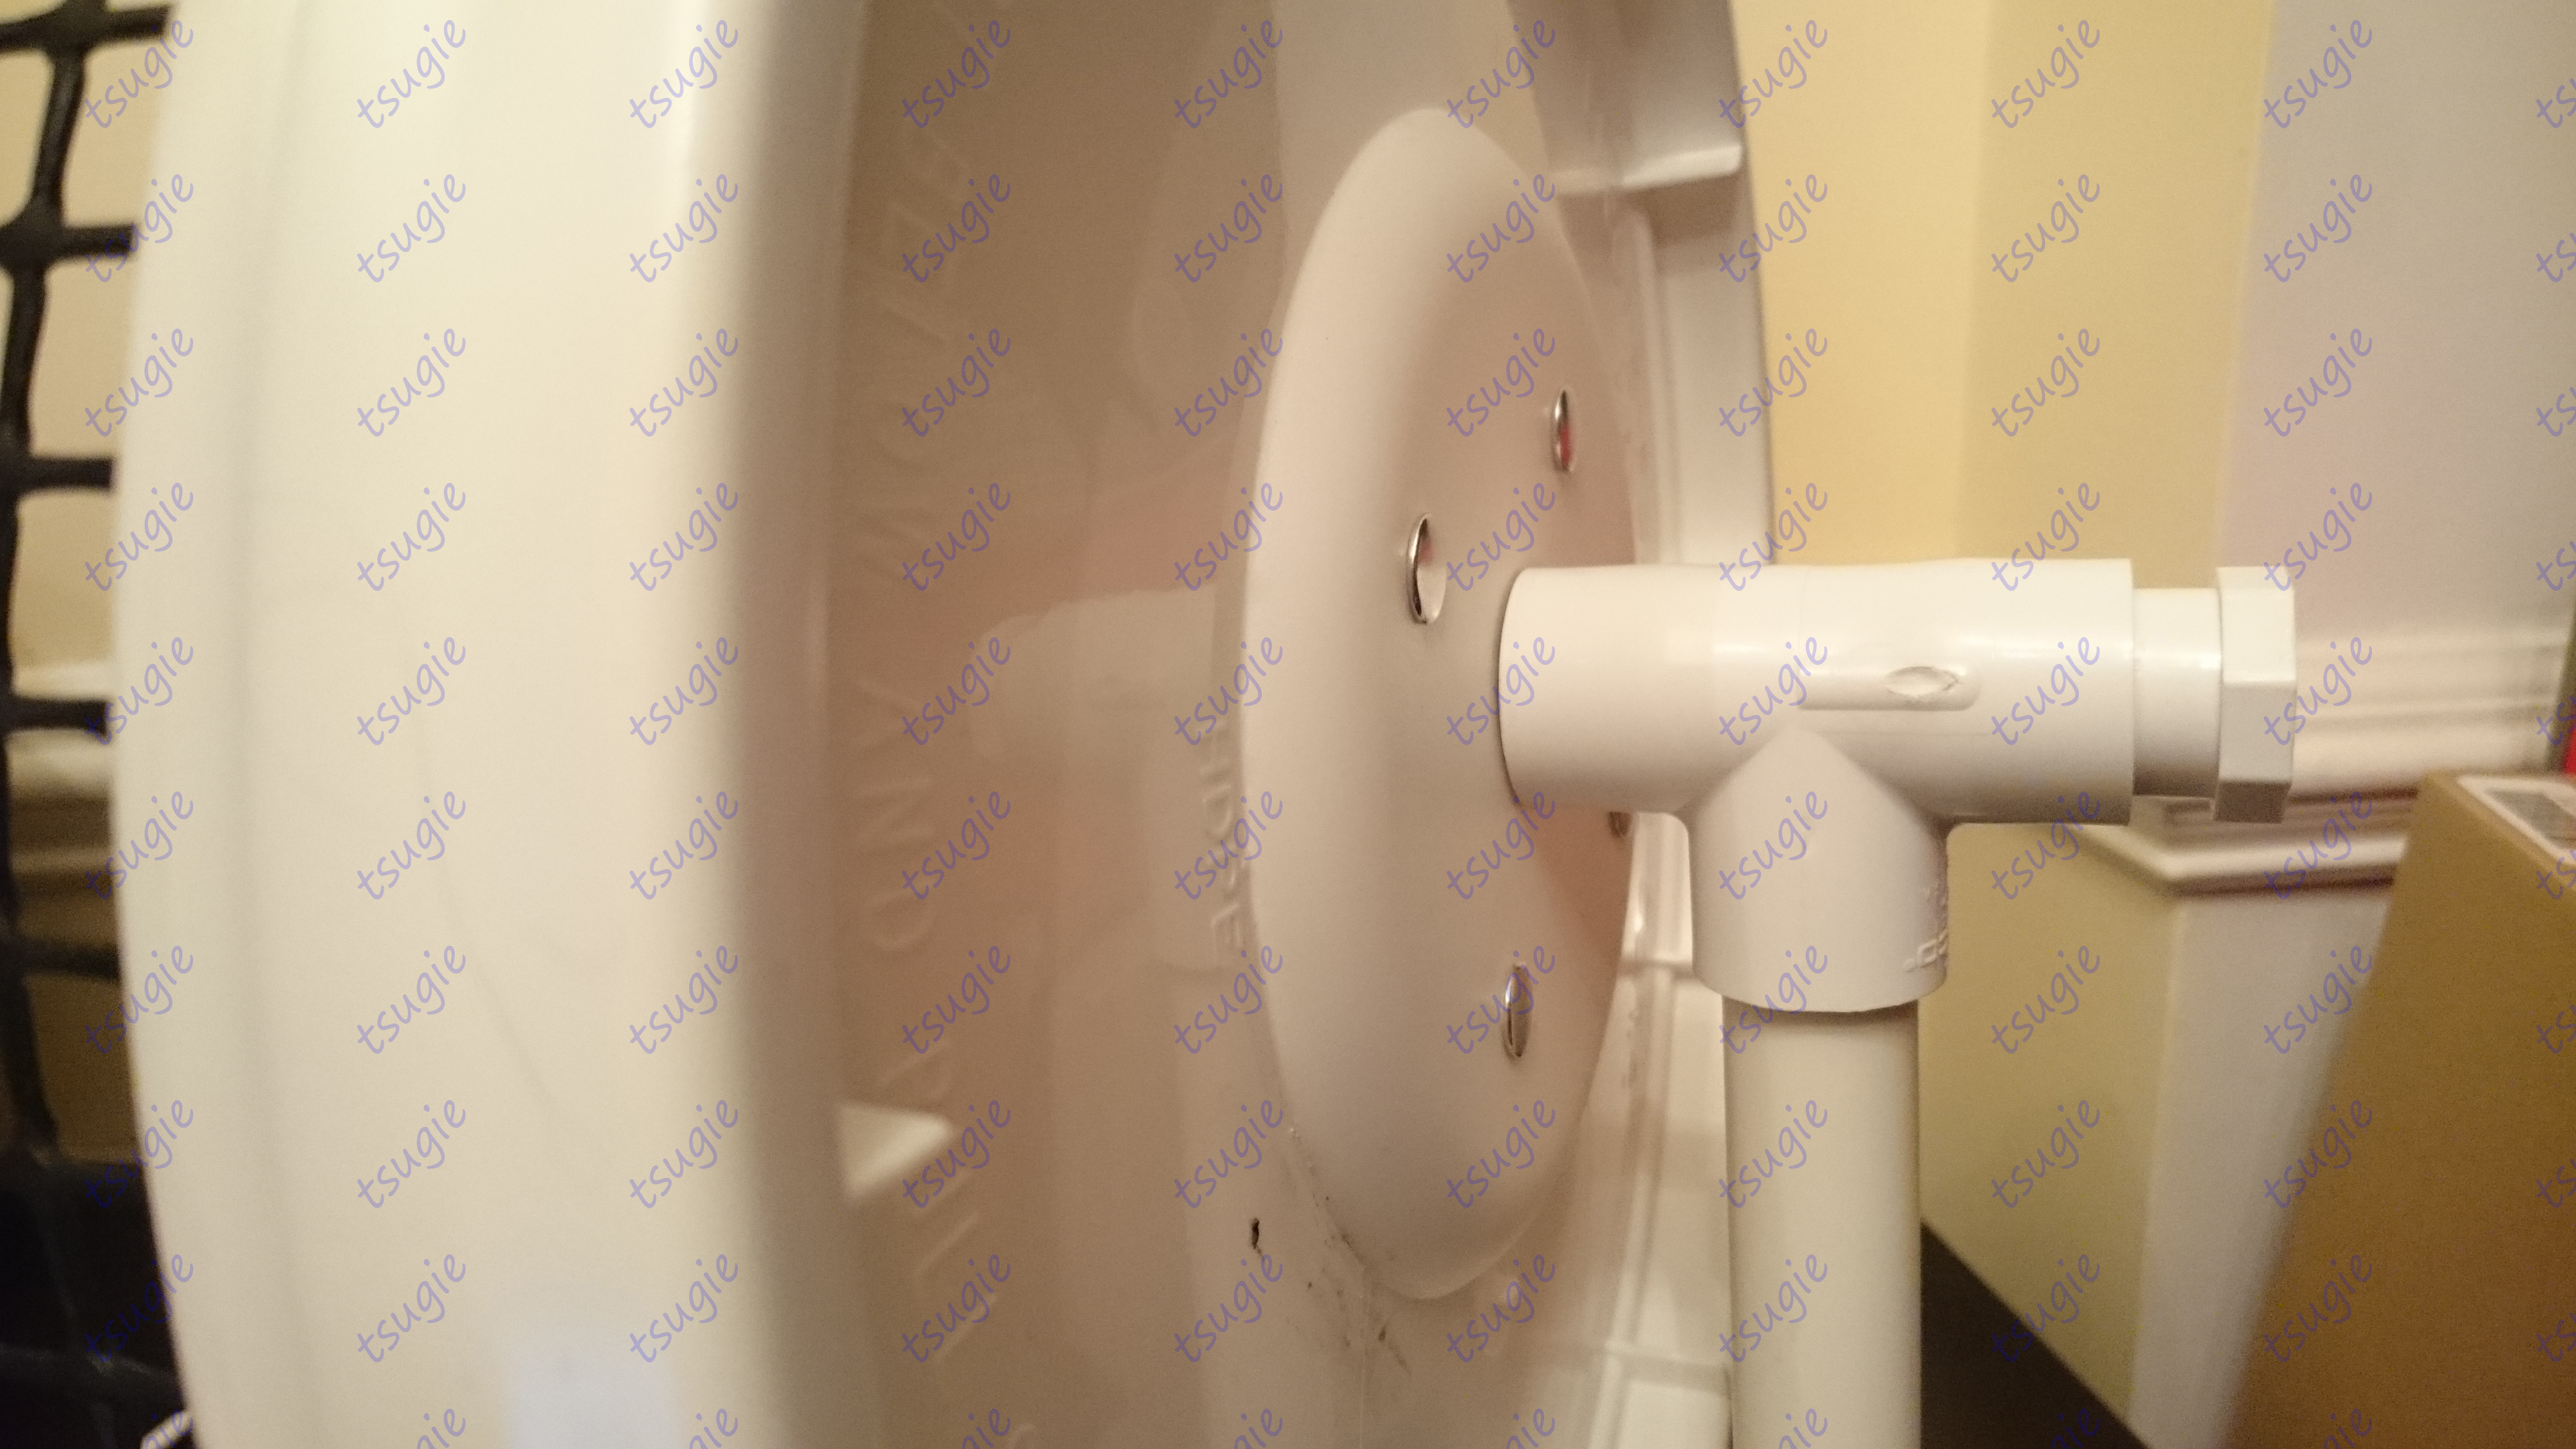
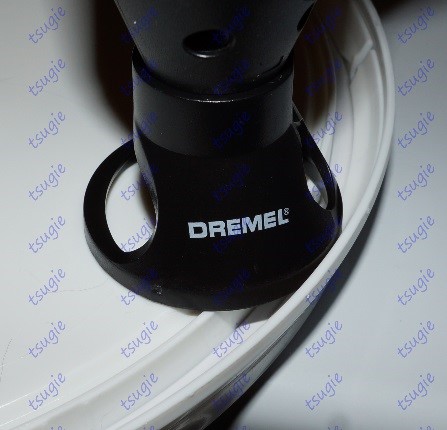
5. Sand down the pegs of both ceiling covers until they are slightly shorter than the edge (so there’s no gap between the ceiling cover and lid). *I first used a 50 grit sand paper to sand down the pegs. It does the job but it takes a long time. I prefer sanding them down with a dremel tool.*
A backing is necessary. It redistributes the force and weight to a wider area when the wheel is in use.
All the safe wheels have their own version. It’s there for a reason.
*Remember the update using the acrylic sheet (requires 1/4″ binding posts): DIY Sugar Glider Wheel Update
Or the wall shield and Plastic Round Blank Cover! (require 3/16″ binding posts) New wheel backing option!*

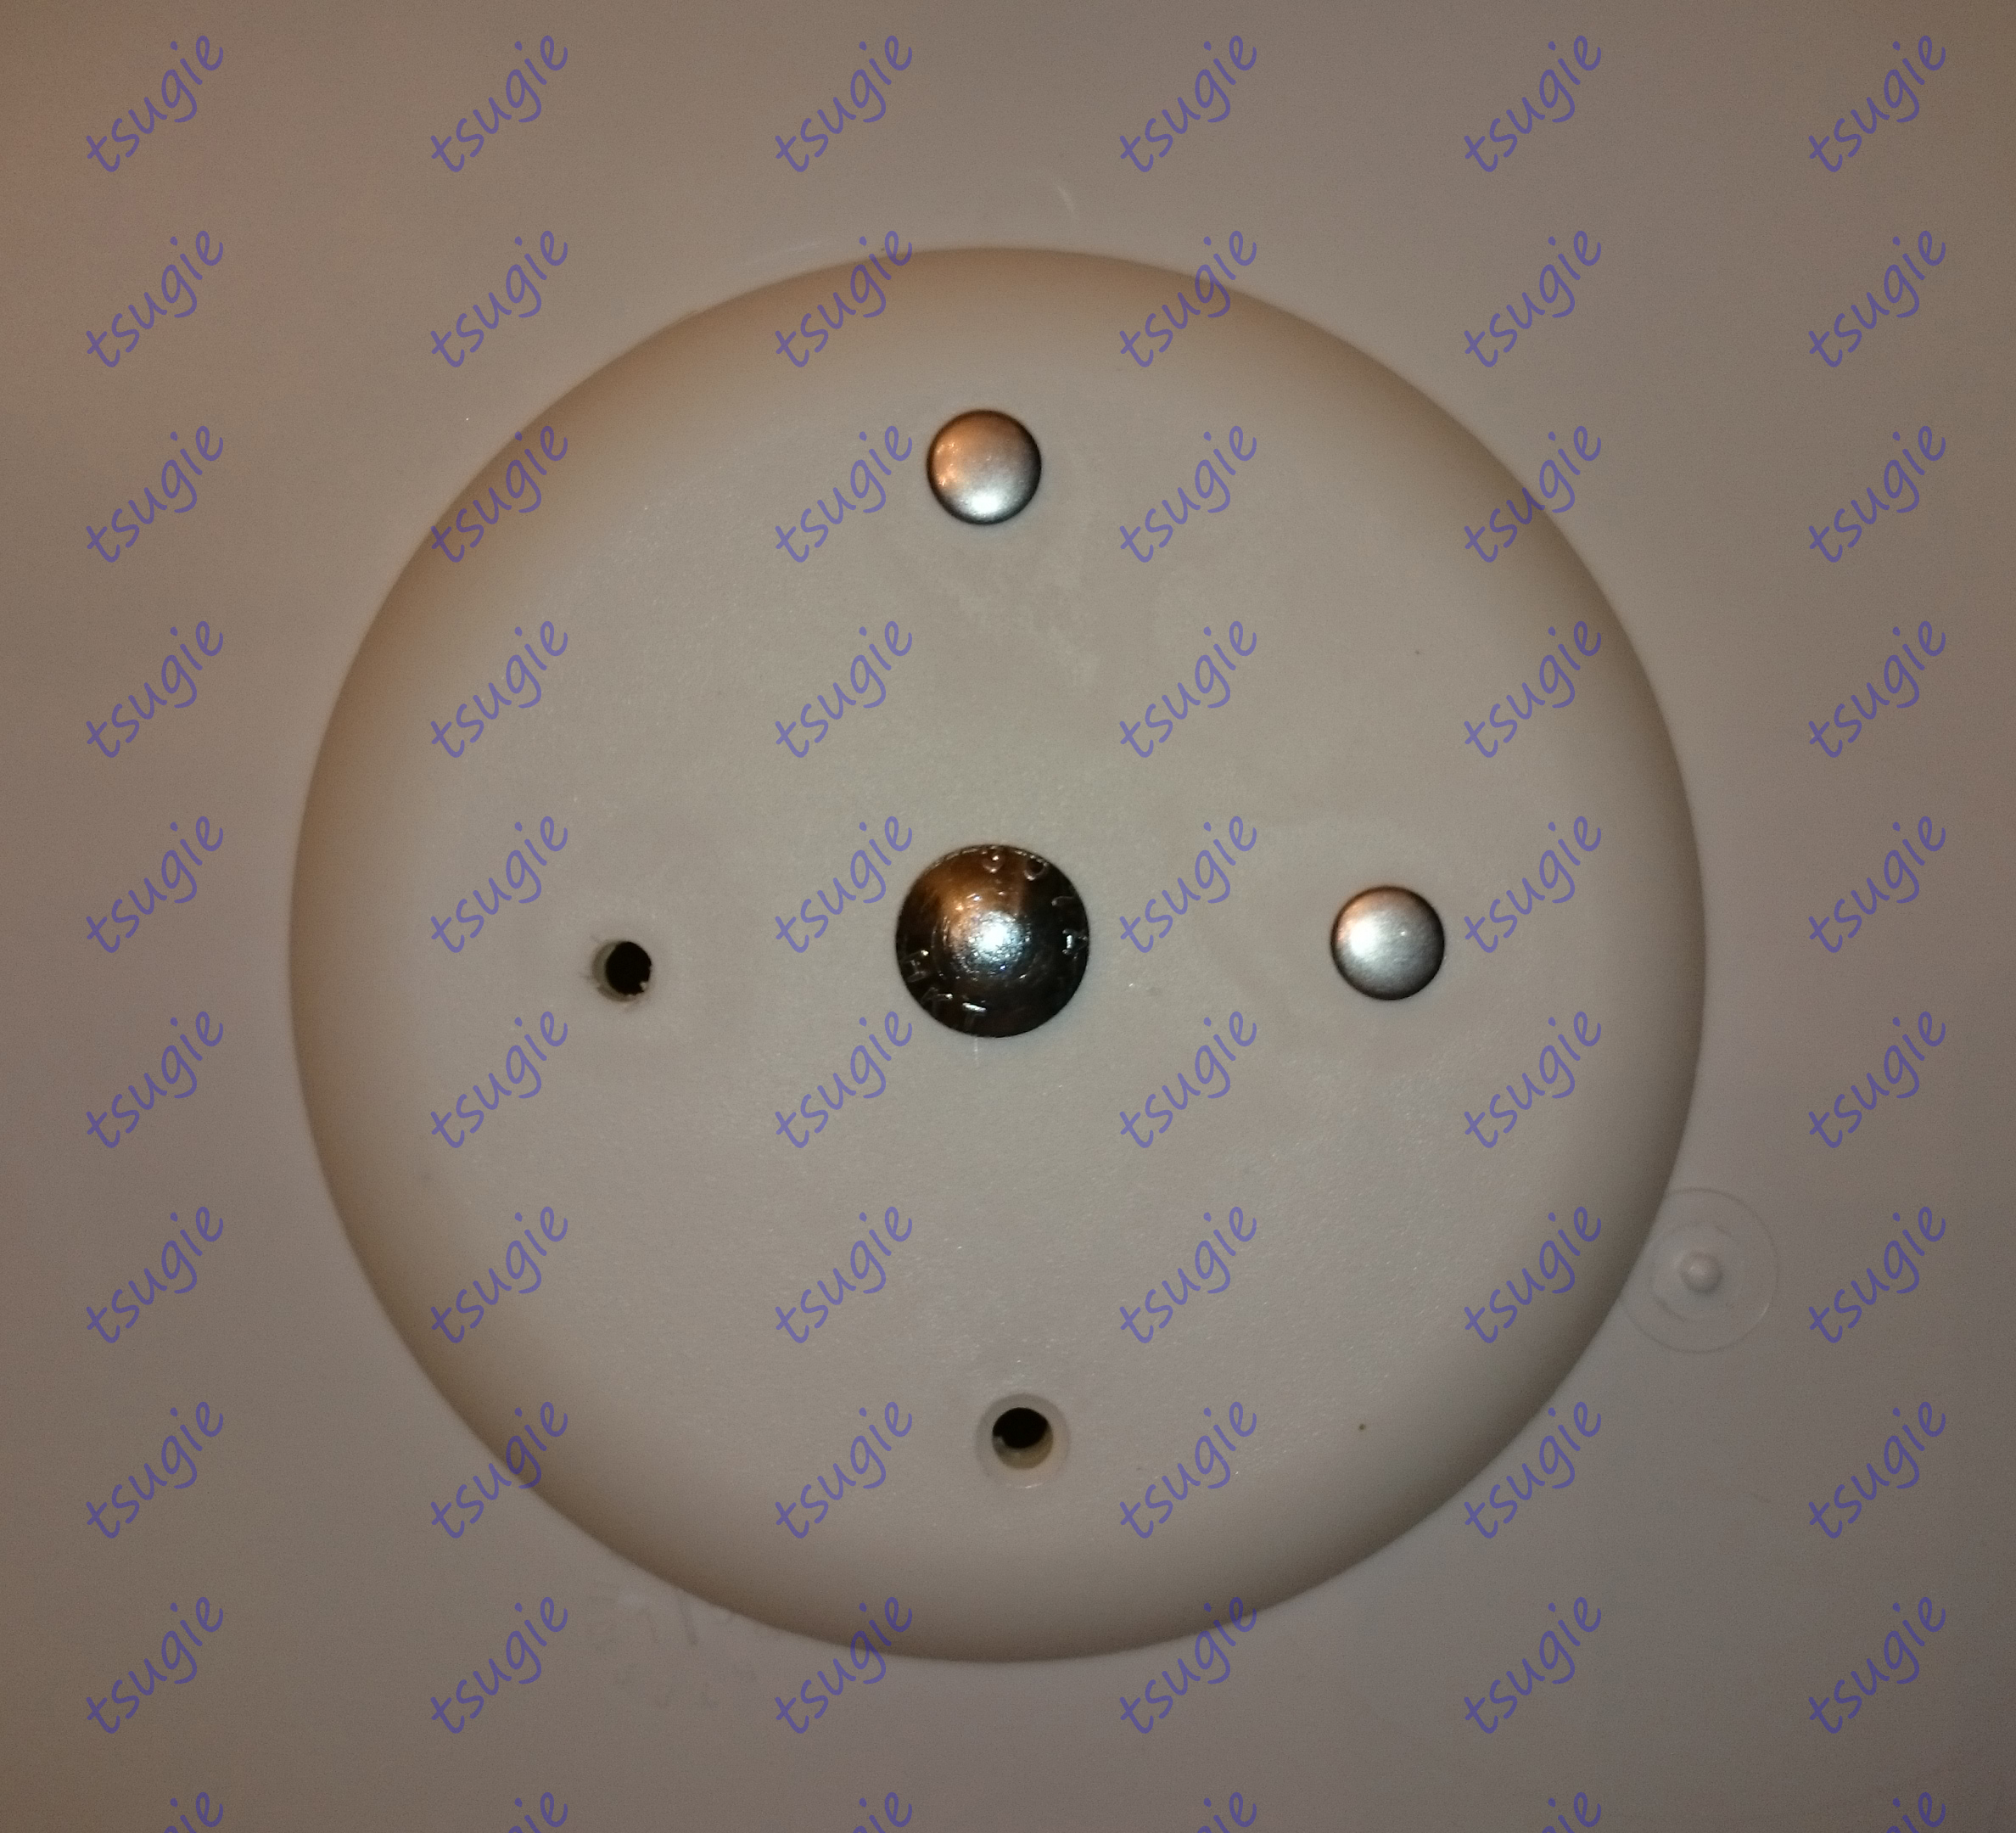
Then, drill through the holes of the four pegs of both ceiling covers with a 7/32″ drill bit to make them big enough for the binding posts. Drill a hole using the 5/16″ drill bit on the center of one of the ceiling covers.
Now align the ceiling covers, so that the pegs/holes match, and screw at least two binding posts through two holes to hold the ceiling covers in place. (You can use clamps to hold them in place instead.) Now use the ceiling cover with the hole in the center to drill the center hole of the other ceiling cover. *The center holes have to match or the bolt won’t go through or it will be diagonal. And you don’t want that.*

6. Make a square on the ceiling cover that will be placed on the front of the lid. I use a soldering iron to make the general shape and then I shave off what’s necessary with a box cutter. The bolt should have a snug fit. It shouldn’t be loose.
Slide the bolt through the ceiling cover.

7. Make a hole, using the 5/6″ drill bit, on the center of the lid. Now, place the ceiling cover with the bolt over the front part of the lid. Drill a hole (using one of the holes on the ceiling cover as a guide) on the lid using the 7/32″ bit. Place a binding post on the new hole. Then drill another small hole and put a binding post through it as well. Now drill the other two small holes.
Remove the two binding posts and slide the other ceiling cover through the bolt on the back of the lid. Align the four holes of each ceiling cover with each other and tighten the four binding posts. Then, slide the washer over the back ceiling cover and start tightening a lock nut. *Since the ceiling cover is a harder plastic, you can tighten the lock nut without worrying much about ruining the square on the front ceiling cover. You probably don’t even need the pliers.*

Tighten it so that the lock nut is as close as possible to the ceiling cover. It’s ok if there’s some warping. I’ve actually tighten the lock nut to the point where the carriage bolt can’t be seen if you look at the lid from the side.
For the other backing options, just tighten as much as you can (make sure not to crack the acrylic sheet if that’s what you’re using).
Basically, make sure the bolt can’t move around.
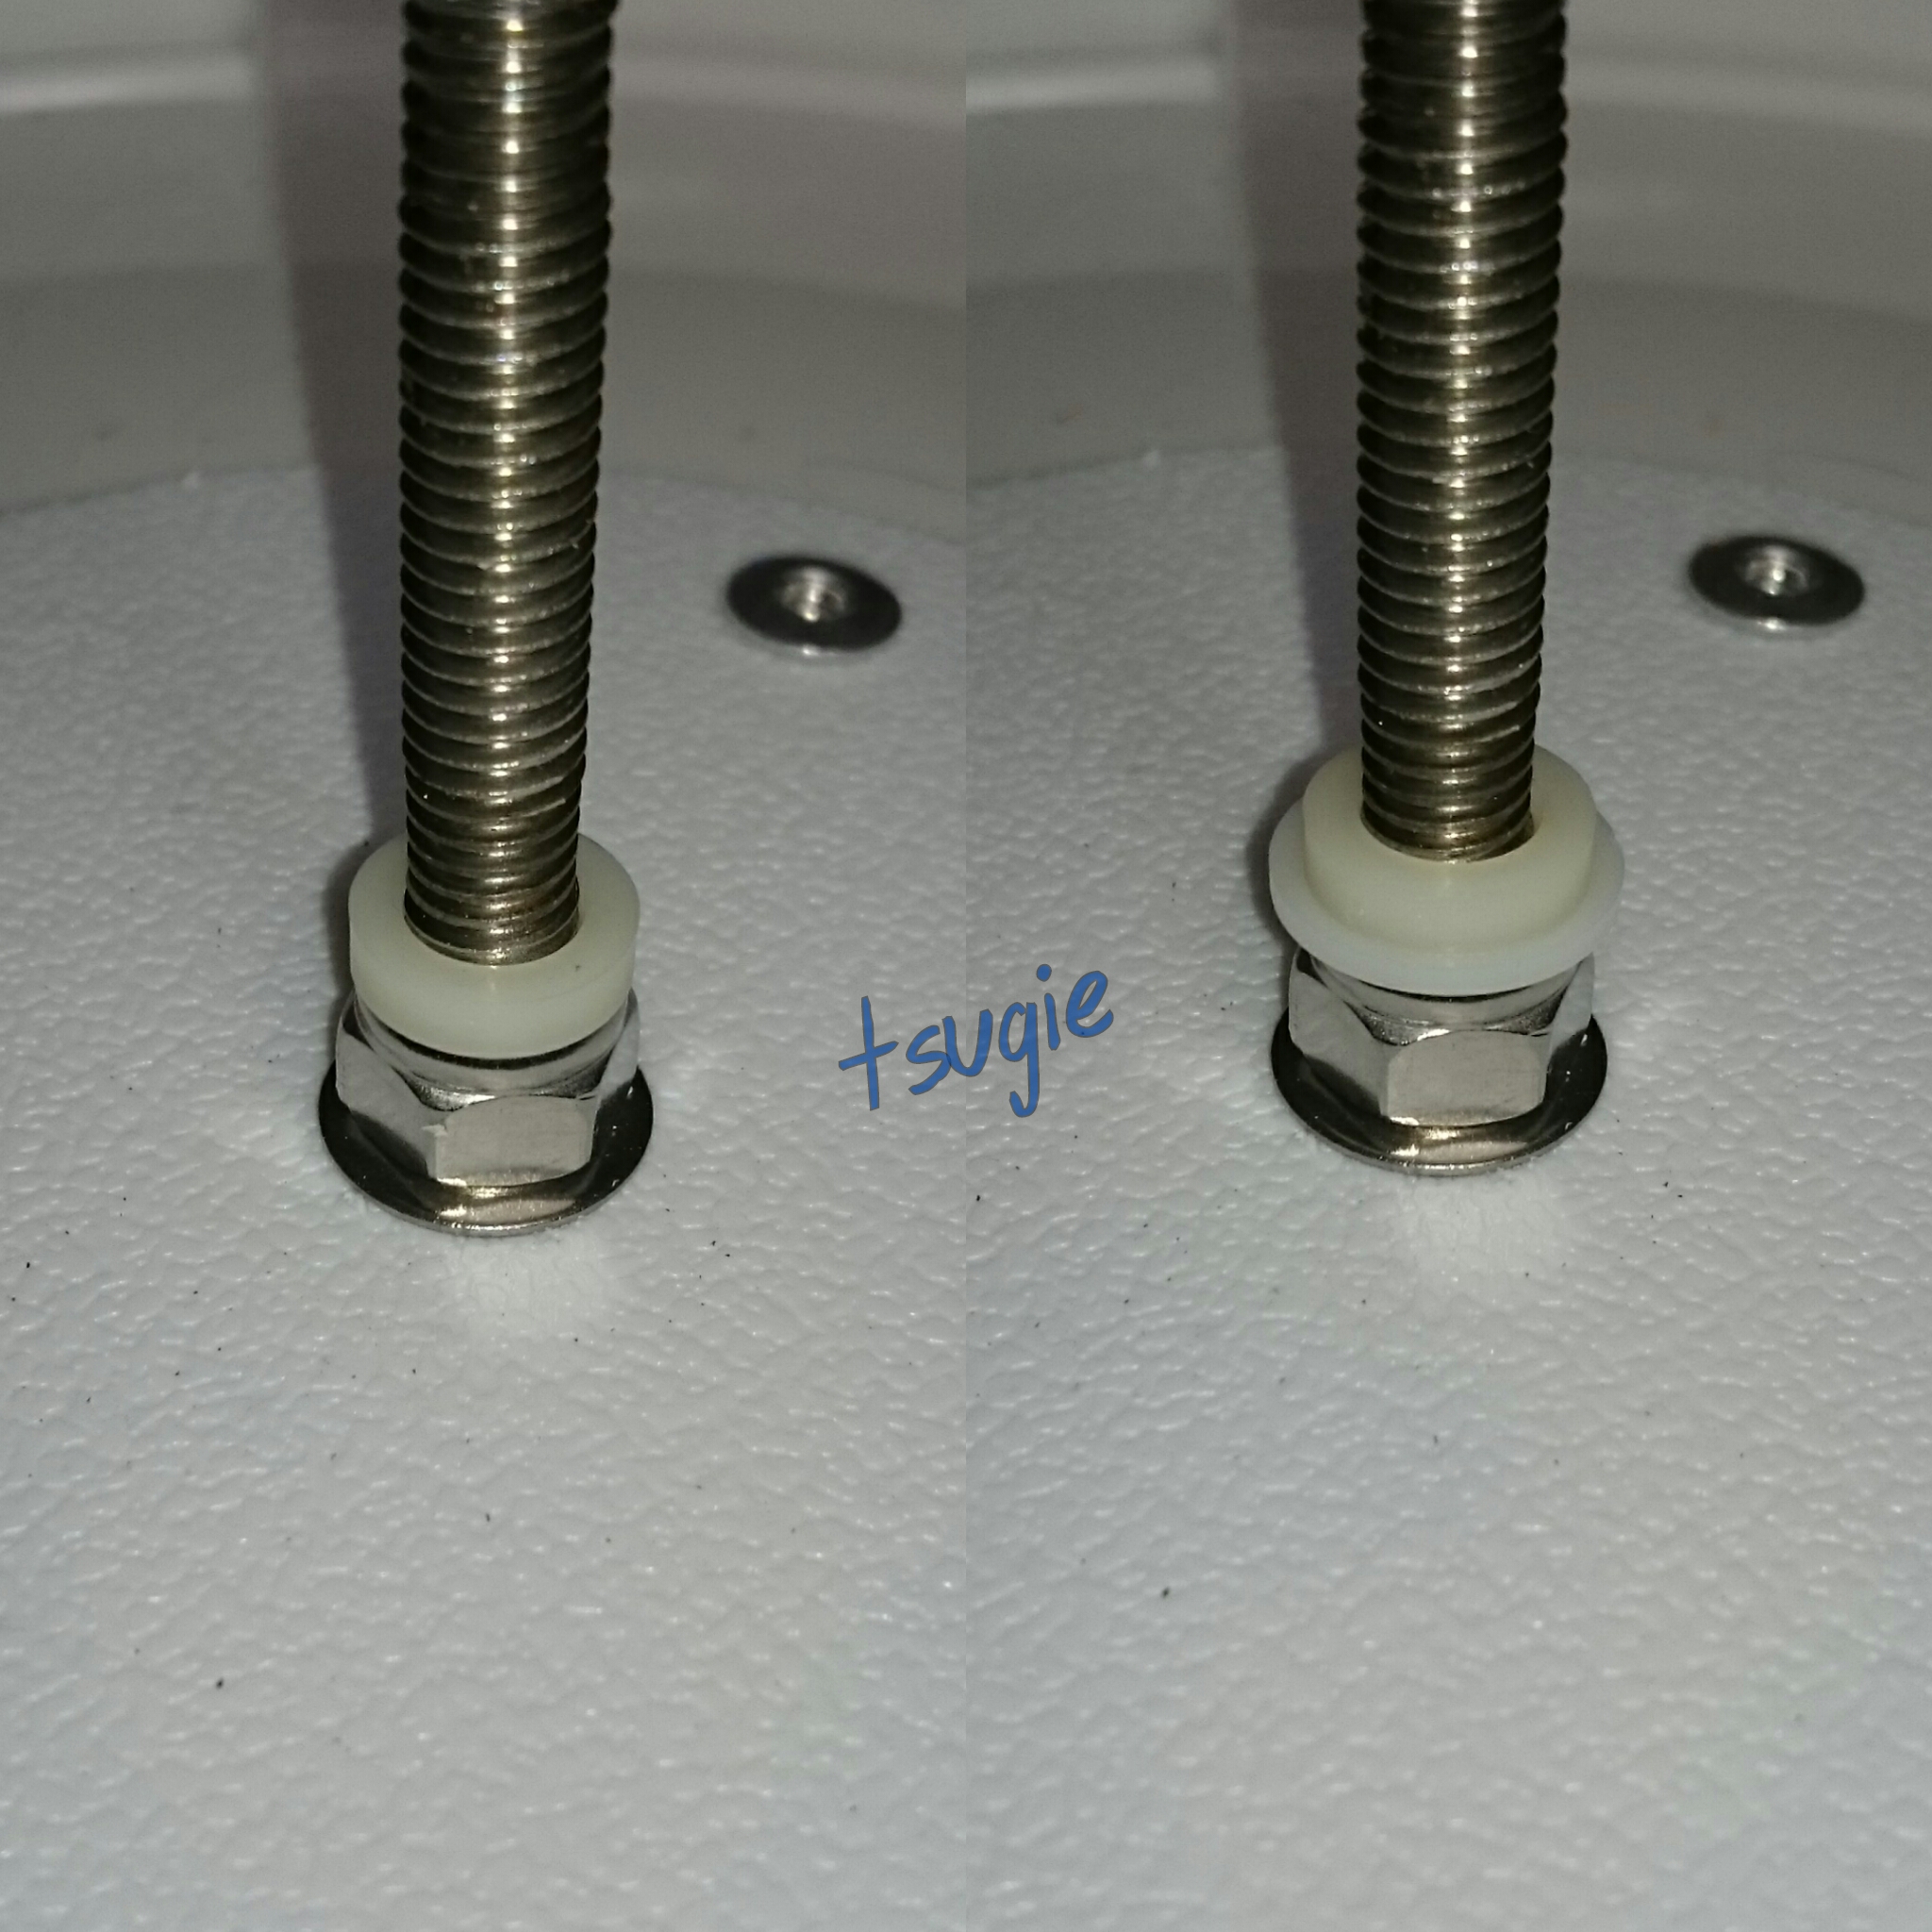
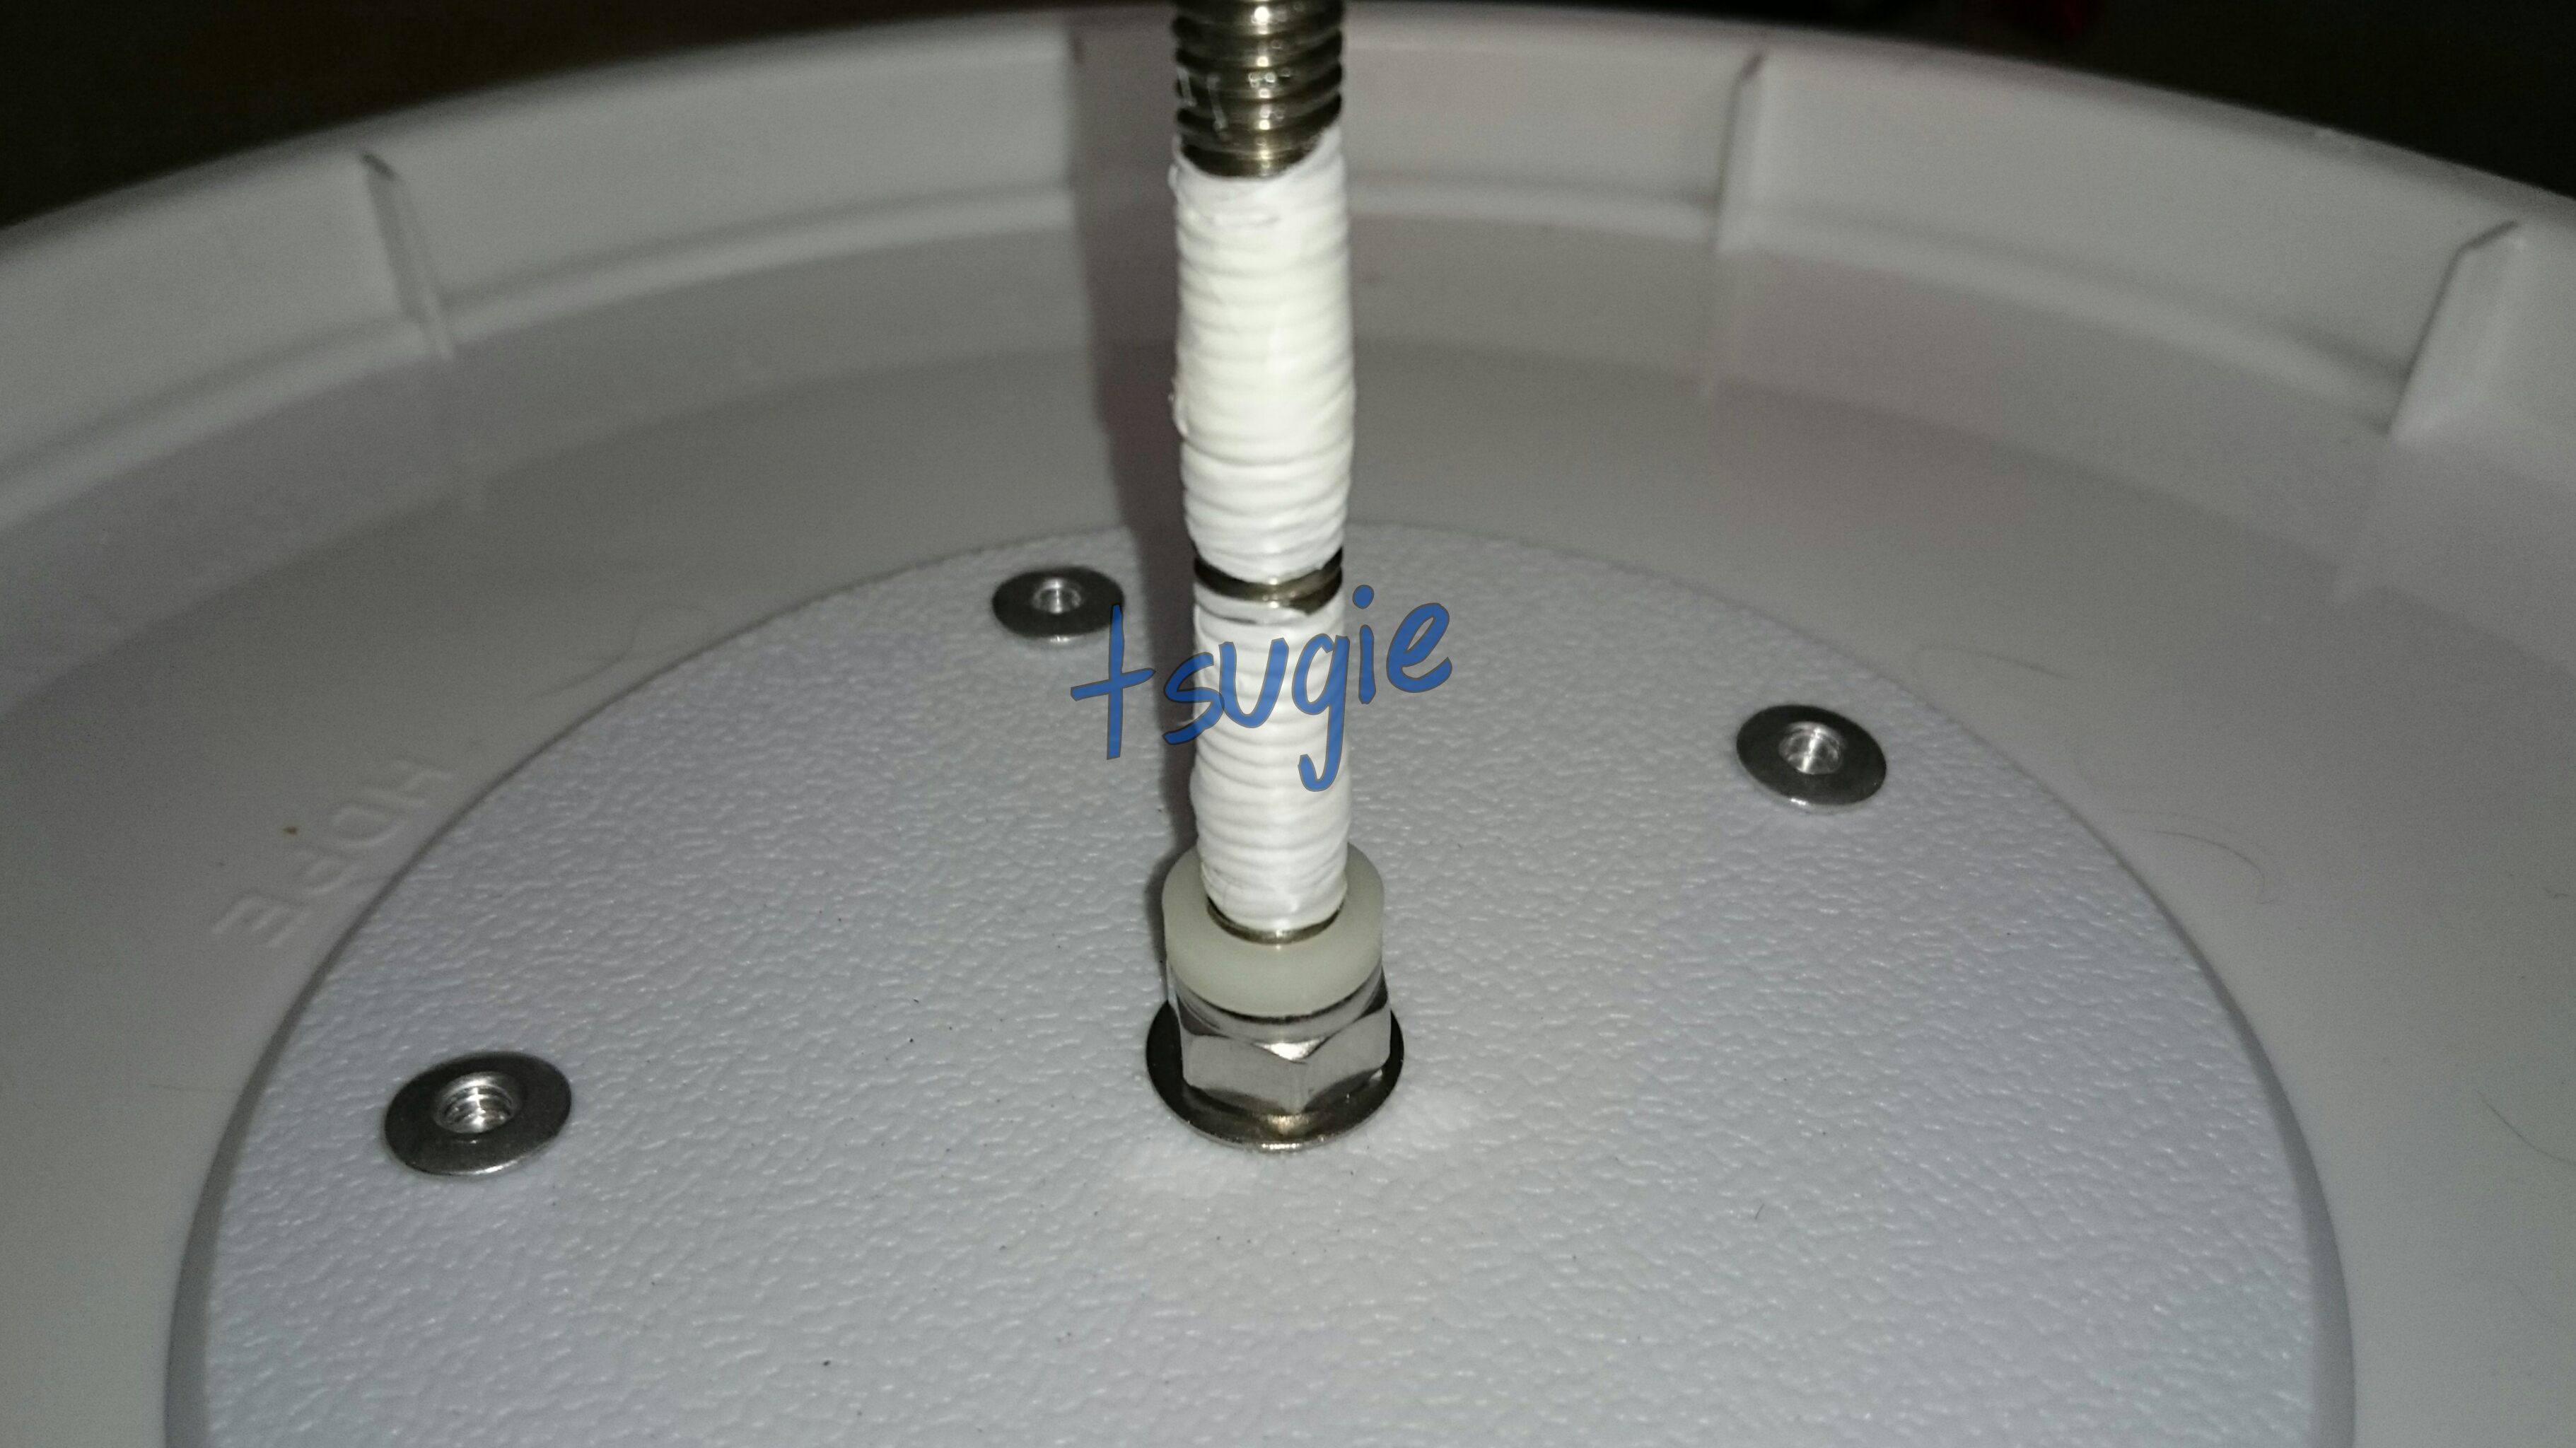
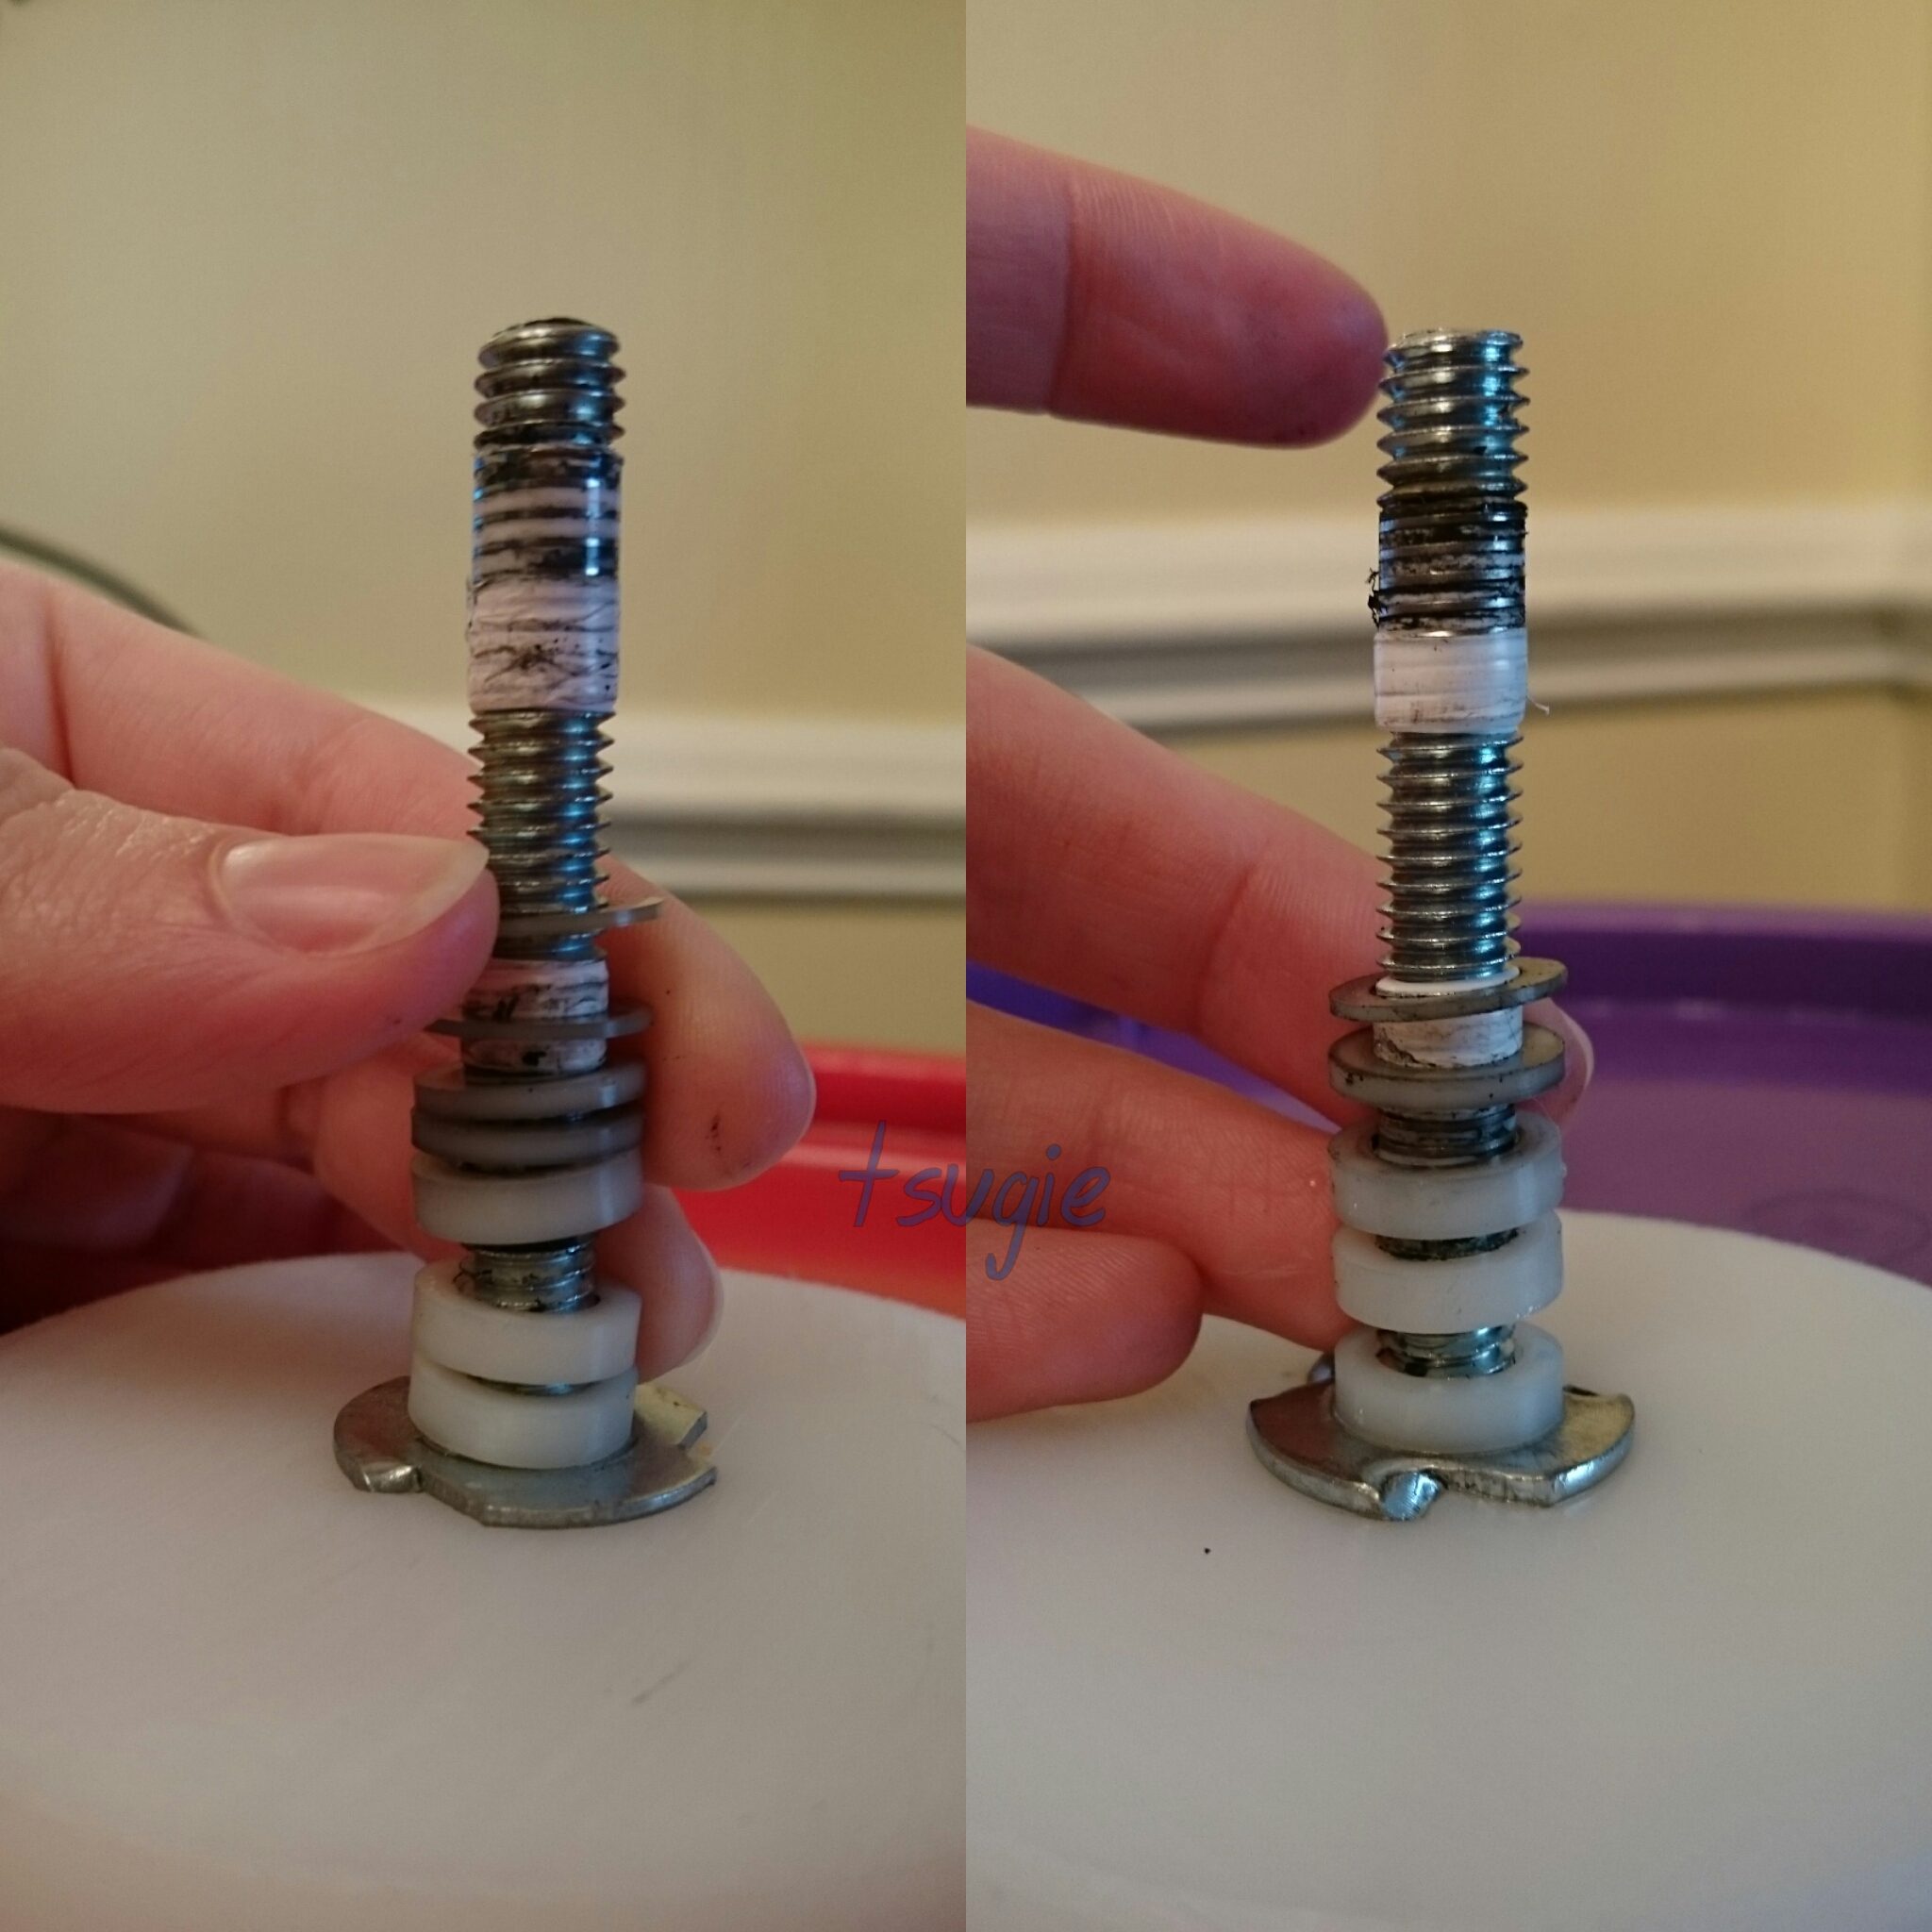
This is a new step I added in March 2016. Place a 5/16″ nylon spacer that’s 1/4″ thick after the lock nut. This will leave a small space between the PVC tee and backing you’re using, which will prevent the PVC tee from wearing away at whichever of the backings you used. (It could also make the wheel more silent because the tee won’t be rubbing against the back.)
Though the single 1/4″ has worked for most of my wheels, I have had to use a 1/4″ one and a 1/8″ in one of my wheels so I suggest buying both or taking the lid with the bolt already attached and the bearing system to the store to make sure you get the ones you need.
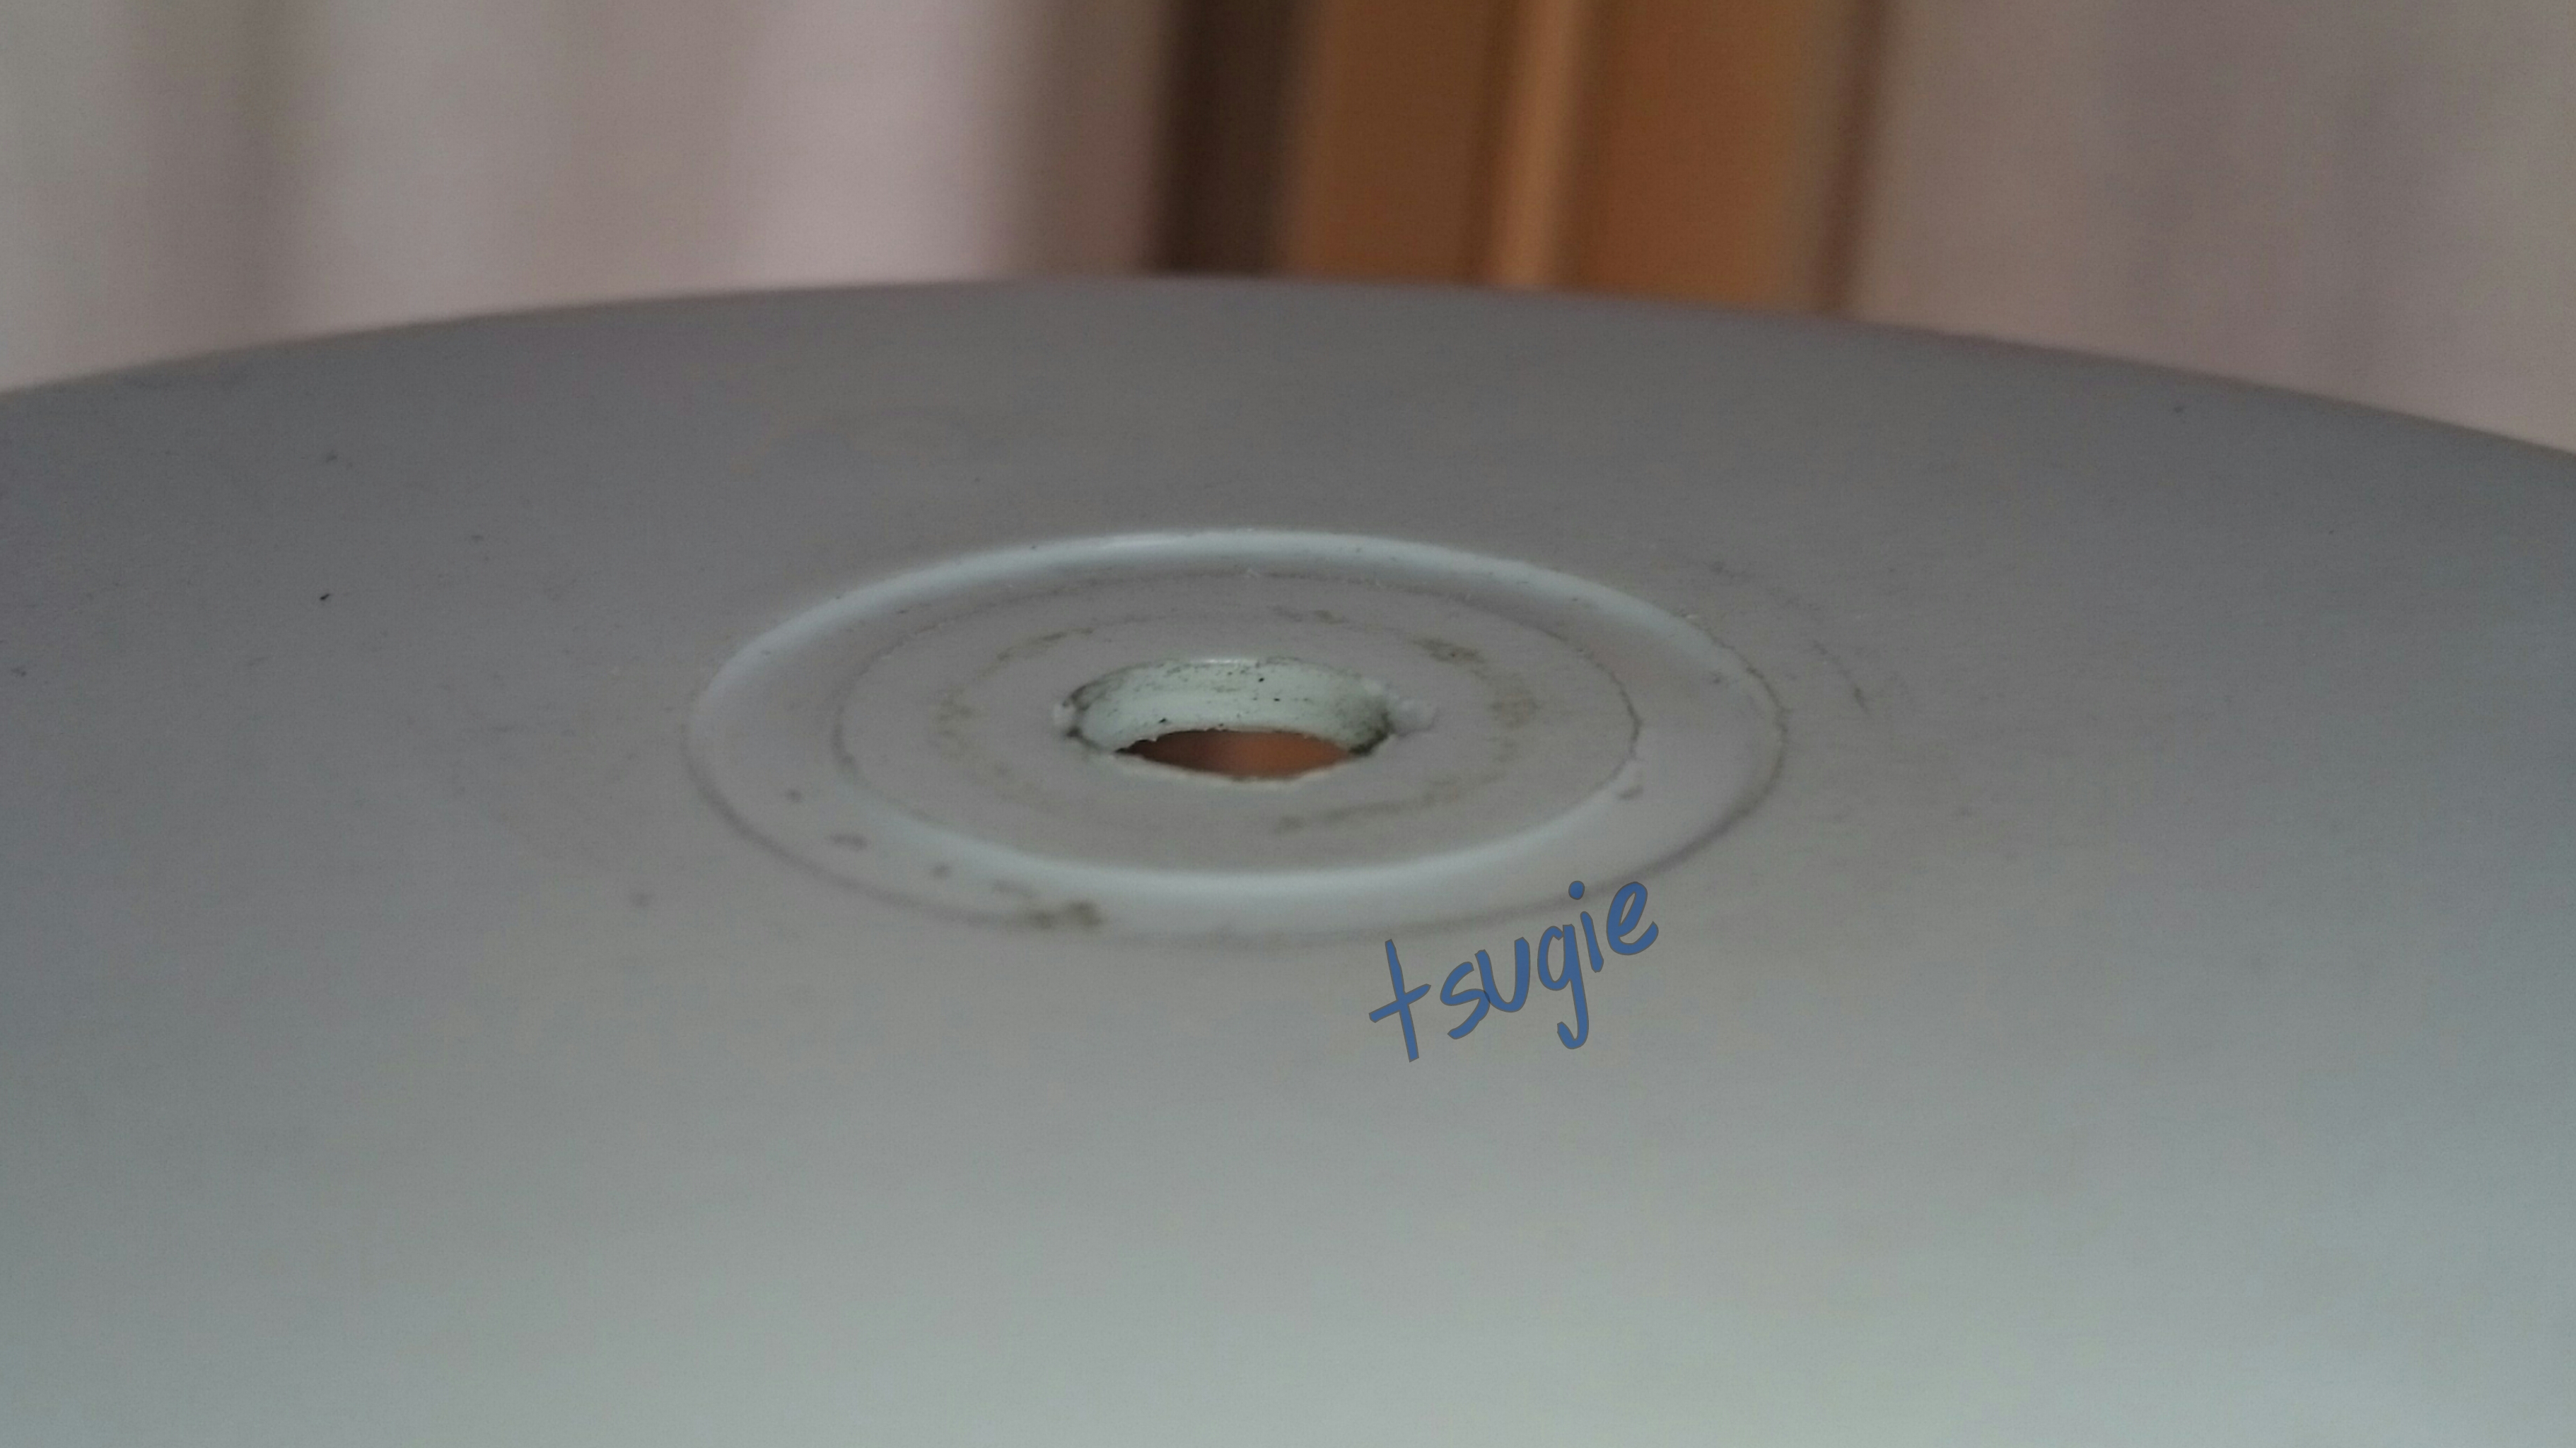
The wearing down of the backing creates a dust that could eventually damage the bearings.
This is what the wearing down looks like on the ceiling cover:
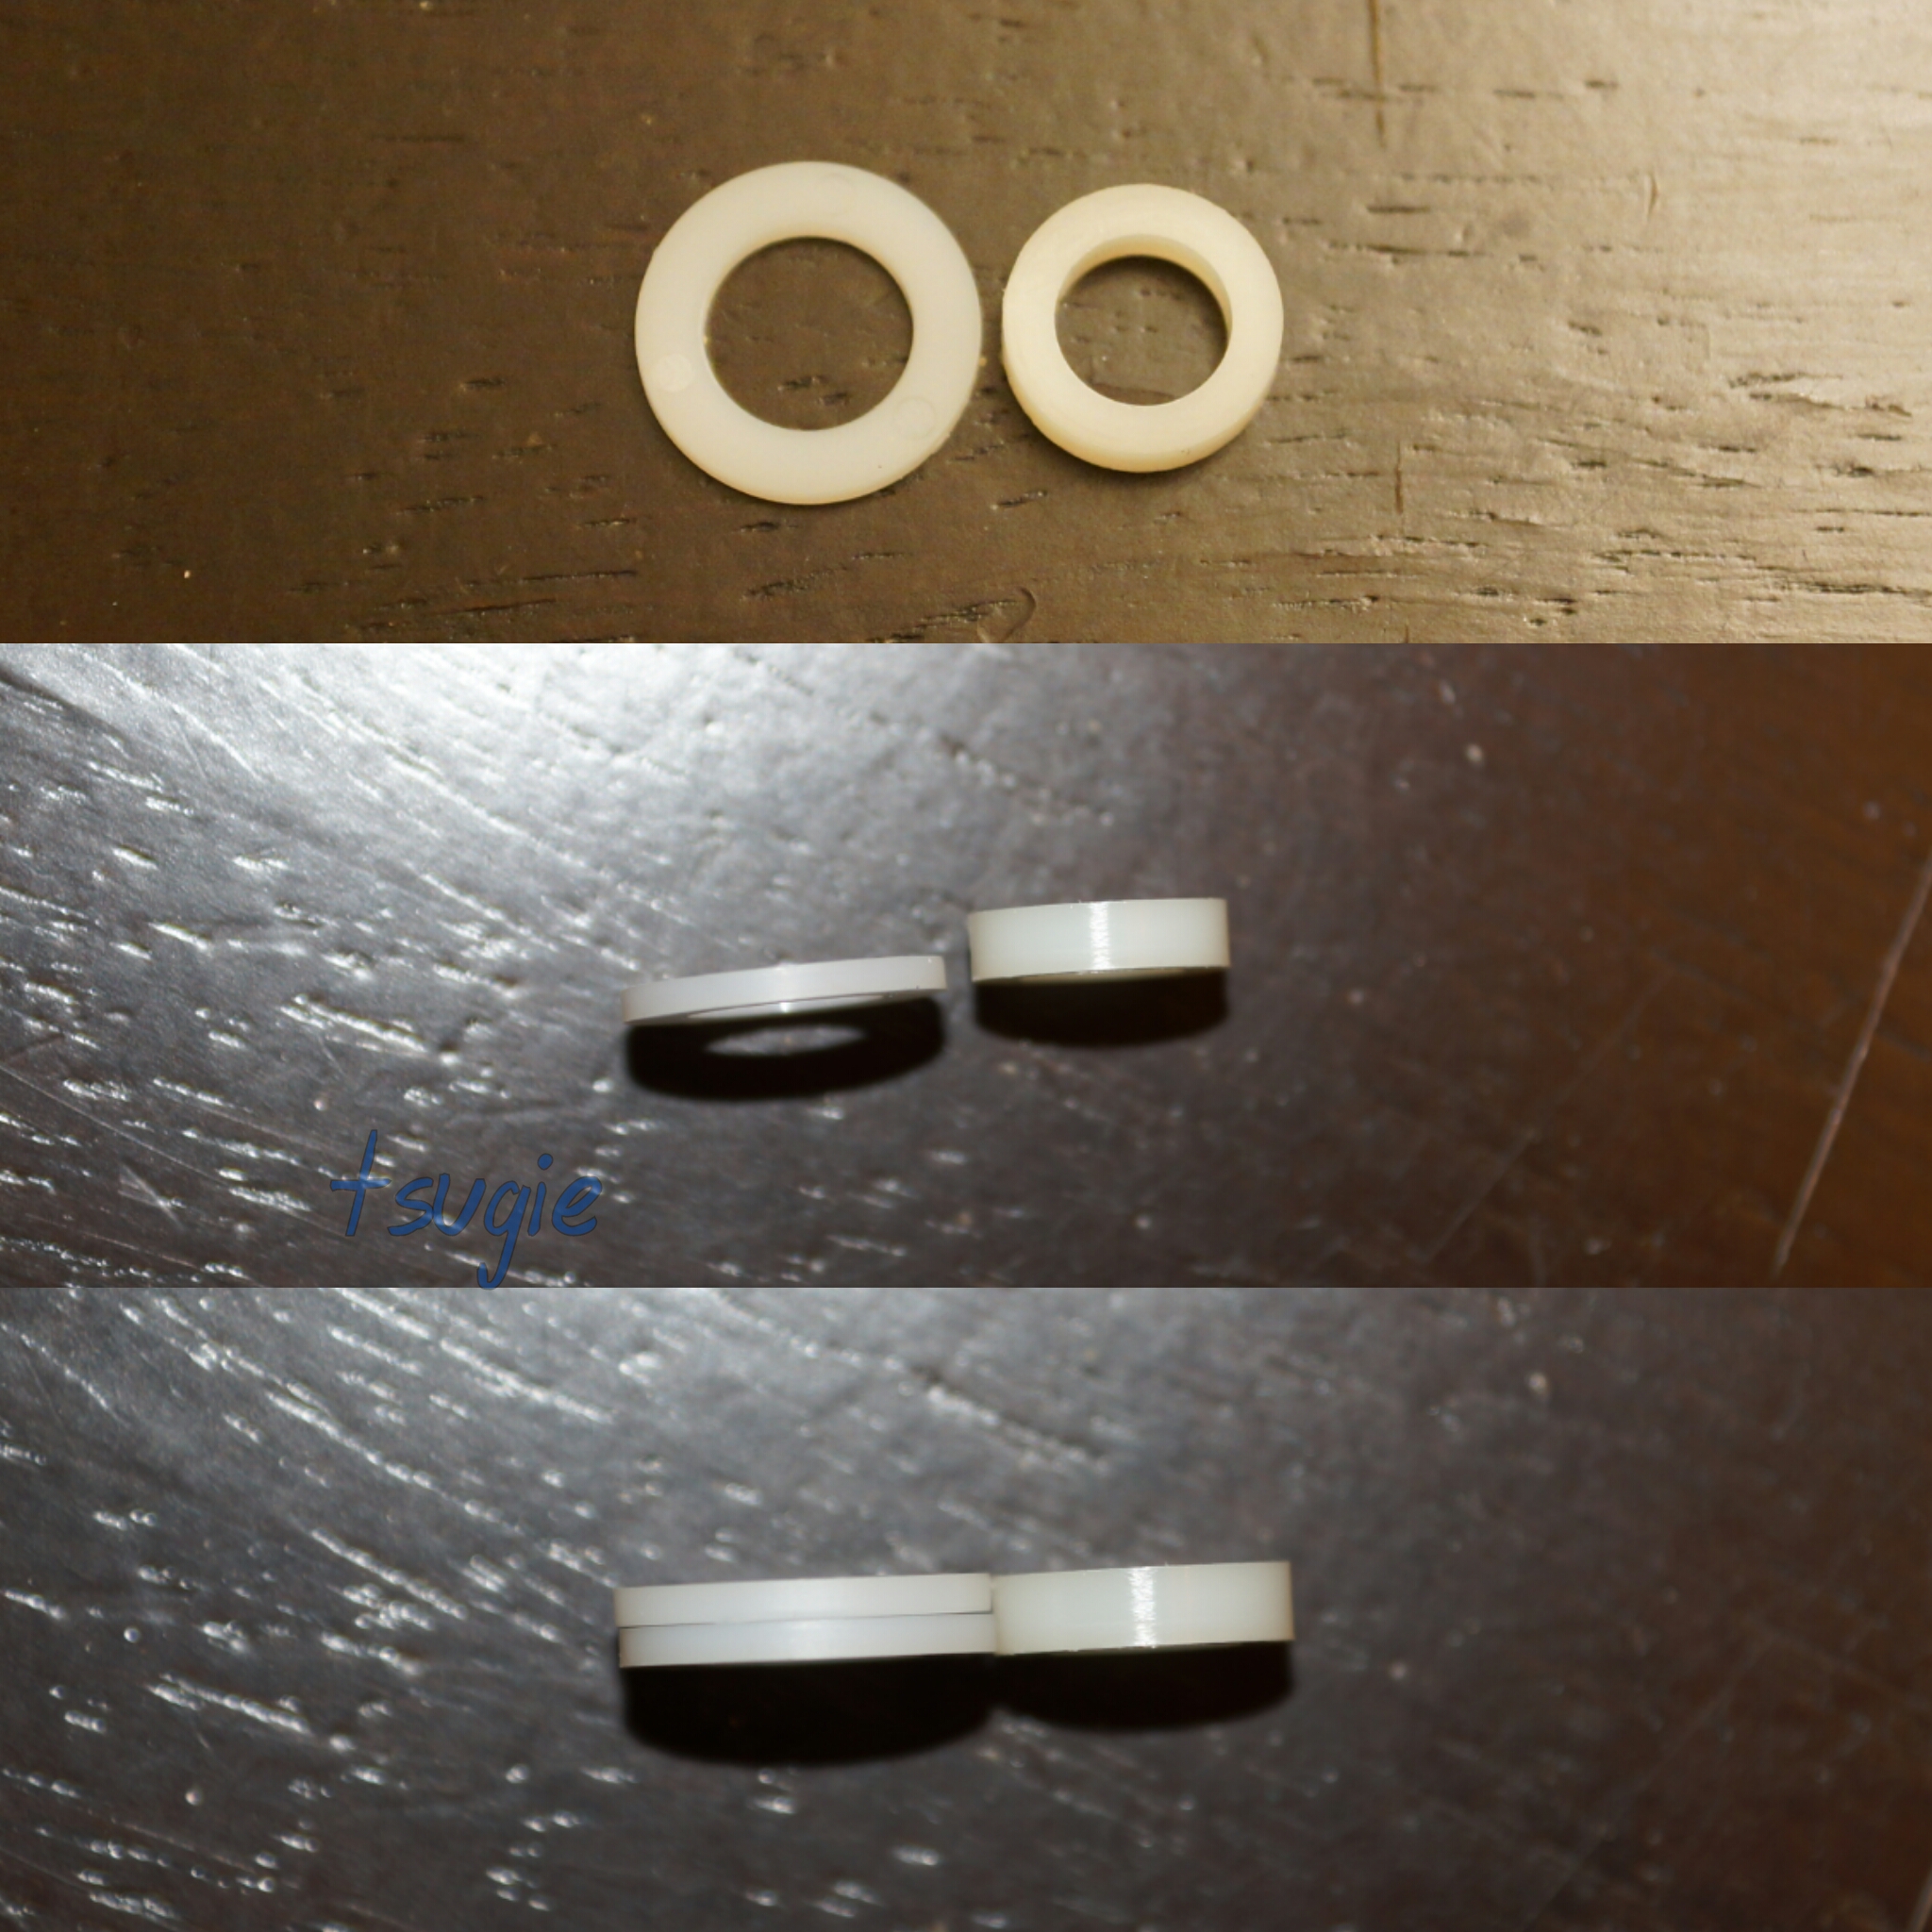
Here are the two spacers I’ve used.
The thinner ones’ holes are 3/8″, instead of 5/16″, because the store didn’t have the 1/8″ thick ones in 5/16″. You would need two if you can’t find a 1/4″ thick one.
8. Use the plumber’s tape to coat the area of the bolt where the bearings will be. This will prevent metal on metal contact between the bolt and bearings, making the wheel spin more silently.
Don’t make the tape layer too thin. Cover the bolt generously…but make sure the bearings can actually pass. If you are having problems finding where the bearings will be, put tape all over the bolt except for about 1/2″ to 1/4″ at the end.
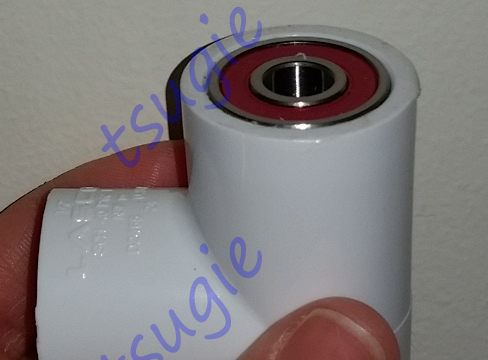
9. Now, place the bearing system and screw the other lock nut using a ratchet wrench.
With the nylon spacer it won’t really matter how much you screw the lock nut. It won’t make the wheel easier to spin if you tighten it less or harder to spin if you tighten it more. Just screw the lock nut until the PVC tee barely moves around. (However, if you tighten it too much the wheel might squeak.)
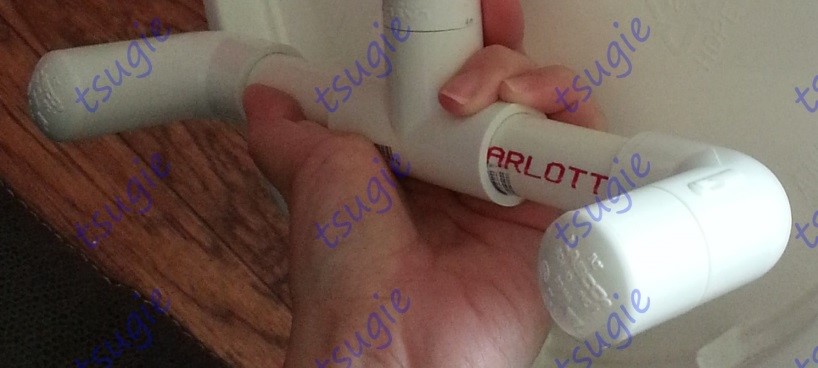
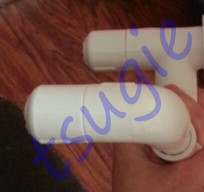
I’ve never had issues with the 3″ bolt but, if you think it’s too short, you can use a 3.5″ bolt.
This is using the 3″ bolt.

This is using a 3.5″ bolt.
*Because of the expanding of the tee, the plug might be too loose and come/slide off easily. I recommend checking the tee and plug before buying them to make sure that the fit is really tight so that when the tee expands the plug won’t slide off. However, if using a cage mount, this probably will not be an issue since the back of the wheel will be pressed against the cage.*
*Depending on the options you chose, the plug and the bolt might be too long making the wheel slightly tilt forward. I’ve cut the plug on all my wheels. If you are using a floor stand, it might not be necessary.
You can also grind or cut the bolt if you chose a 3.5″ one and you want to use a cage mount.*
Cut vs uncut plug.
On the first photo below you can see more or less how long the bolt 3.5″ extends if you don’t cut it. On the middle photo the bolt and plug are cut. *I used the second cutter linked earlier to cut the plug. I have both cutters linked because of when I made my PVC cages. You don’t need to get both. But if you want to cut the plug, the other one linked won’t work.* The last photo is using the uncut plug.
10. For the second lid, if using the jigsaw, drill at least one hole on the edge with the drill. I drilled a lot to have an “outline” but you do not have to.
Use the jigsaw to cut the opening.


If using a dremel, I recommend using a cutting guide. Place the guide like this and cut:
11. You might end up with flaky edges, especially if using the jigsaw, so sand them down. Make sure you don’t leave any sharp edges.
12. Now, remove the gasket from both lids using the flat head screwdriver or butter knife.
I HIGHLY recommend throwing away the gaskets and using a 1/4″ outside diameter polyethylene tubing instead. But if you’re going to use the gaskets, make sure that whatever you use to remove them doesn’t have a sharp edge so that it doesn’t puncture/damage the gasket and, also, pull the gaskets carefully. Do not stretch them. But seriously, throw them away and use the tubing.

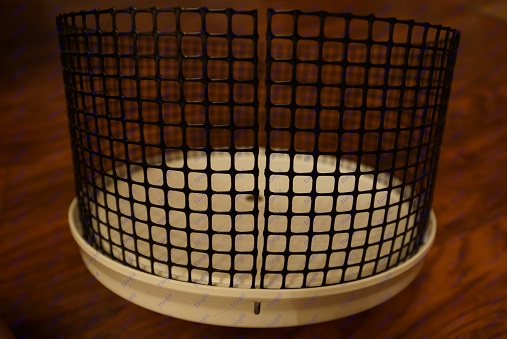
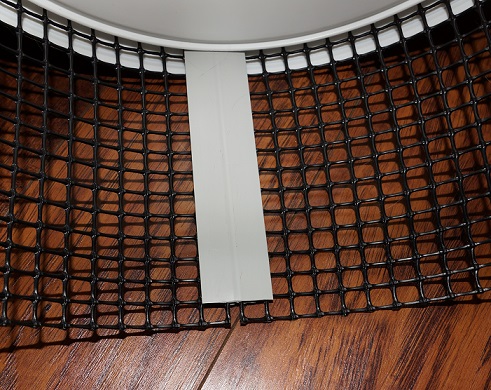
13. Next, cut the hardware cloth or gutter guard and divider bar with a pair of scissors.
The width of the hardware mesh will depend on how wide you want the track of the wheel to be. I prefer my wheels to have a track of about 5” (12.7cm) width so I cut the mesh about 6 1/2” (16.51cm) wide. The gutter guard is 6” (15.24cm) wide.
*The hole spacing of the hardware mesh may not be suitable for very young/small joeys (think around 6 weeks OOP or less, depending on size). More comments on the final comments at the end.*

The length should be about 36 3/4″ (93.345cm) but it may vary depending on the lids and/or mesh you use, so measure it using your lids to be sure. You can easily do this by cutting it a little longer, about 38” (96.52cm), and placing it around the groove of the lid where the mesh will be and cutting however much you need to.
The space between both ends should be very small, as shown in the photo.
Since my mesh is 6 1/2” (16.51cm) wide, the divider bar has to be roughly 5 1/2″ (13.97cm) long. Basically, the divider bar should be about 1” (2.54cm) less than the width of the mesh.
14. Now, with the mesh in place, insert the gasket/tubing inside one of the lids using the flat head screwdriver or whatever you are using. Make sure to insert the gasket/tubing surrounding the inner part of the mesh and that it is completely inside. Then place the divider bar between both ends. Lastly, place the other lid on the mesh and insert the gasket the same way as before.
*I placed it first on the lid with the bearing system but you can do it on the other lid first. It doesn’t make a difference.*
When attaching both lids, make sure that the wheel does not pull apart easily. In other words, make sure that the tubing has a tight and strong hold on the mesh and the wheel isn’t going to fall apart.
15. Make a stand/mount for your wheel. And attach the wheel to it.
Unfortunately, I do not have photos of the process. But making stands/mounts is much more straightforward than the wheel.
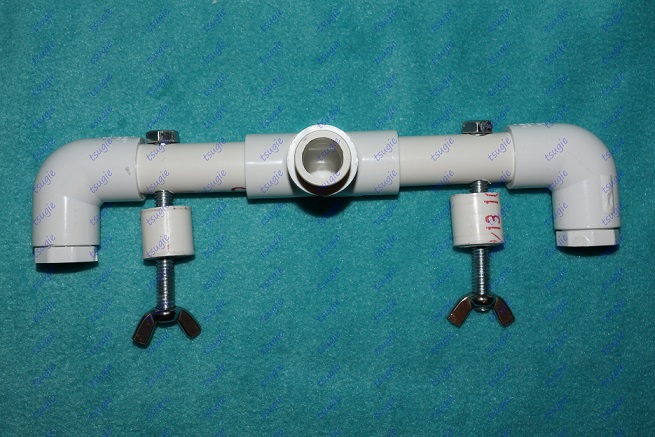
Horizontal cage mount:
- Cut pieces of the PVC pipe the following sizes:
– 1 of 1-1/2″ (3.81cm)
– 2 of around 3” (7.62cm)
– 2 of 3/4″ long (1.905cm) - Insert the 1-1/2″ long piece into the middle opening of the PVC tee.
- Insert the two 3″ PVC pipe pieces into the other two side openings.
- Place the two PVC elbows on the ends of the two longer PVC pieces and insert the plugs into the elbows.
- Drill holes using the drill and 5/16” drill bit as seen on the photo.
Try to make it so that there is barely any, if any, space for the bolt to move around. - Now, attach the mount on the cage, placing the 3/4″ PVC pipe pieces on the exposed bolts to cover them.
*Photos after the Vertical Cage Mount.*
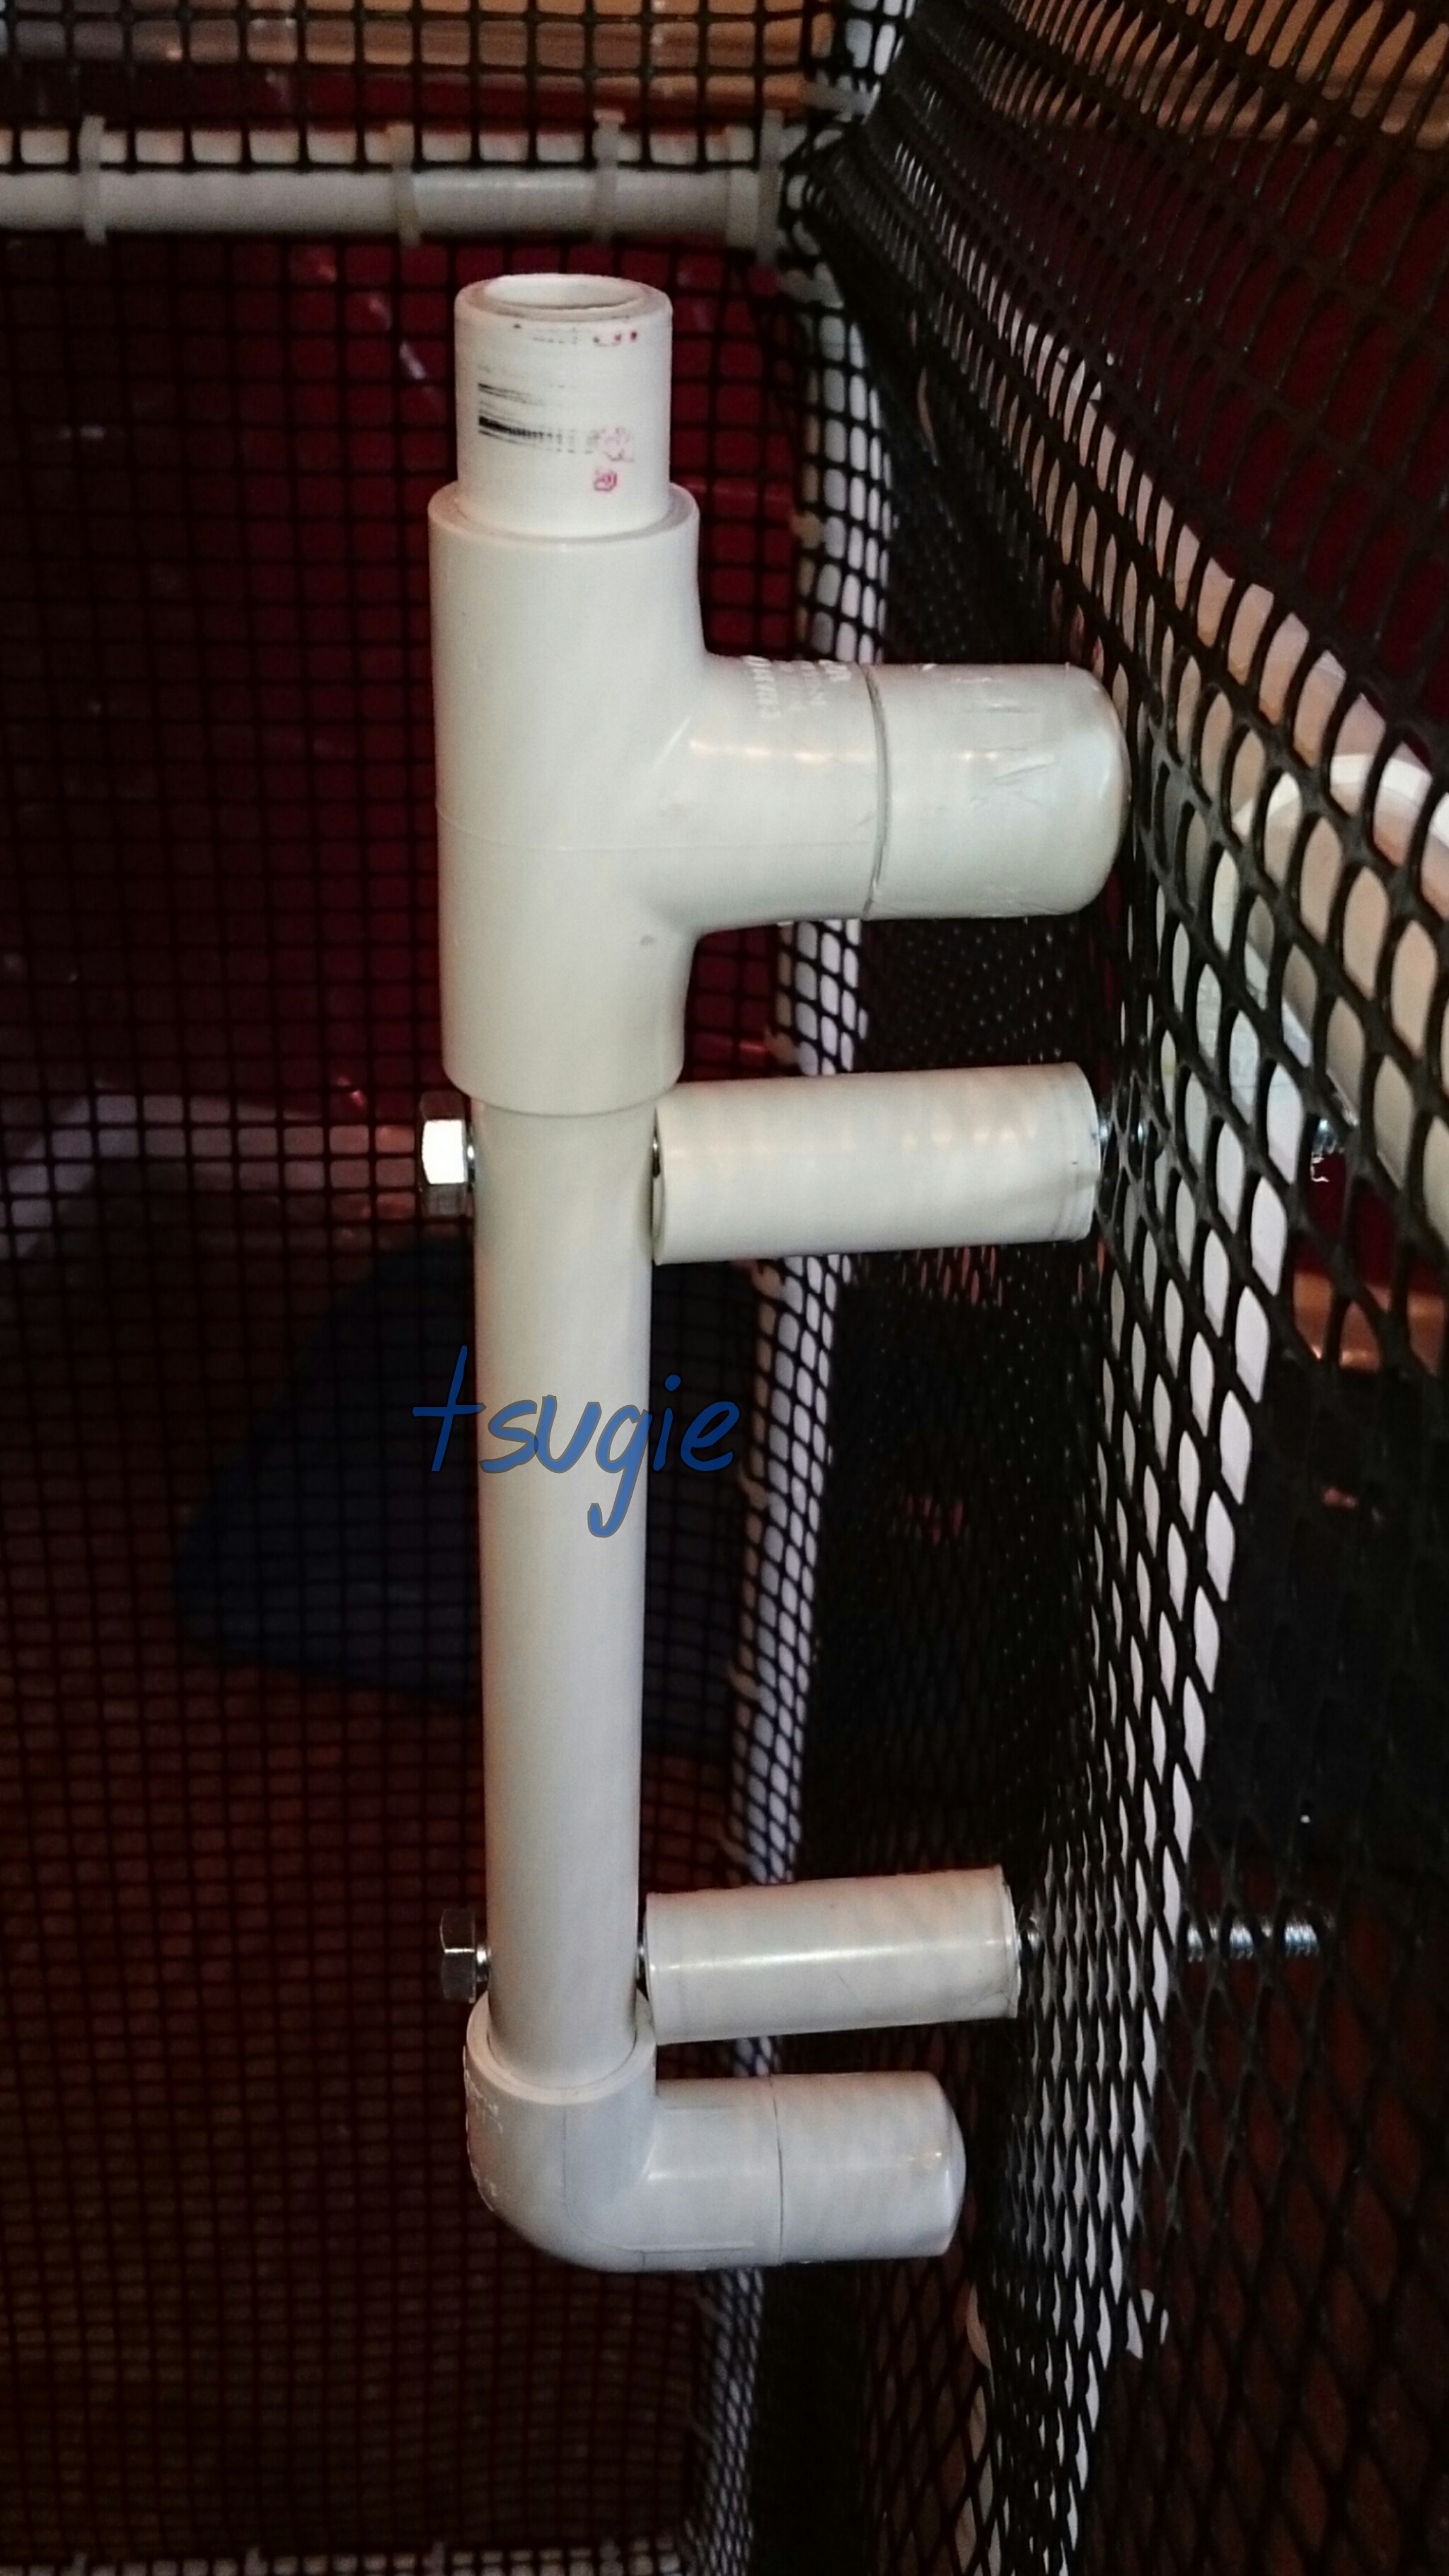
Vertical Cage Mount (using caps):
- Cut pieces of PVC pipe into the following sizes:
- 1 of 9″ (22.86cm)
- 2 of 2″ (5.08cm)
- 2 of 1-1/2” (3.81cm)
- Insert a 1/2″ elbow into one end.
- Insert a 1/2″ tee into the other end.
- Insert one 1-1/2” piece into the elbow and one into the tee.
- Insert a cap into each 1-1/2″ pipe piece.
- Drill holes using the drill and 5/16” drill bit as seen on the photo.
Try to make it so that there is barely any, if any, space for the bolt to move around. - Attach the mount, placing the 2″ PVC pieces on the exposed bolts to cover them.
This is how your mounts should look. *You don’t have to use fully threaded hex bolts.*
*Remember that you might need washers depending on your cage. Get the biggest 5/16″ washers you can find. Or, better yet, improvise. I’ve been using leftover ceiling covers I had lying around as the washers for the mounts now that I have metal cages. Maybe make two large circles, squares or rectangles to use as washers out of the part of the lid that you cut to make the wheel opening. Heck, I’ve even used the whole circle I cut from the lid. Like this: ![]() *
*

*The bolts used for the horizontal and vertical mounts can be shorter or longer depending on your cage and desire. They don’t have to be 3″ long.*
*Like I previously mentioned, the plug covering the bearings will be too long and could make the wheel slightly tilt forward on some mounts and a wheel version. It might not affect it negatively if you leave the plug long but I decided to cut it anyway.
Alternative 1: However, like I already said, you can grind/cut the bolt and/or cut the PVC plug.
Alternative 2: You could cut some 1-1/2” (3.81cm) PVC pipe pieces and use caps on the mount and/or tee. Remember, you will need longer bolts and pipe pieces to cover the bolt. Like I did with the Vertical Cage Mount.*
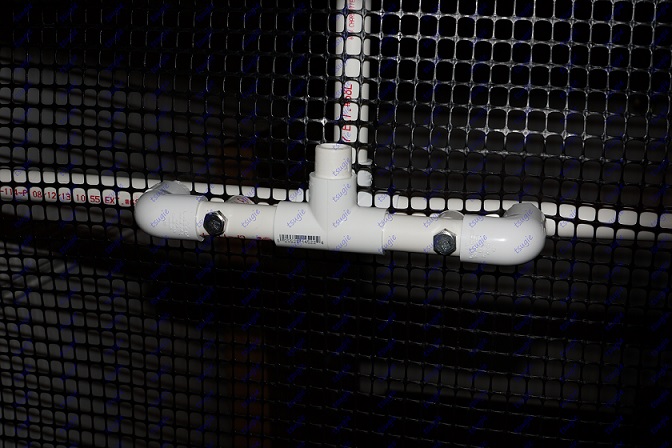
Here are some photos of Alternative 2 on the Horizontal Cage Mount:
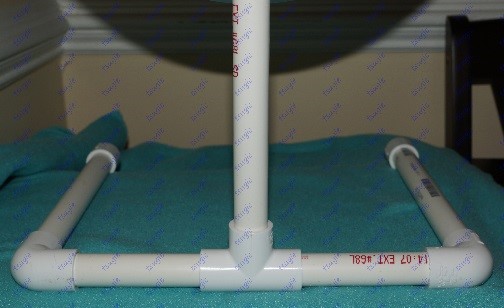
Floor stand:
- Cut the PVC pipe into the following sizes:
– 3 of 9” (22.86cm-25.4cm)
– 2 of 5-1/2″ (13.97cm) - Insert one of the 9” PVC pipe into the middle opening of the PVC tee. (This piece doesn’t have to be as long but make sure that there’s at least 4 inches between the bottom of the wheel and the floor.)
- Insert the one of the 5-1/2″ pieces on each of the other two openings of the PVC tee.
- Insert two elbows on the ends of those two 5-1/2″ pipe pieces.
- Insert the other two 9” pipe pieces on both elbows.
- Insert the caps on the ends of the 9” pipes.

16. Insert the wheel on the mount or stand and enjoy your wheel! (Well, your gliders will!)
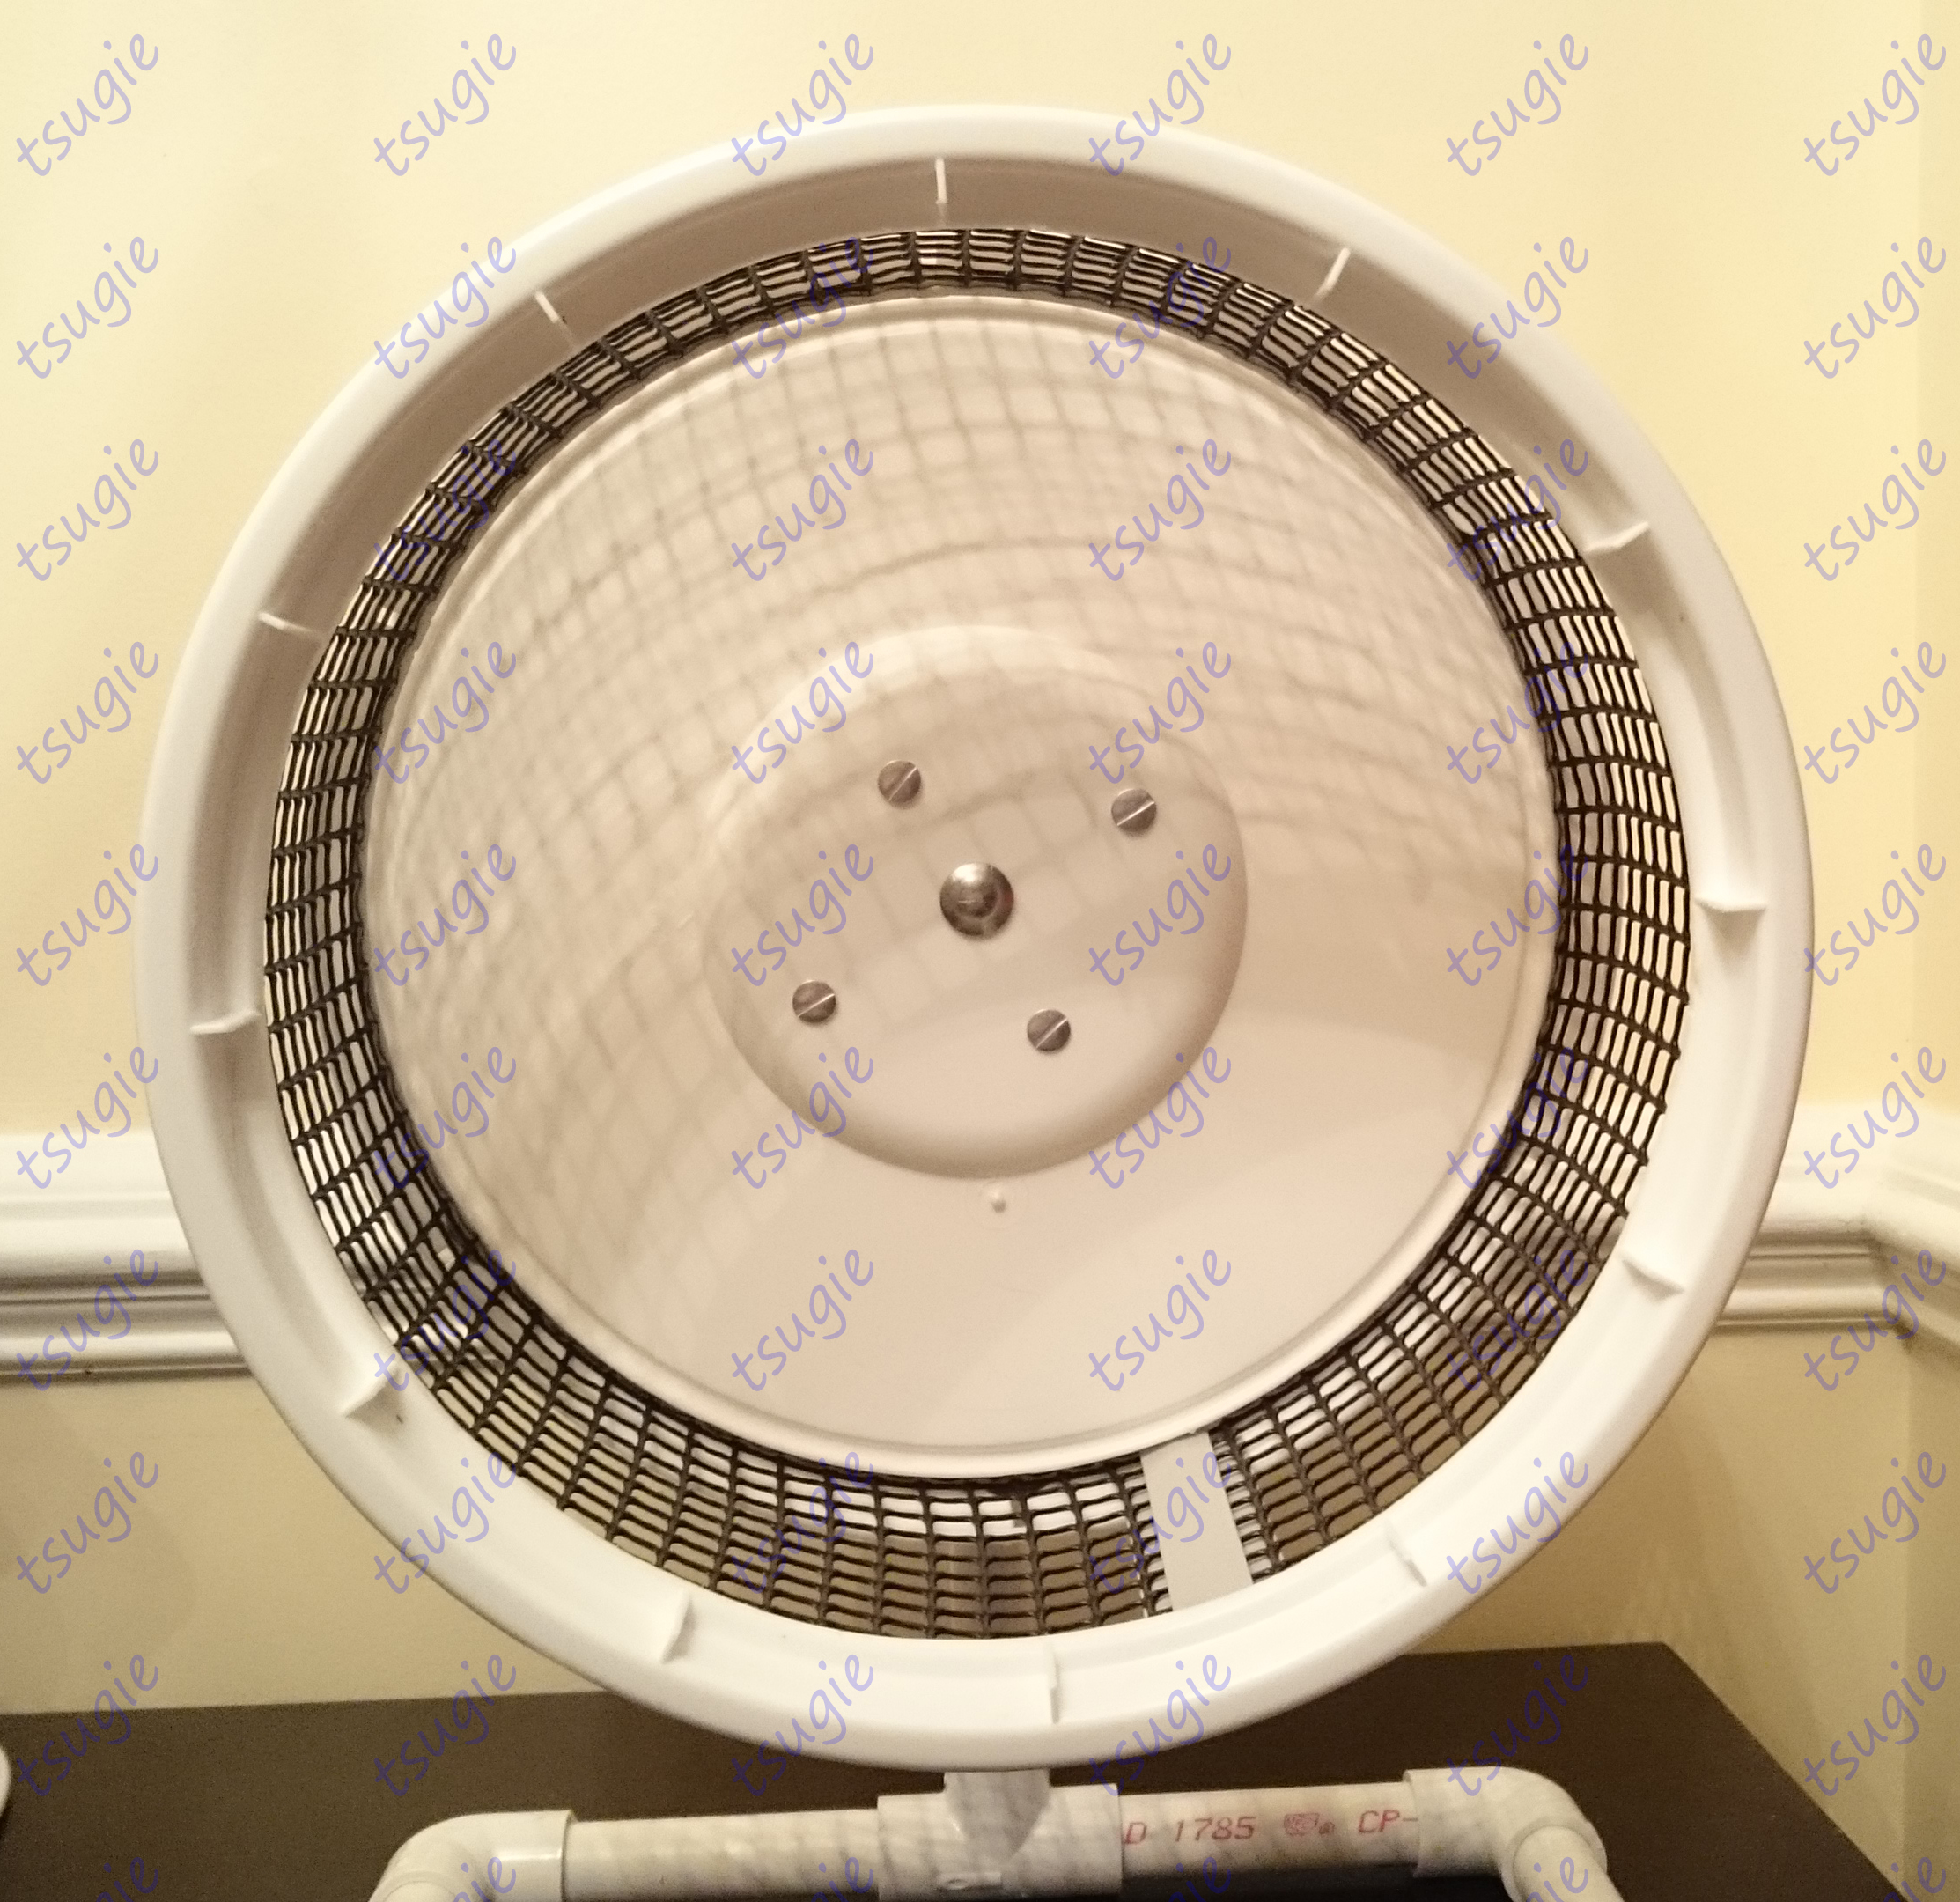
On this wheel, the plug is intact. The front lid was cut using a jigsaw and the track is hardware cloth.

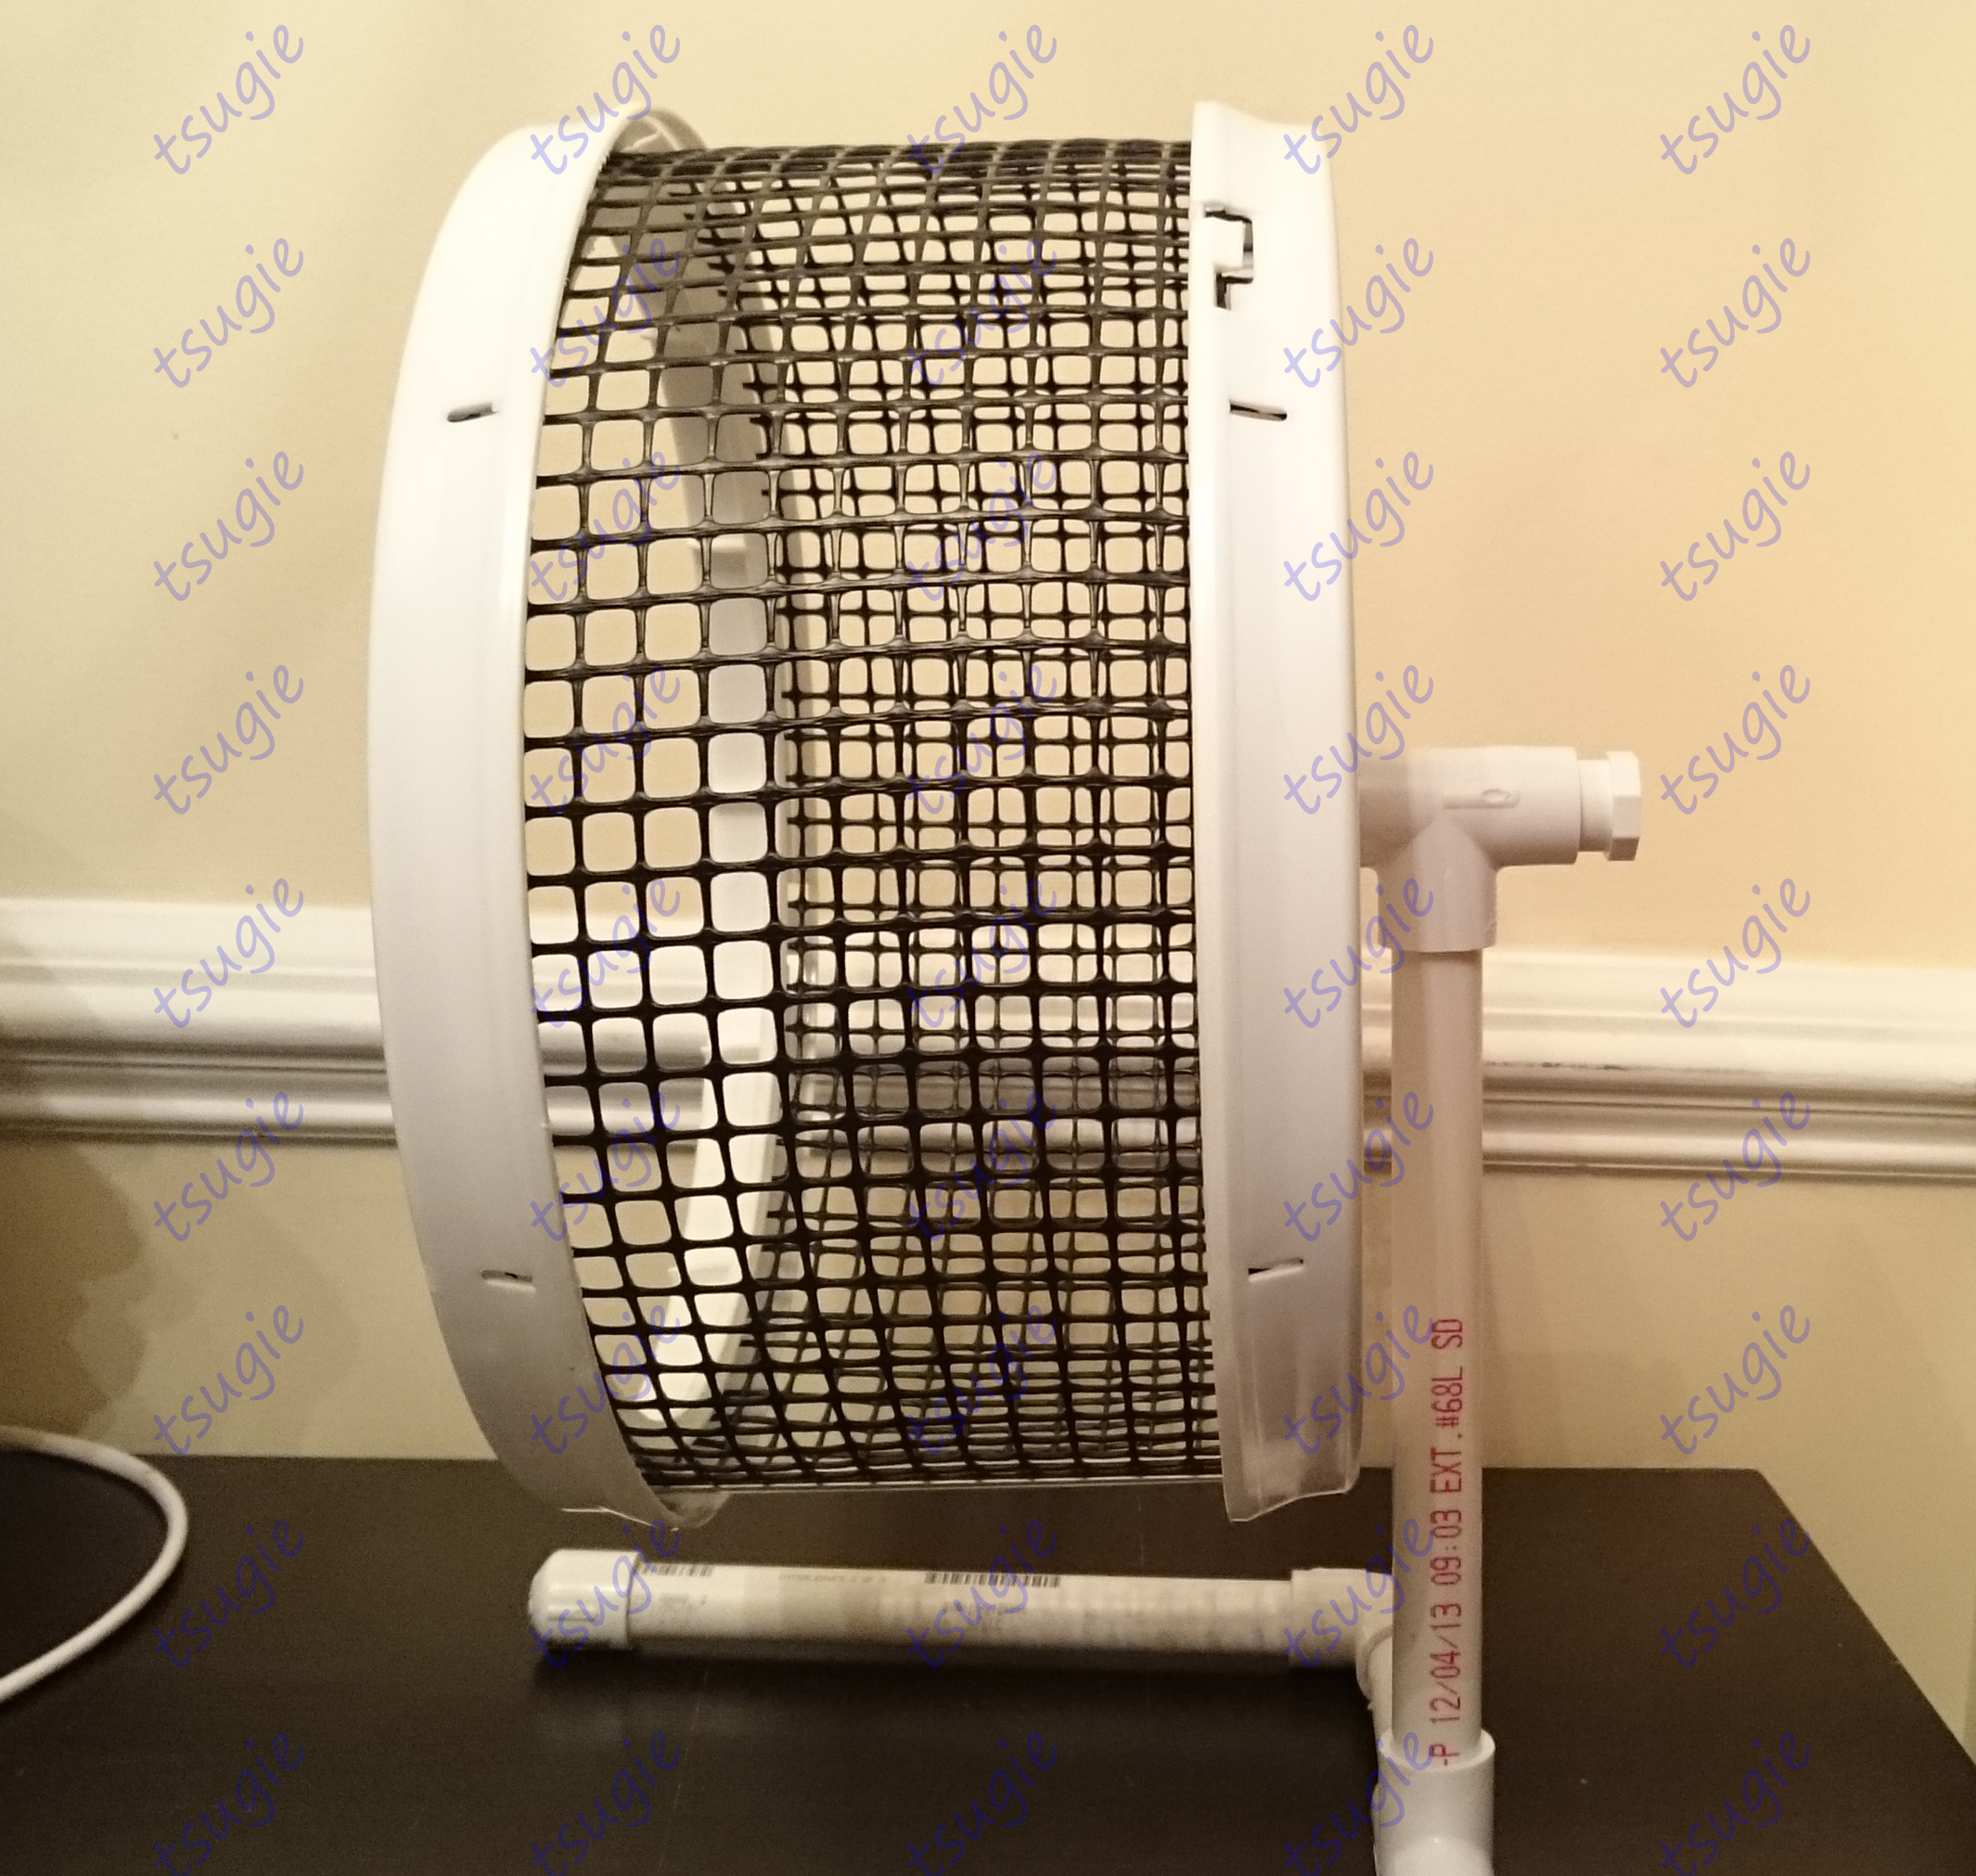
This wheel has the acrylic sheet on the back, instead of the two ceiling covers. The plug was cut and the track is plastic gutter guard.
I hope this tutorial has been helpful!
Remember the video tutorial! It helps if you’re confused about some things. 🙂
Also, remember to NOT get the bearings wet. I know it can be hard without removing the bearing system, but try your best not to get them wet when cleaning the wheel.
Final comments:
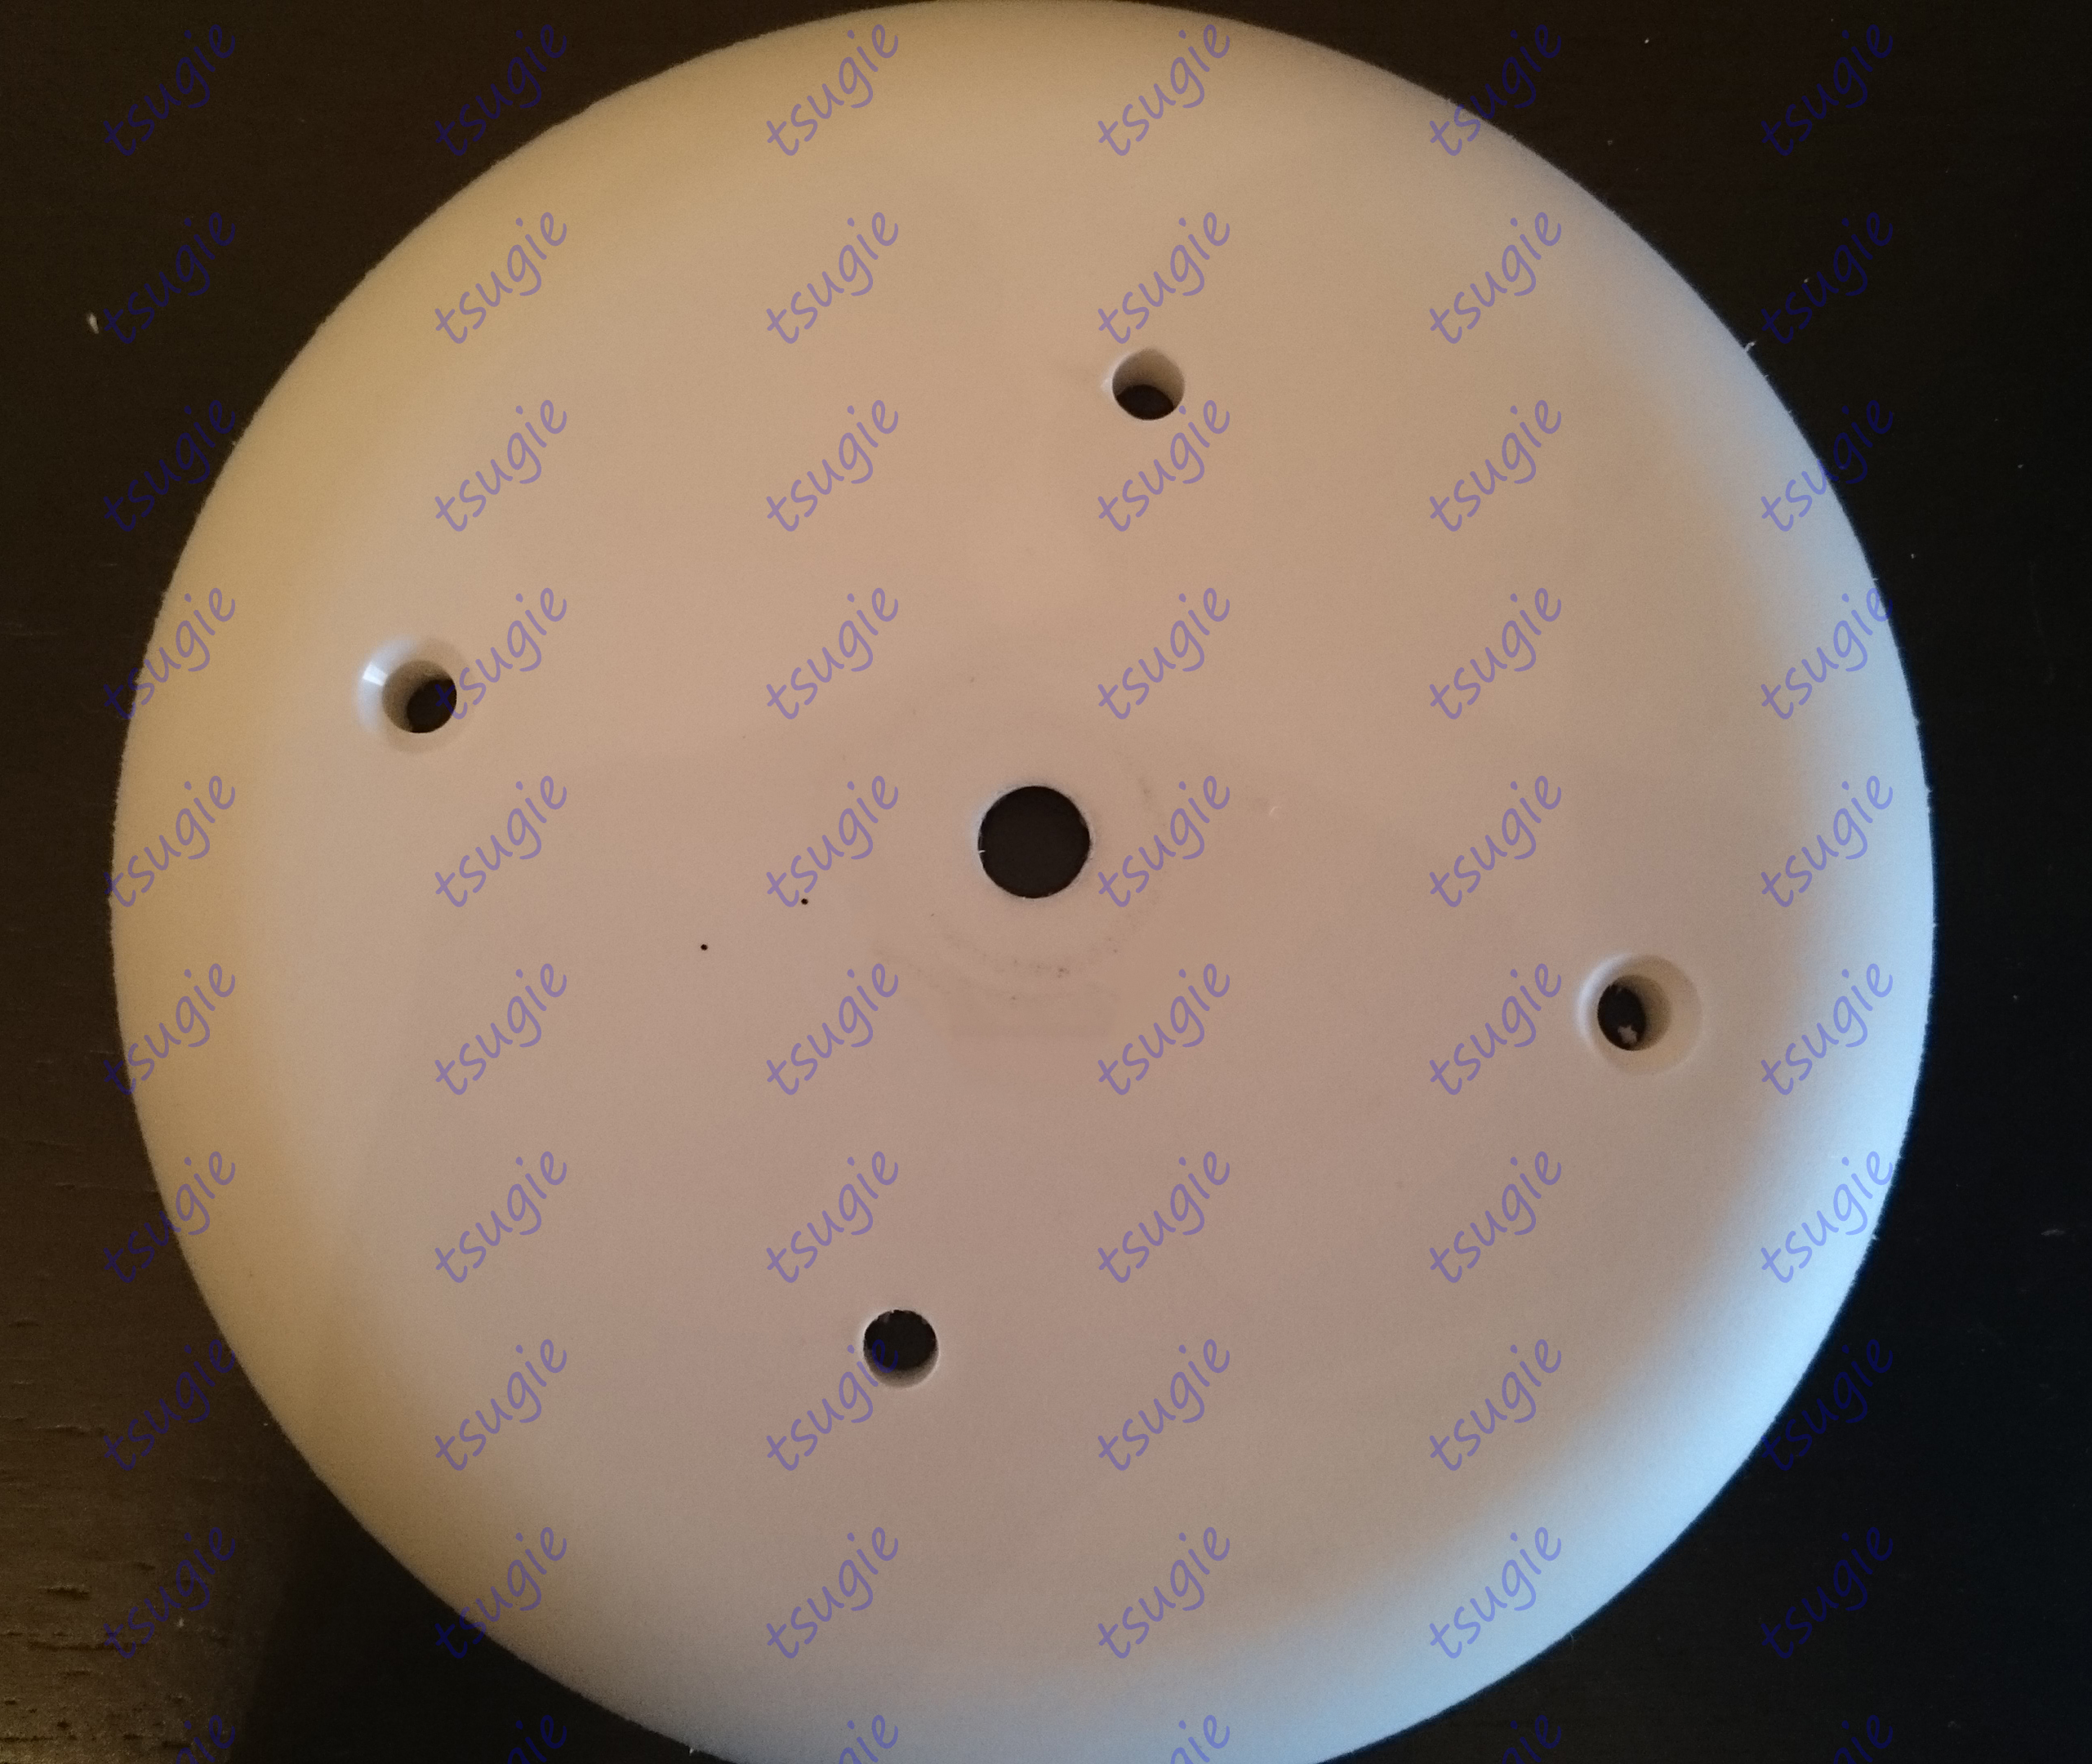
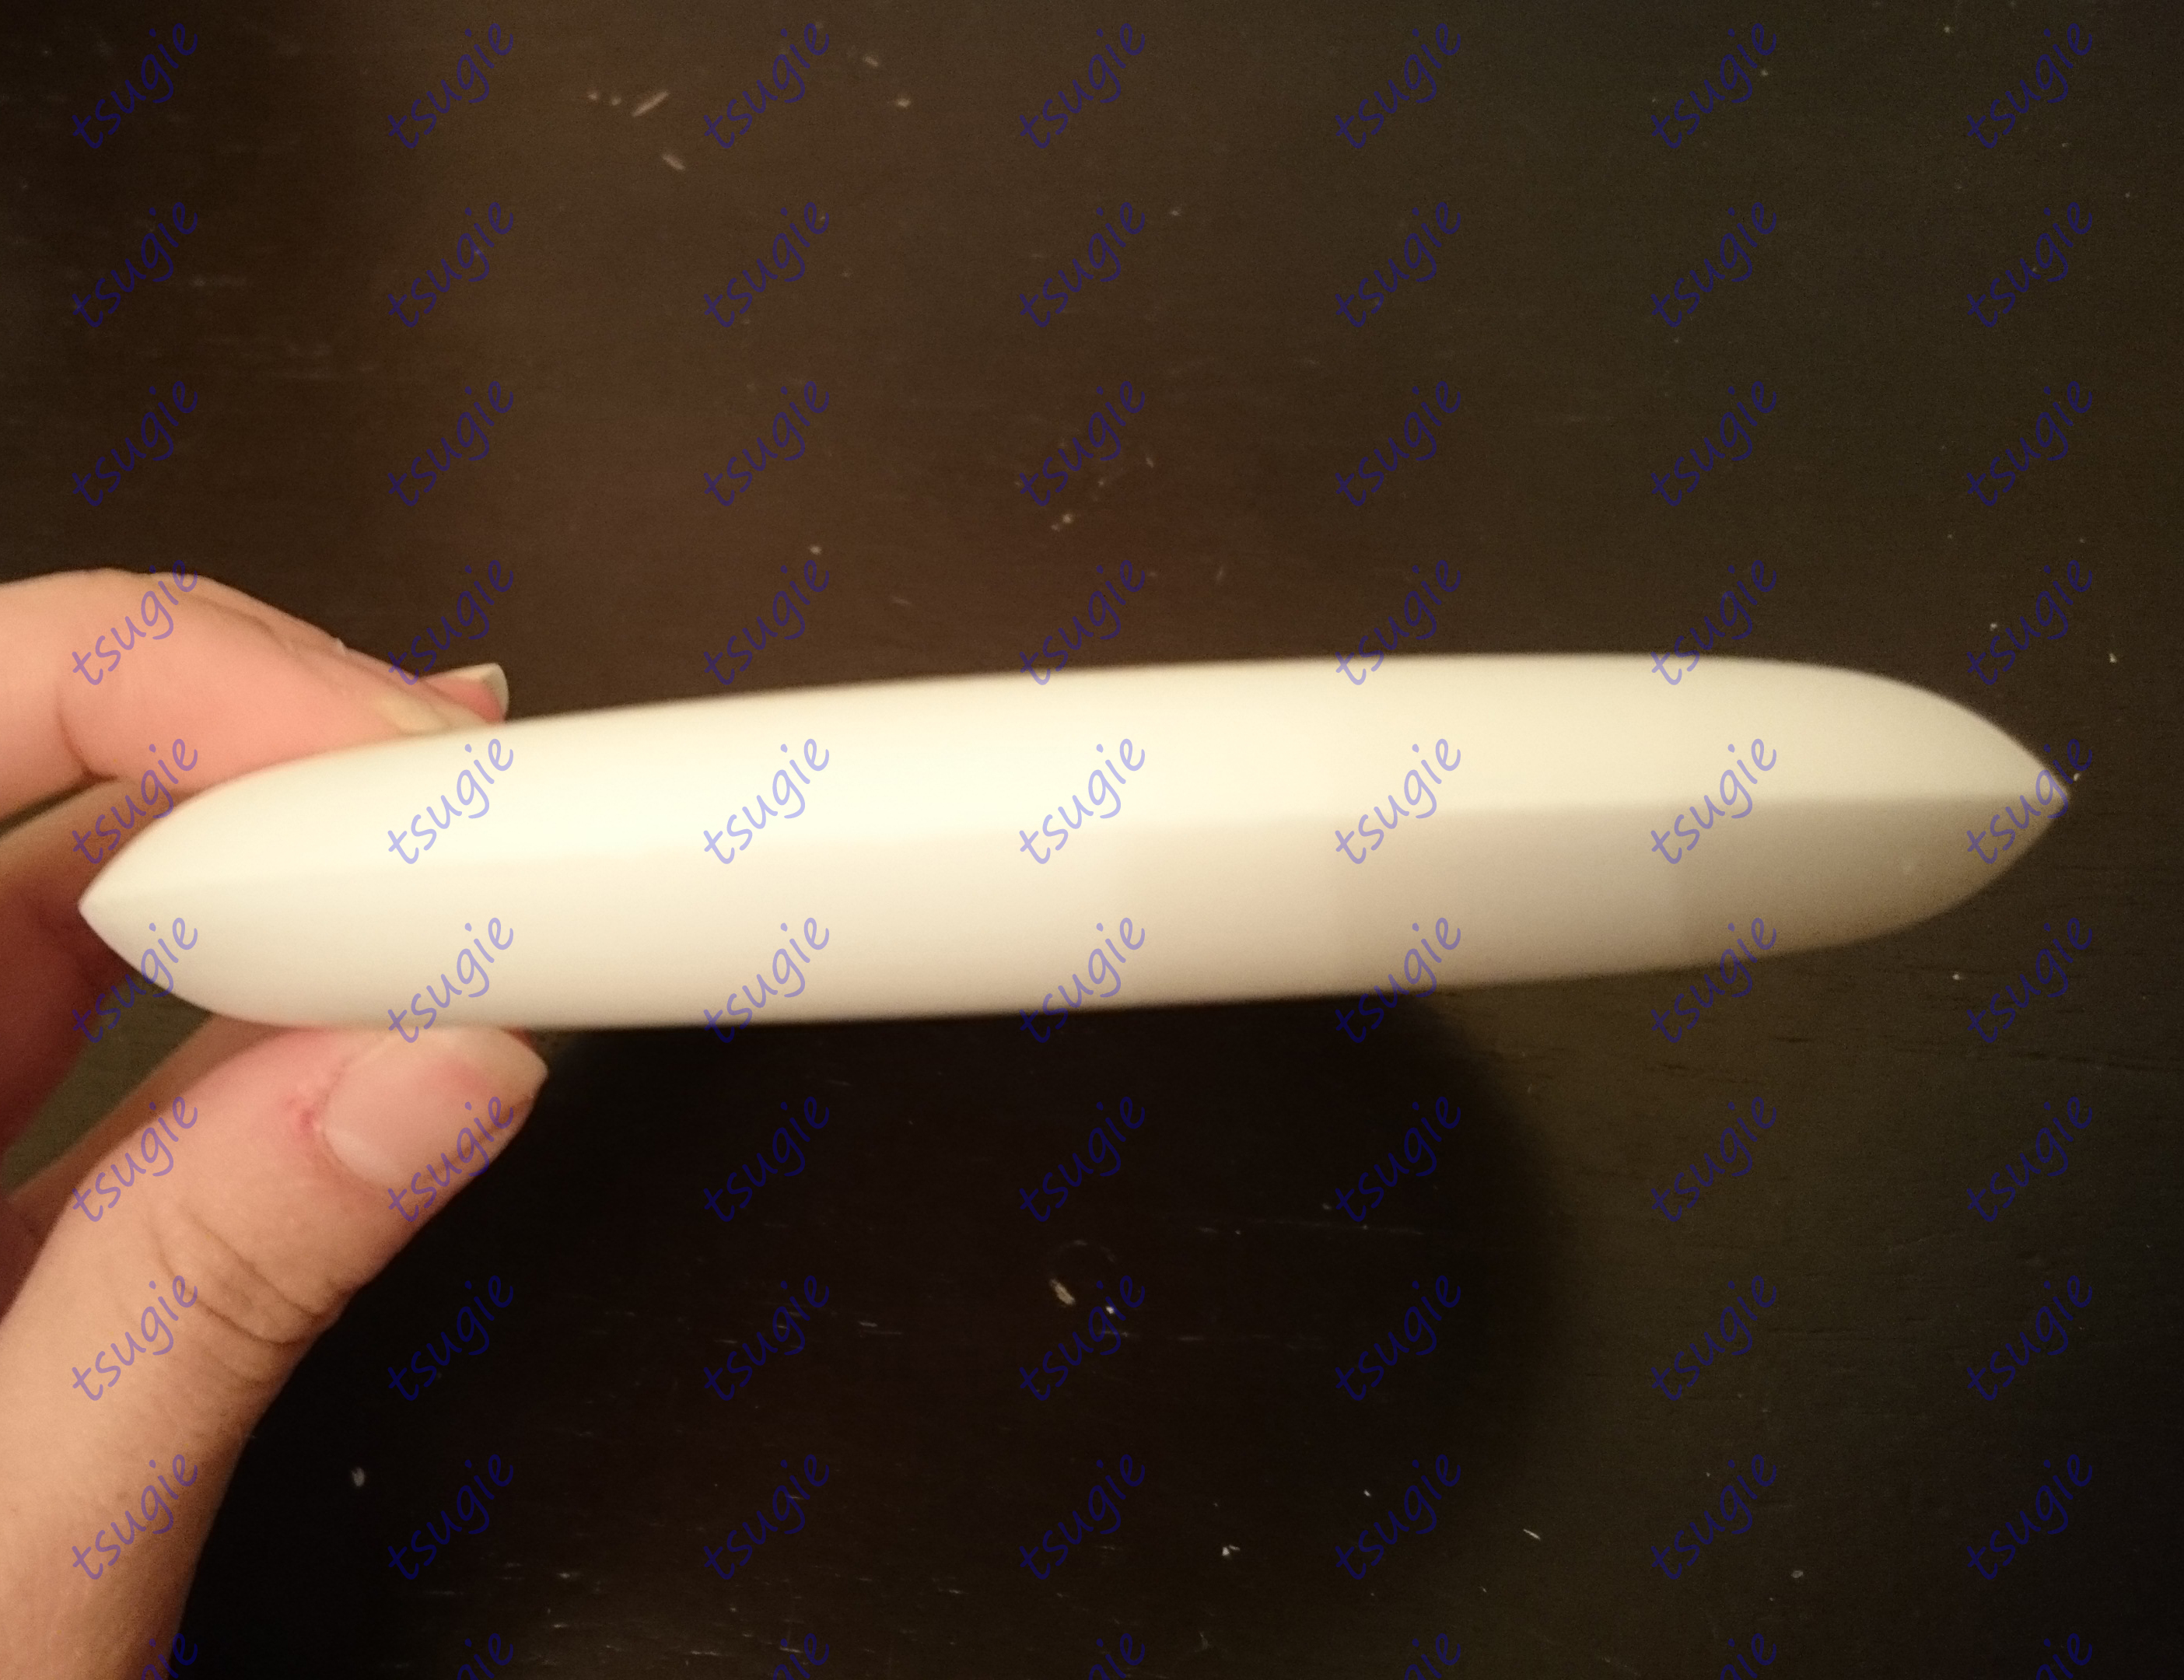
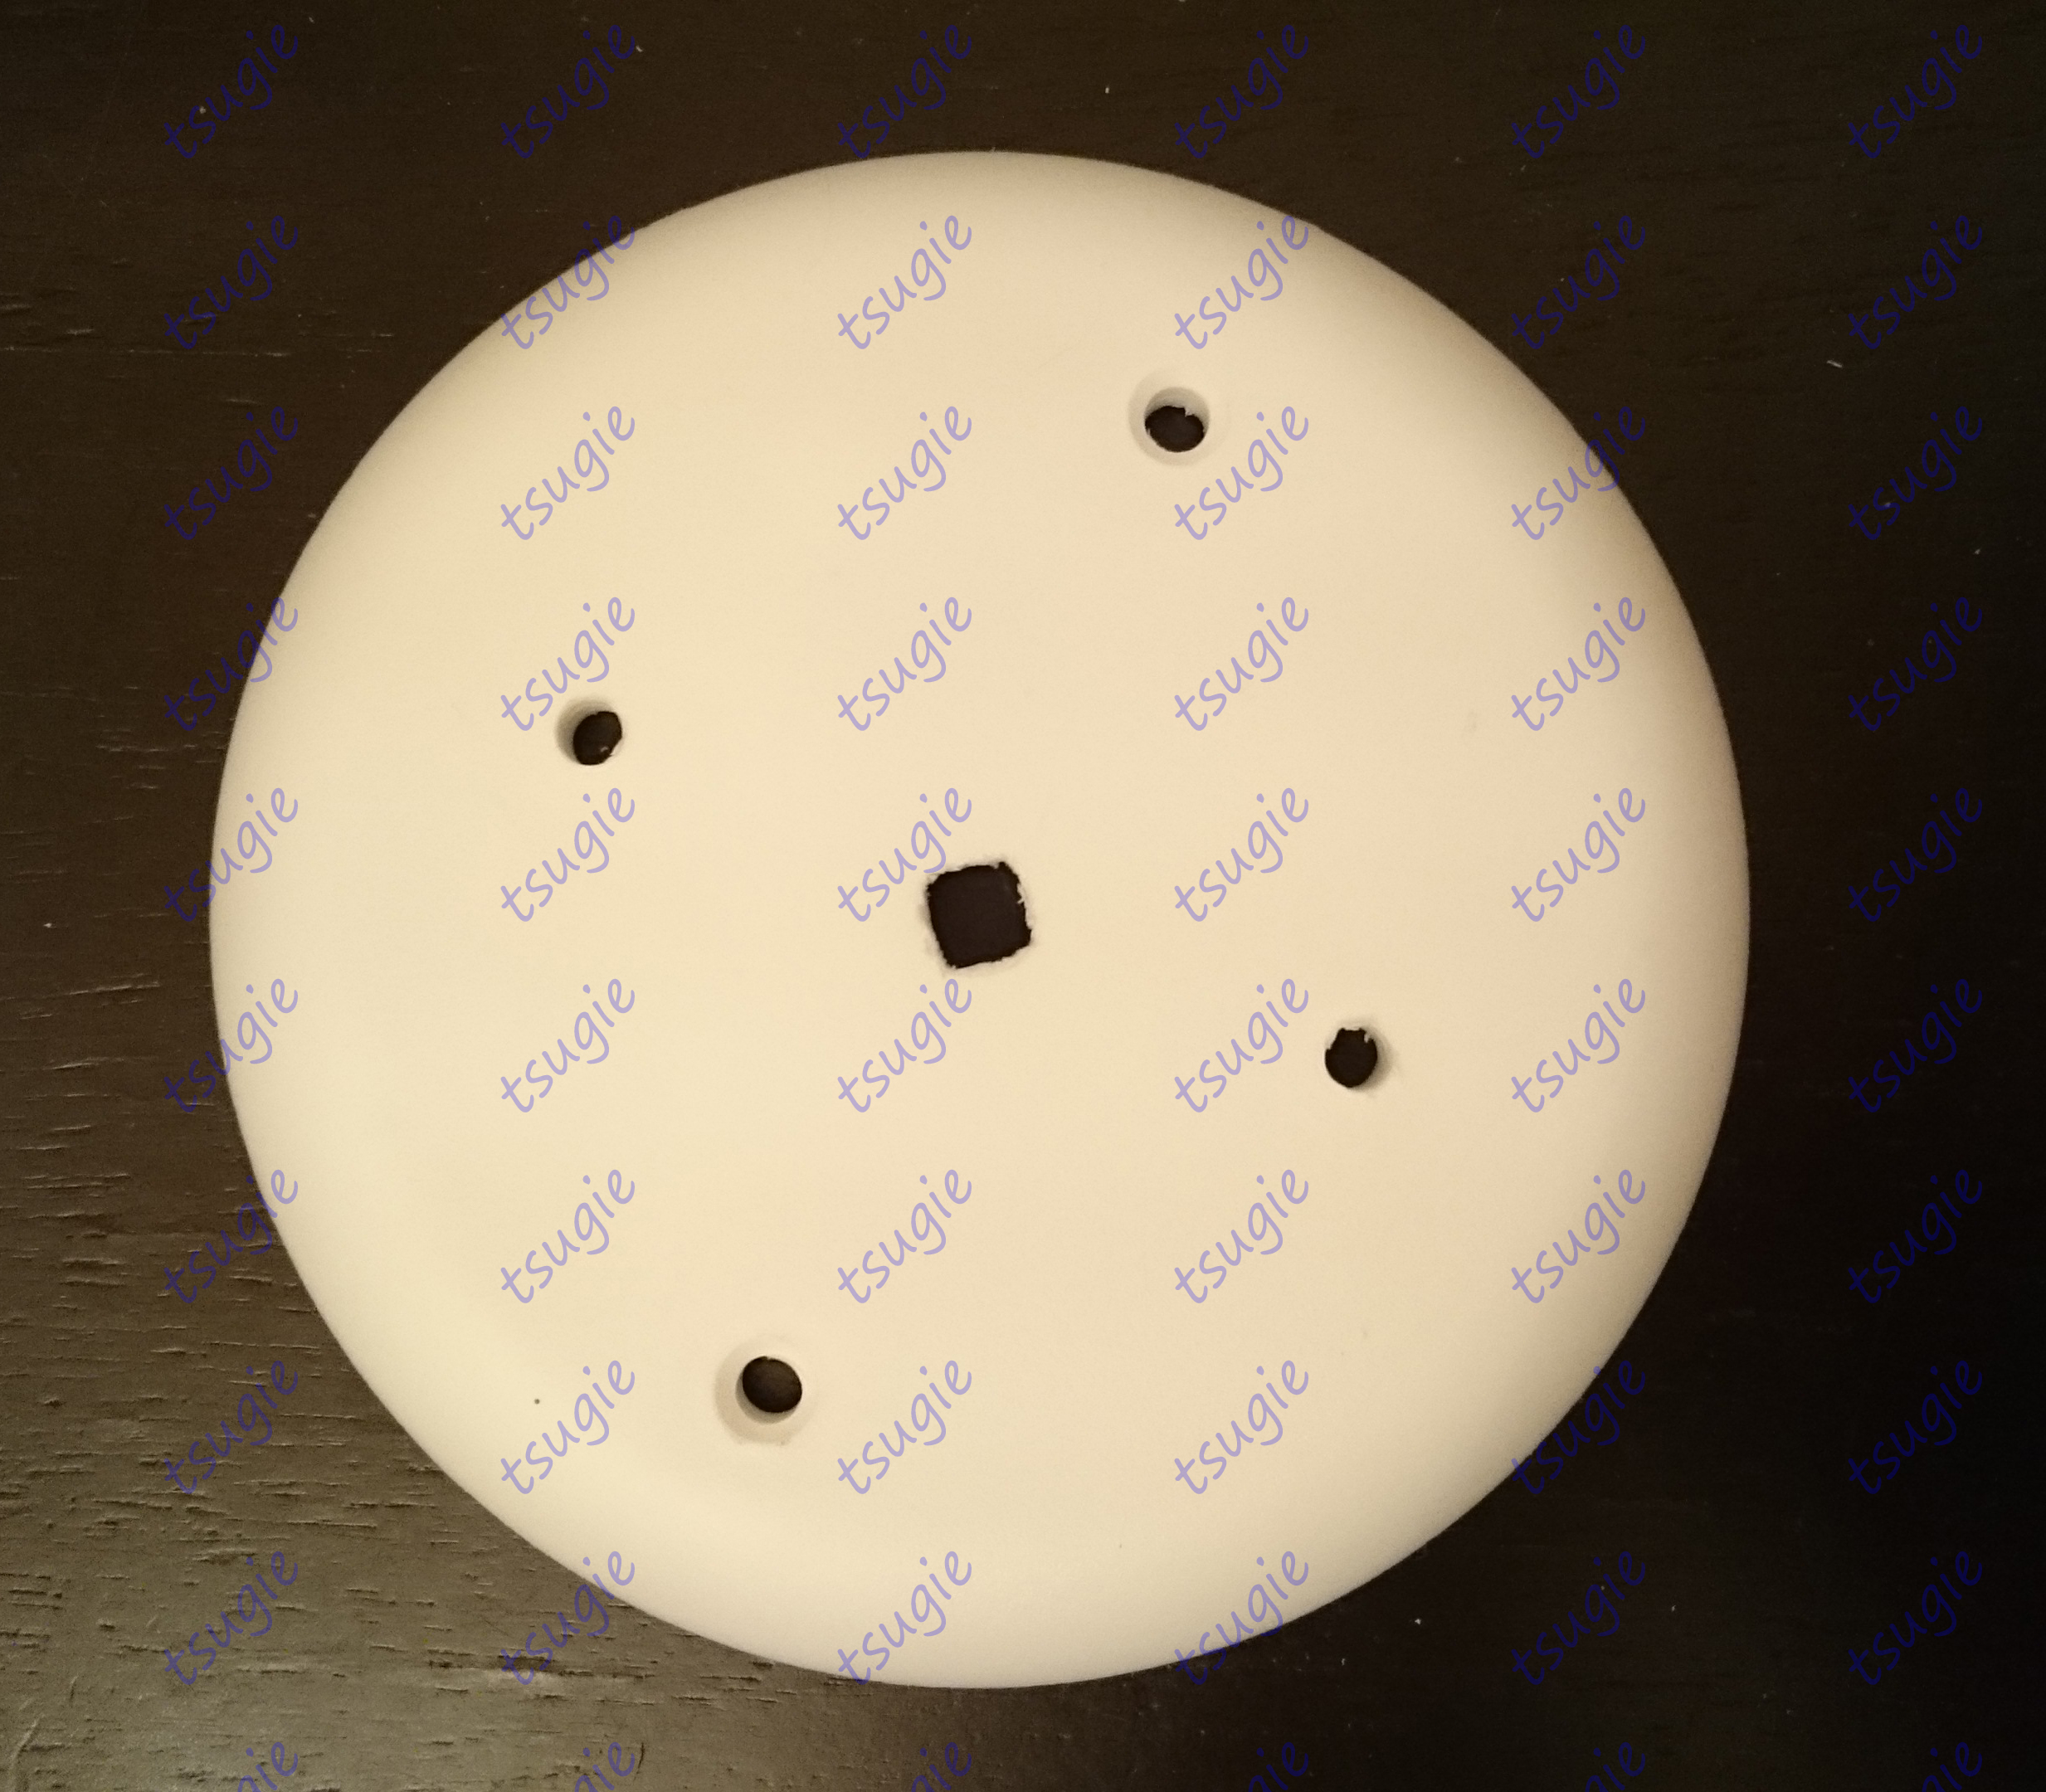
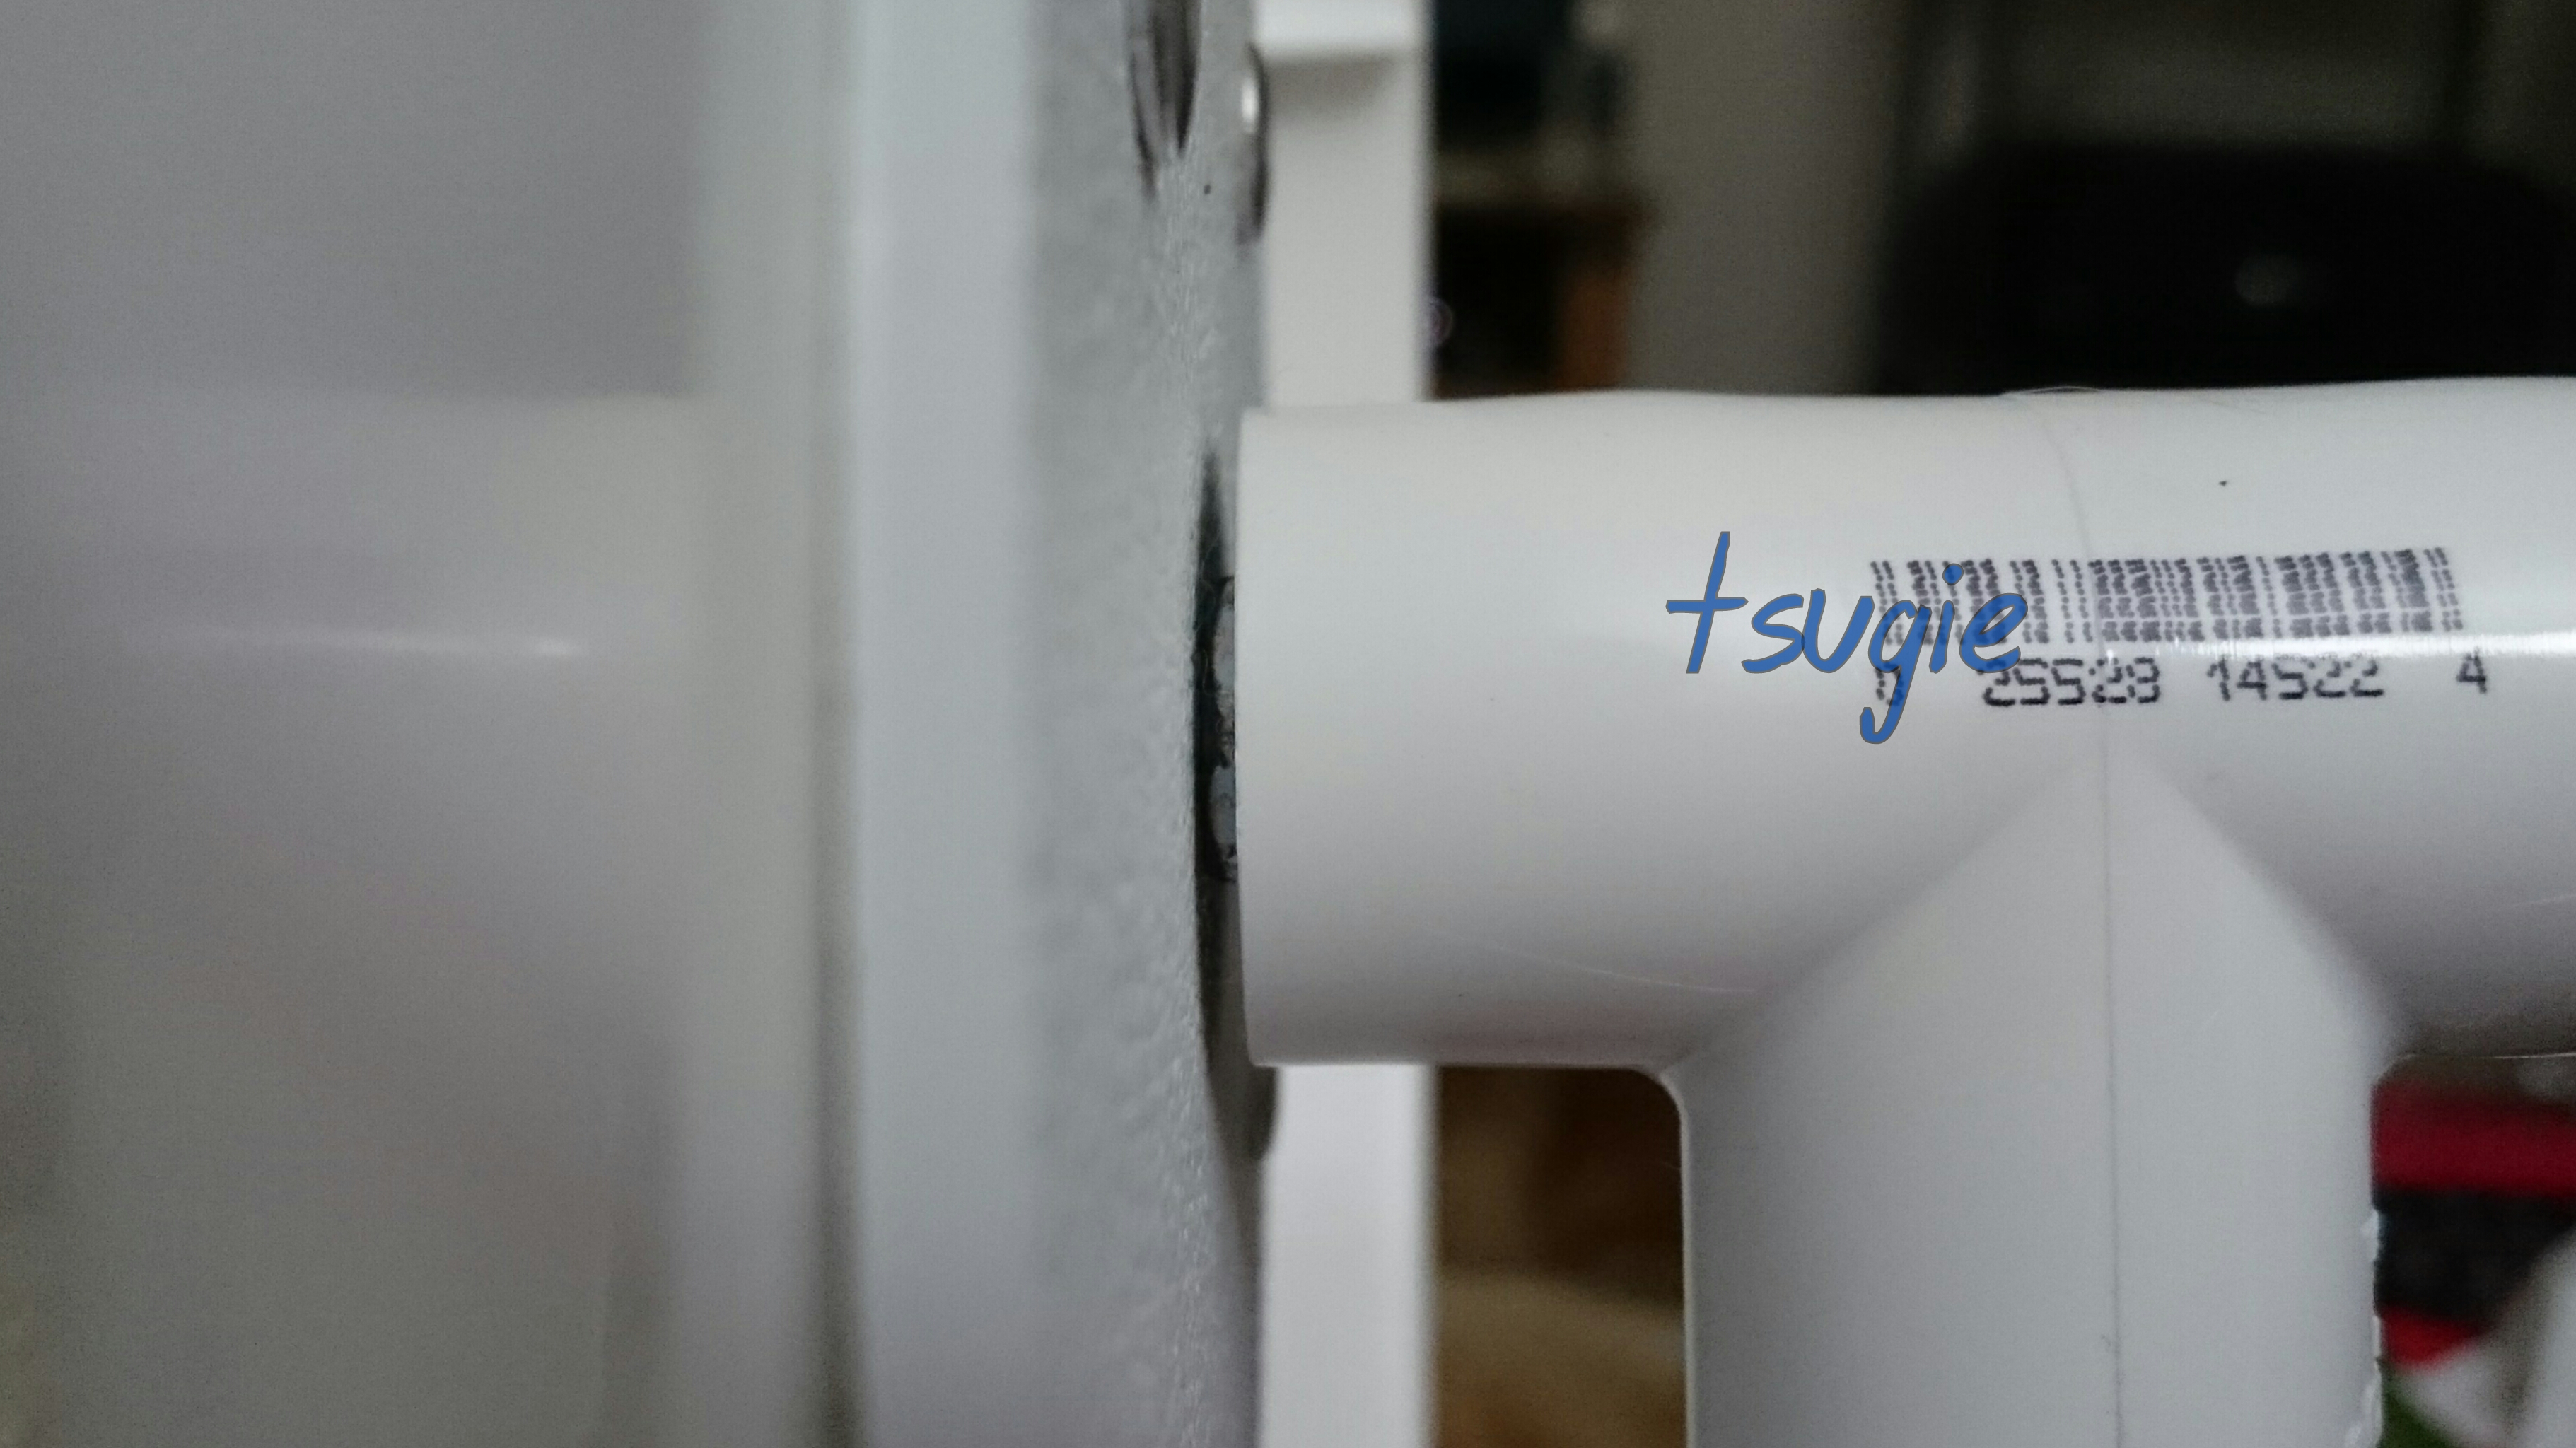
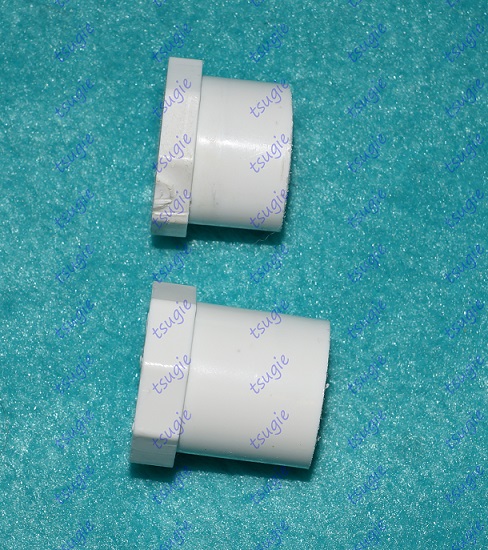
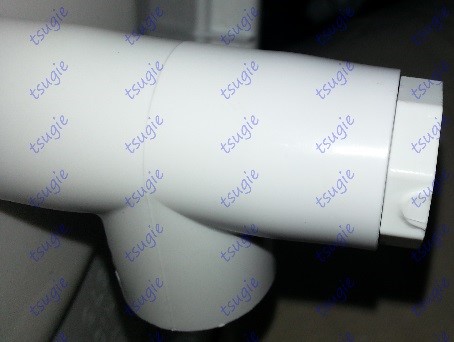
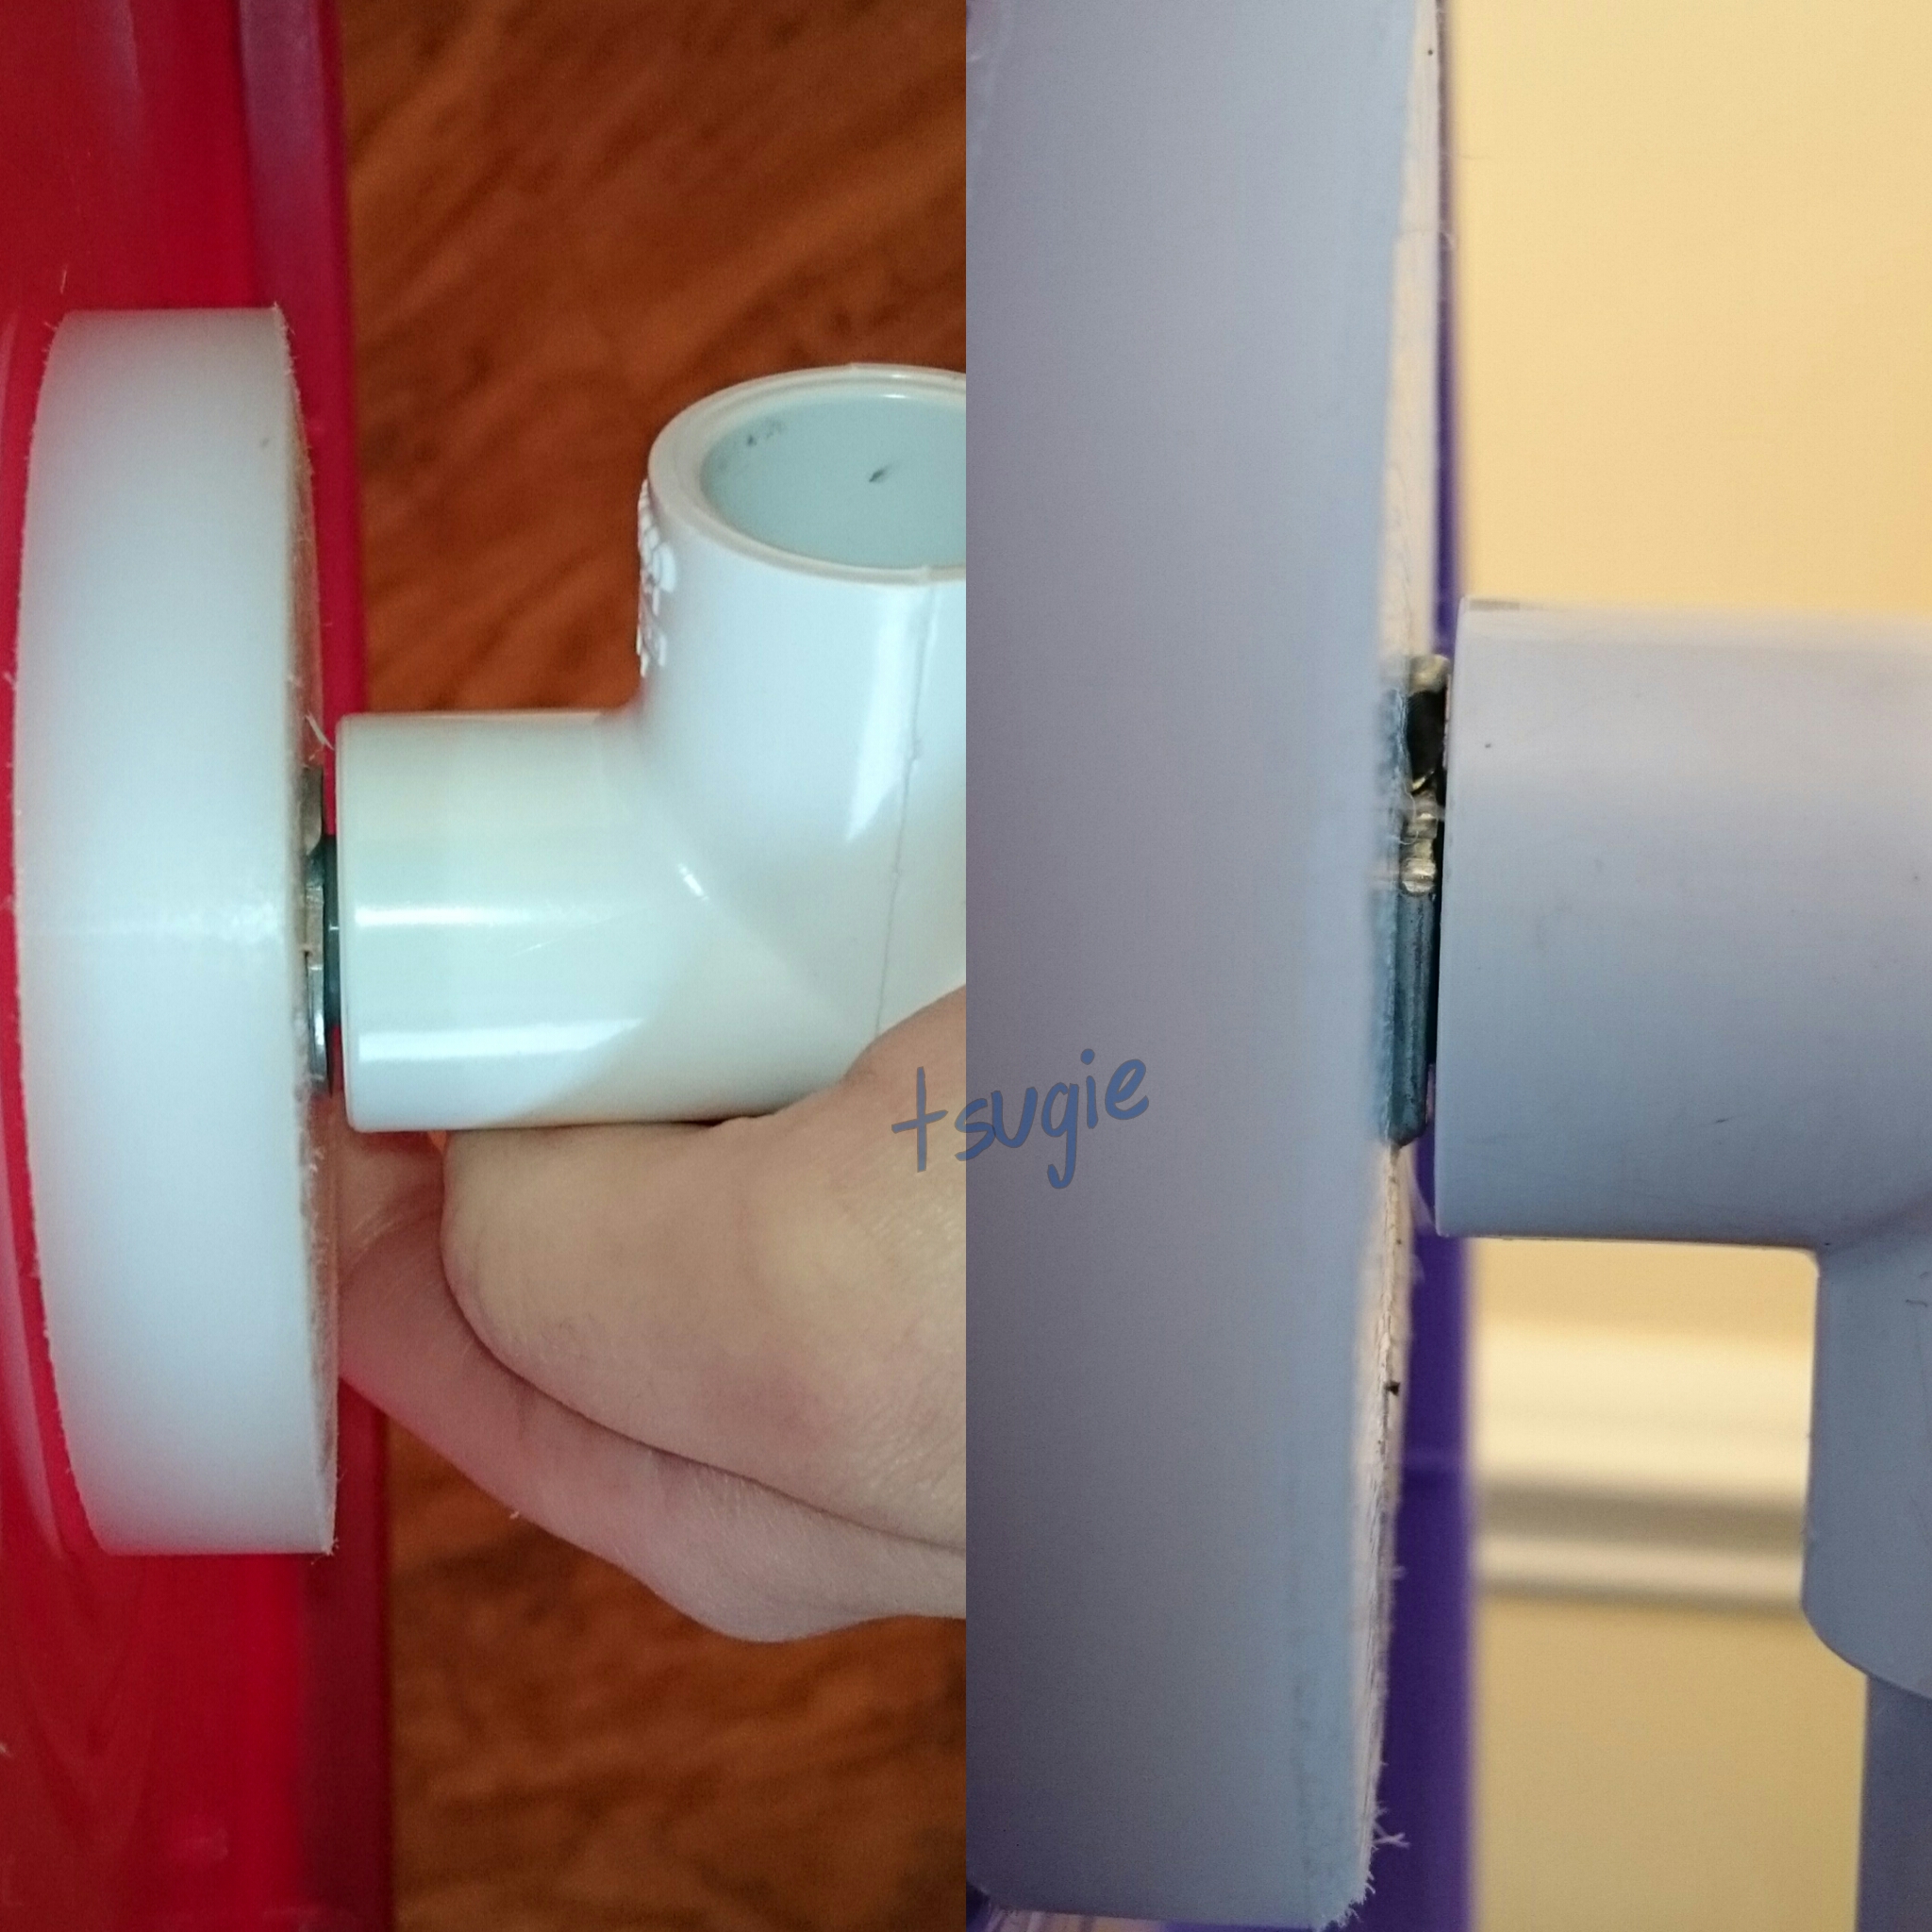
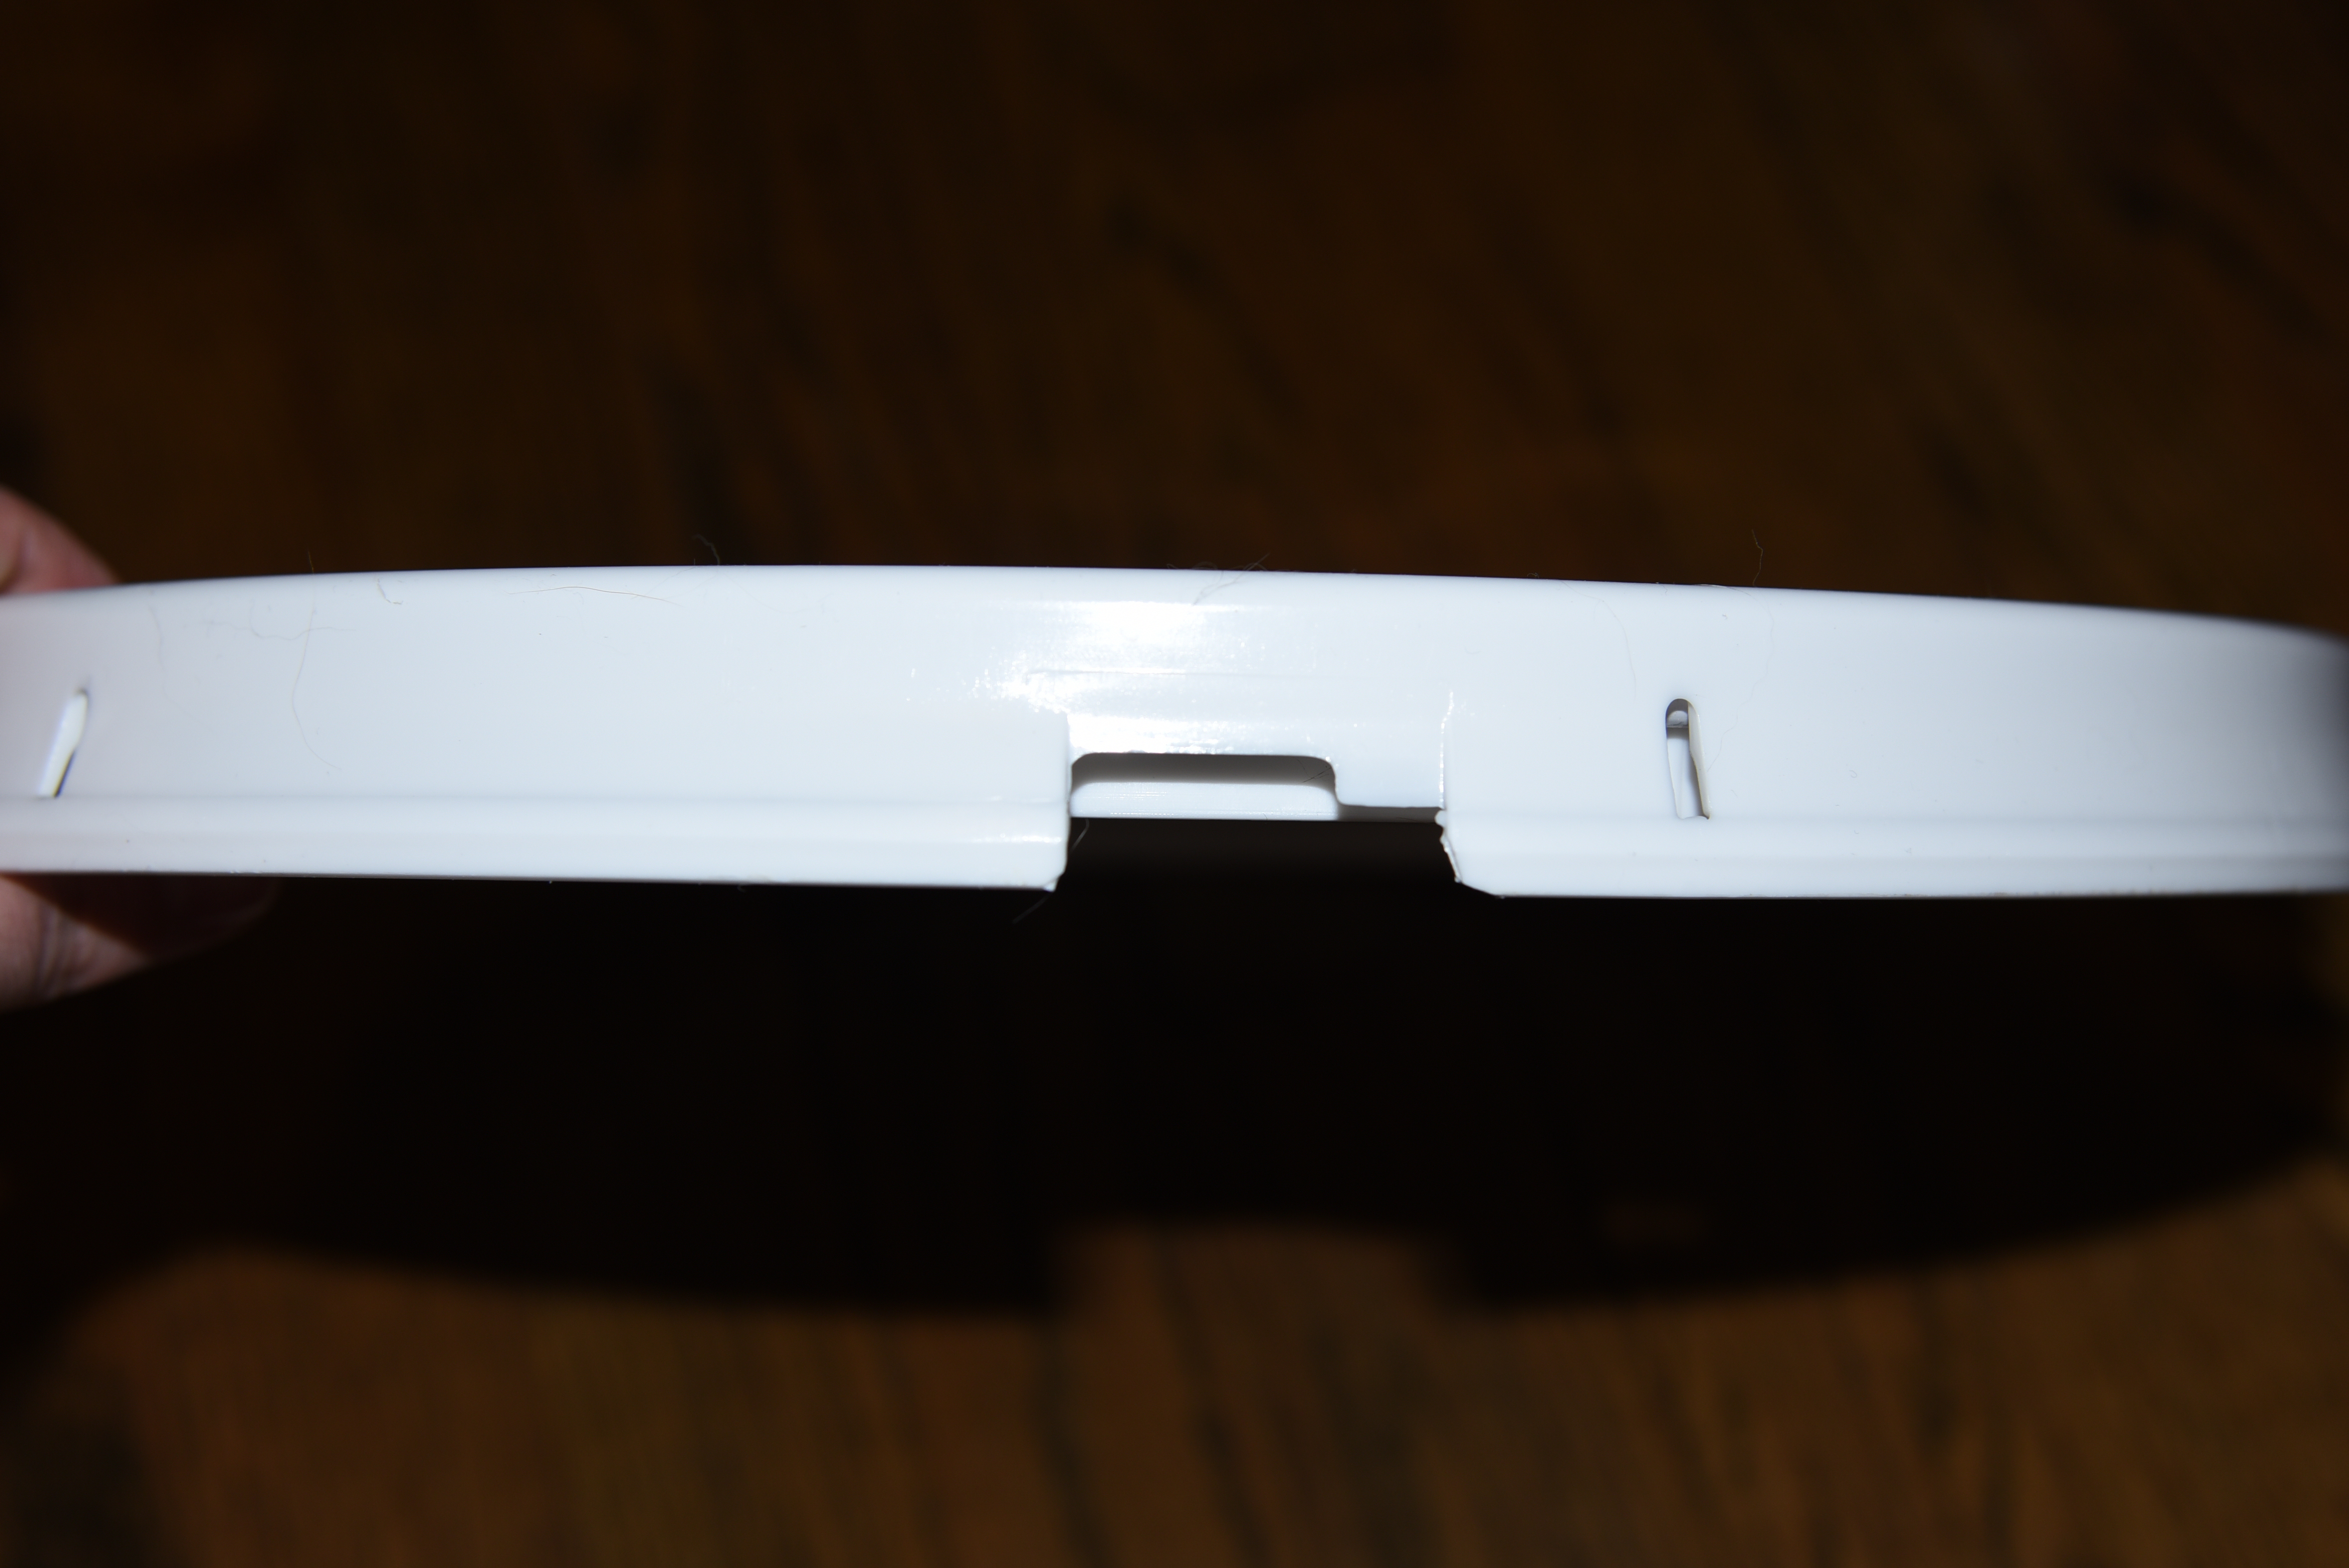
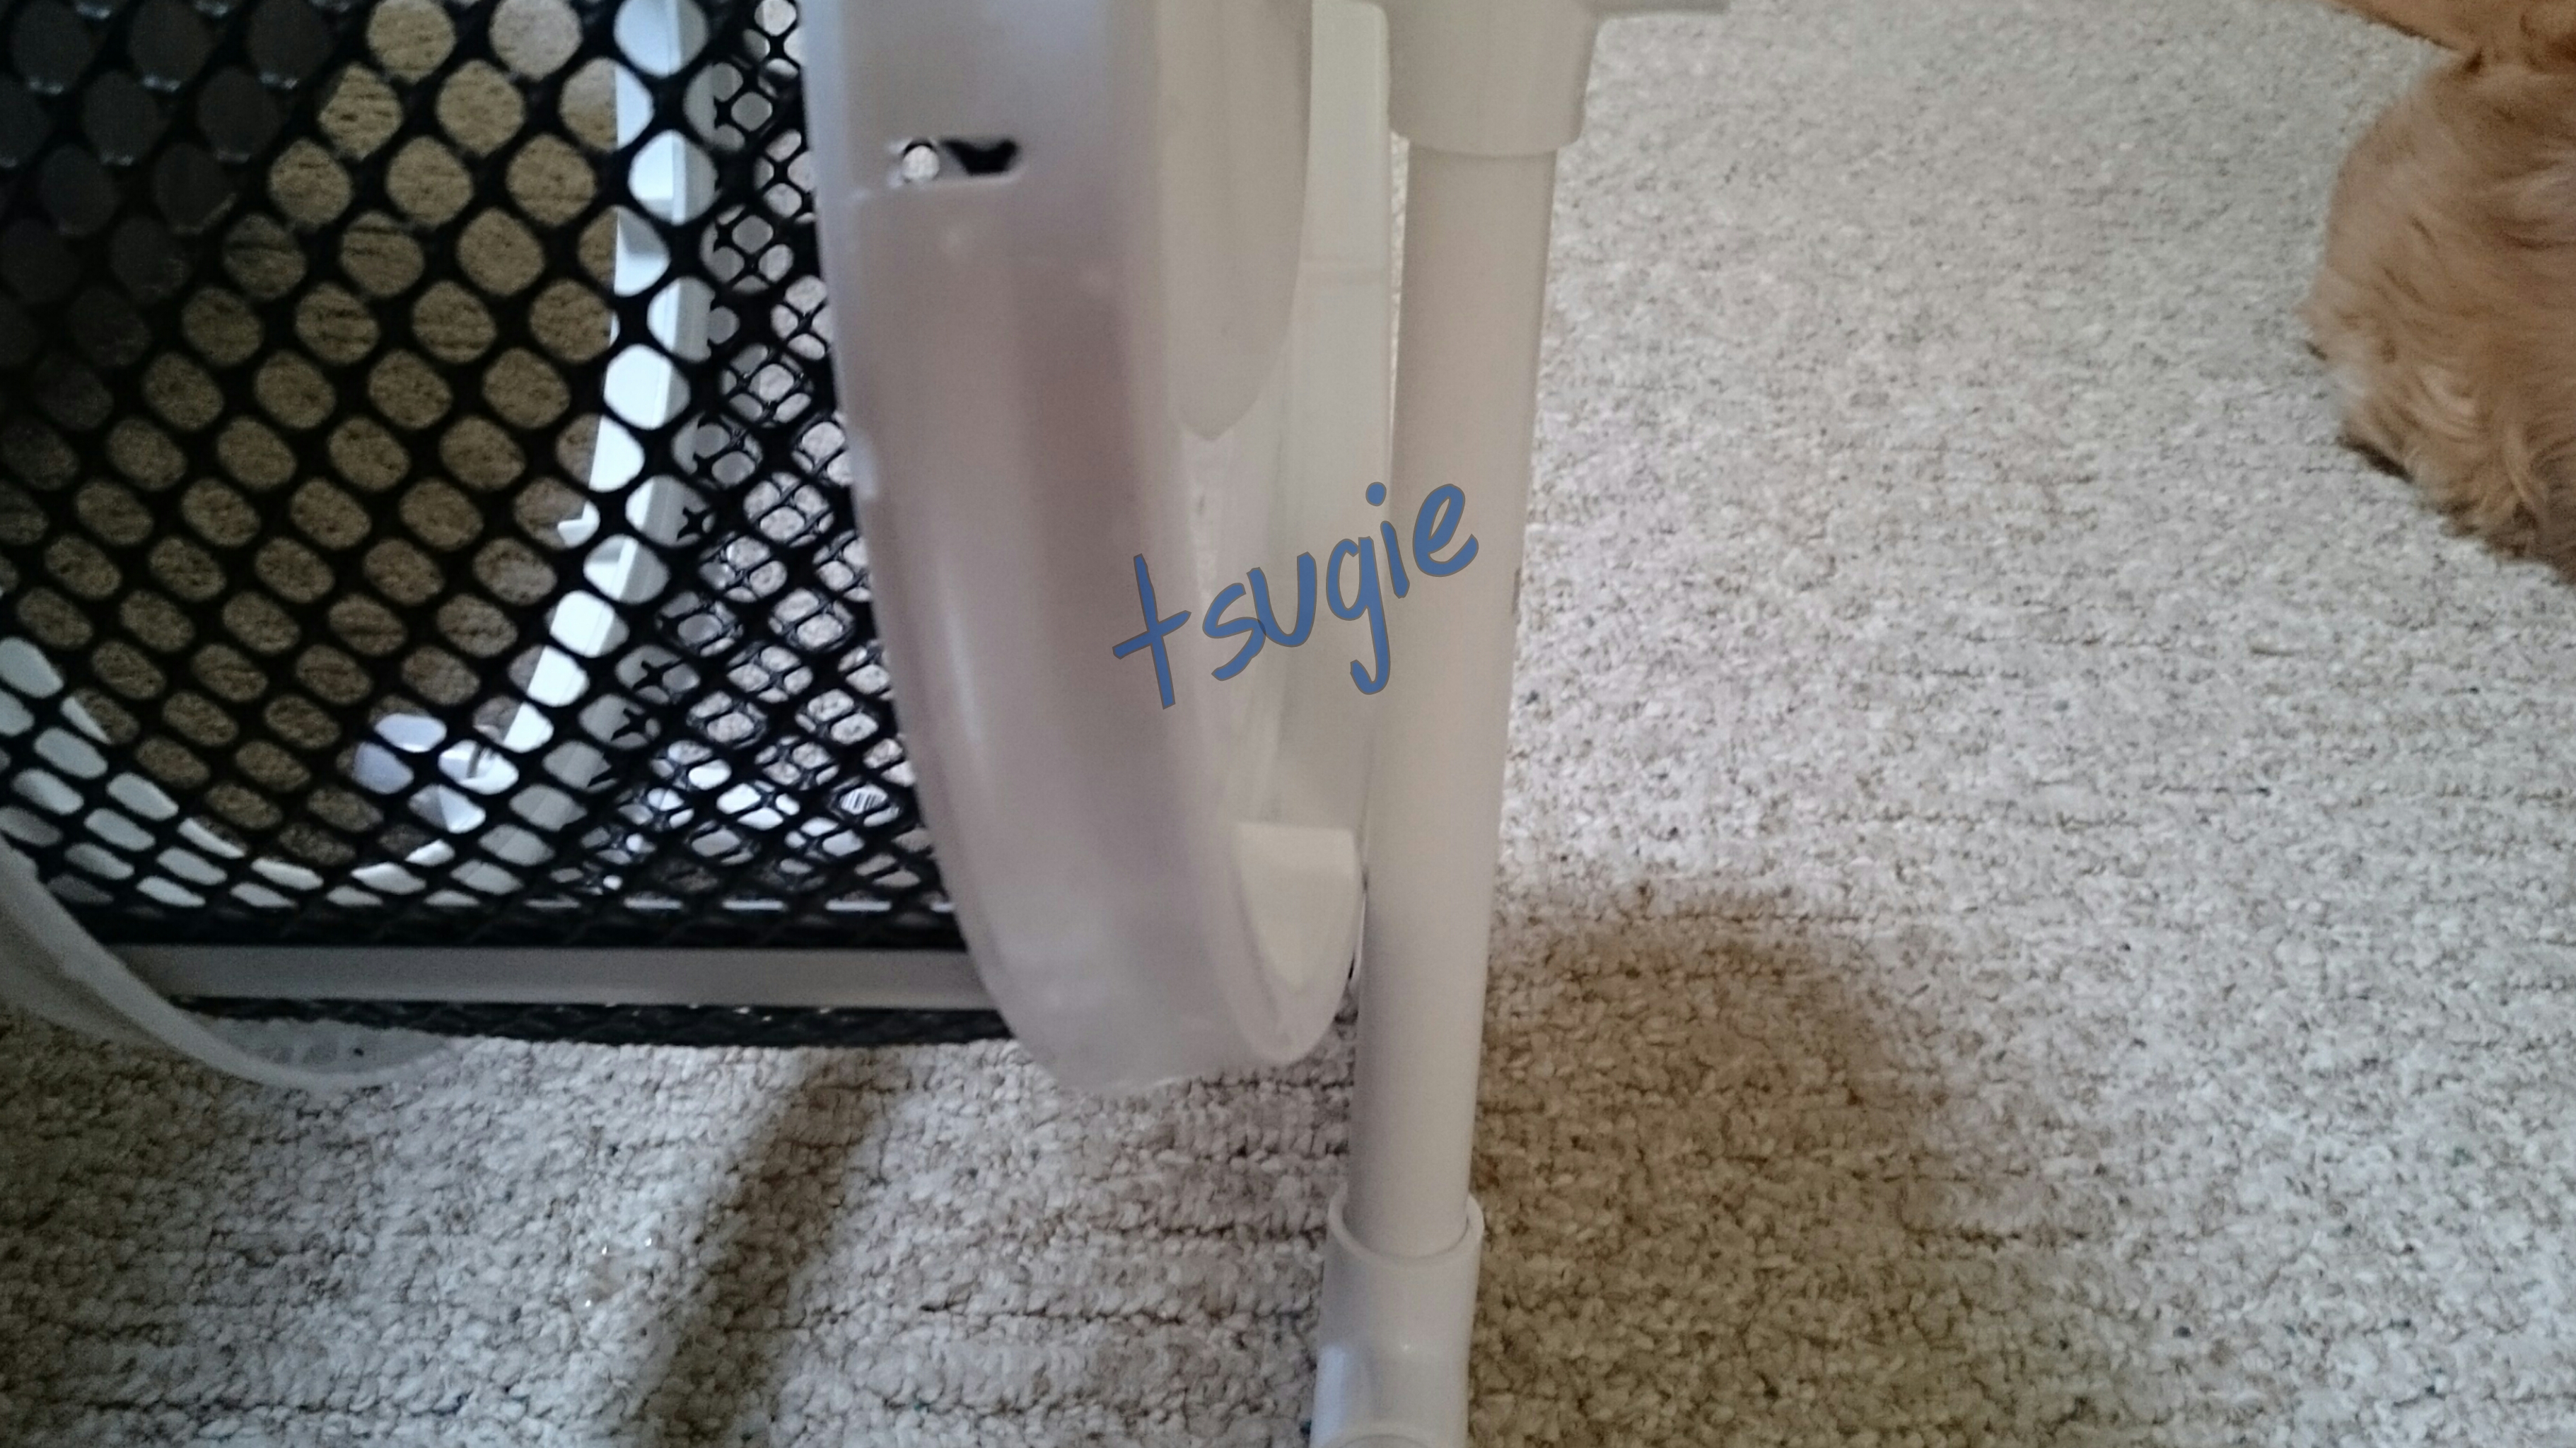
– Here are photos of two different lids comparing the grooves where the gaskets/tubing hold the track.
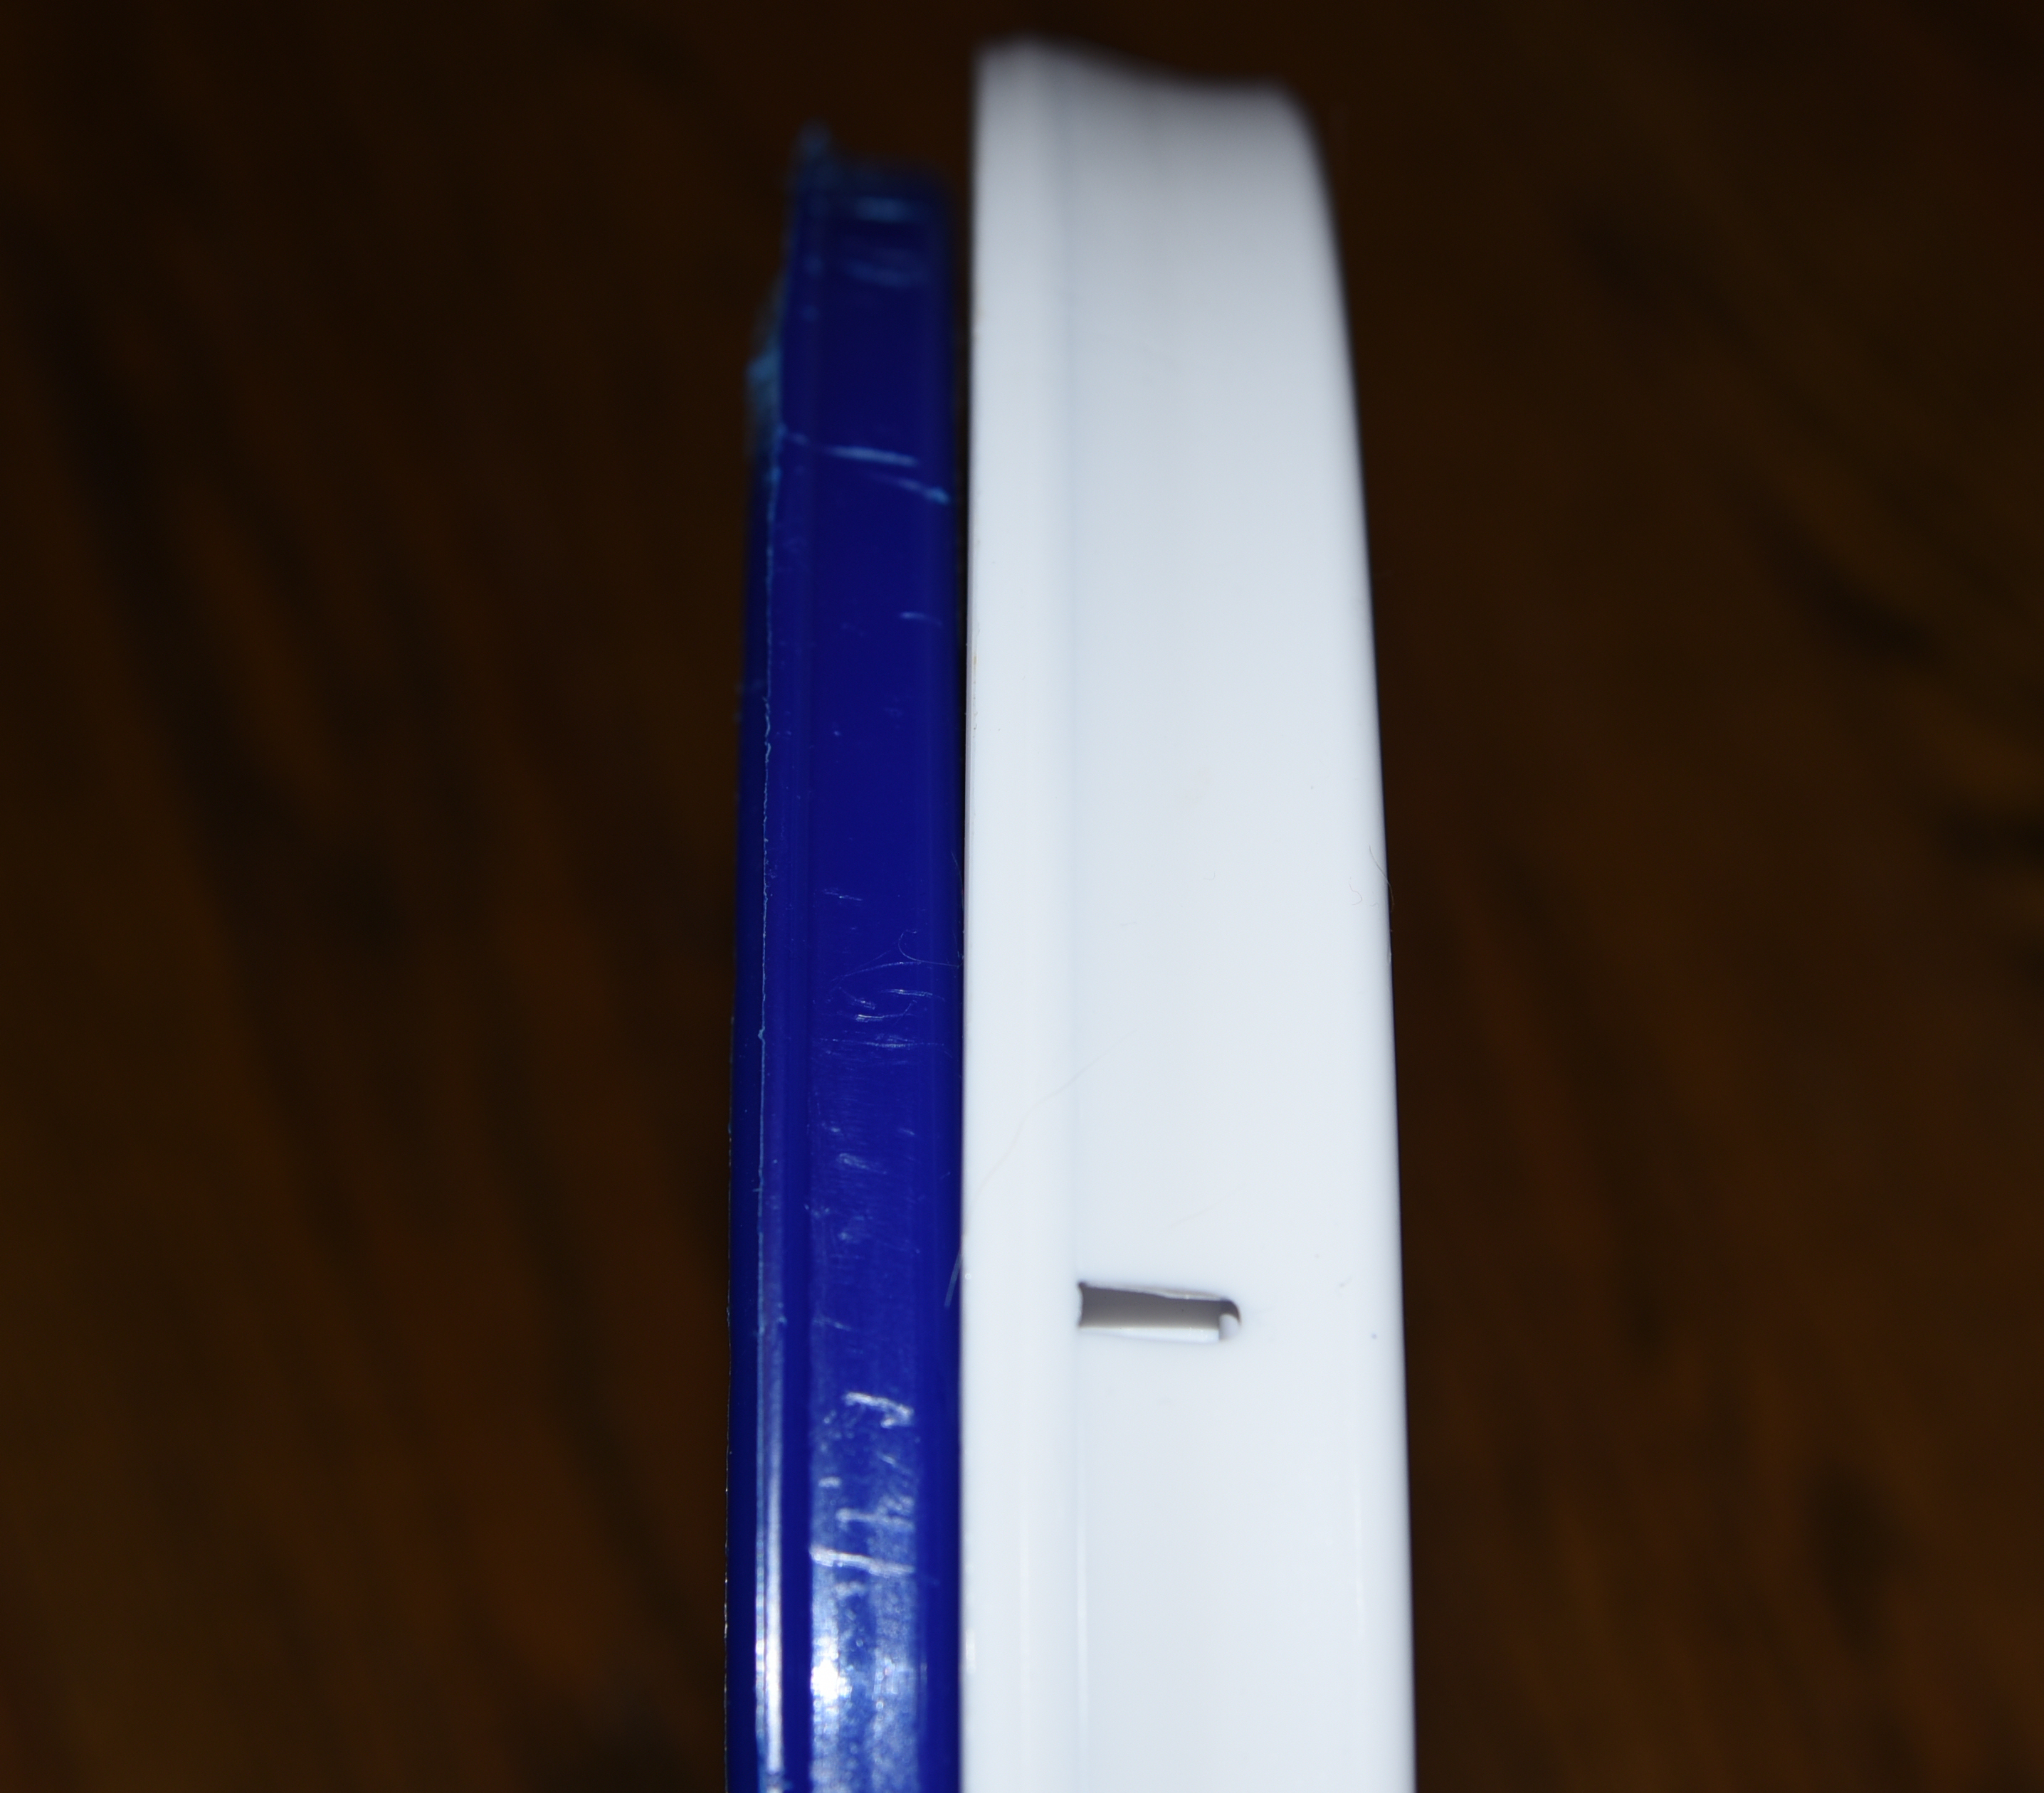

It’s hard getting good photos but if you look at images 2-4 you should be able to see the clear difference between both lids when it comes to the space where the gasket and mesh go. The white lid has a “lip” that the blue lid doesn’t. That “lip” helps hold the mesh and gasket/tubing in place.
Just by putting the gaskets and tubing by themselves, I could tell that the white lid has a much better hold.
In short, lids like the blue one are not safe and should not be used for wheels.
– I used to do a version with a single ceiling cover on the back and there’s another tutorial recommending that. I do NOT recommend doing that anymore since the lid will probably crack around the bolt. It happened to the two wheels I left with just the ceiling cover on the back. I thought the first time was a one-time incident but I tried it out with another and it happened again. I recommend using two ceiling covers, one on the back and the other in front, or using the acrylic sheet (or similar material) on the back. And, although not necessary, I also recommend using the polyethylene tubing, instead of the gaskets, because they provide a stronger hold and will undoubtedly outlast the gaskets.
– It’s possible the binding posts aren’t necessary when using the ceiling covers. But I prefer to go the safe way and recommend them.
-The centimeter measurements are given so people outside USA have an idea of the size. Look for the closest materials to those measurements.
-I don’t recommend using a lid without a space for gaskets and using zip-ties to hold the wheel together. Zip ties can be chewed, and I’ve seen people posting about their gliders biting the zip ties on wheels they’ve made, so you would have to be constantly checking the wheel to make sure it won’t fall apart. Also, if the mesh has to be replaced, it will be more difficult and it would take longer since you would have to cut all those zip-ties and tie them again.
–I have actually added this to the tutorial itself. The wearing away creates a dust that could damage the bearings. This design is basically the same as the Fast Track/Spinzone Global design. If you want to make it more like theirs, they put nylon spacers around the part of the bolt that is between the back lid and bearing. Though I can’t be 100% sure, I believe they use them to prevent the PVC tee from touching the disk they use on the back (the equivalent of the backings suggested in this tutorial) and wearing away at the disk and, probably, to keep the bearing on that side in place (since they sand down the PVC and slide the bearings in). They leave a very small space between the back piece and PVC tee.
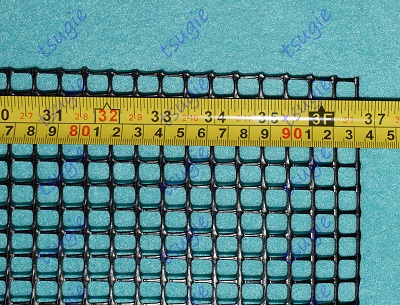
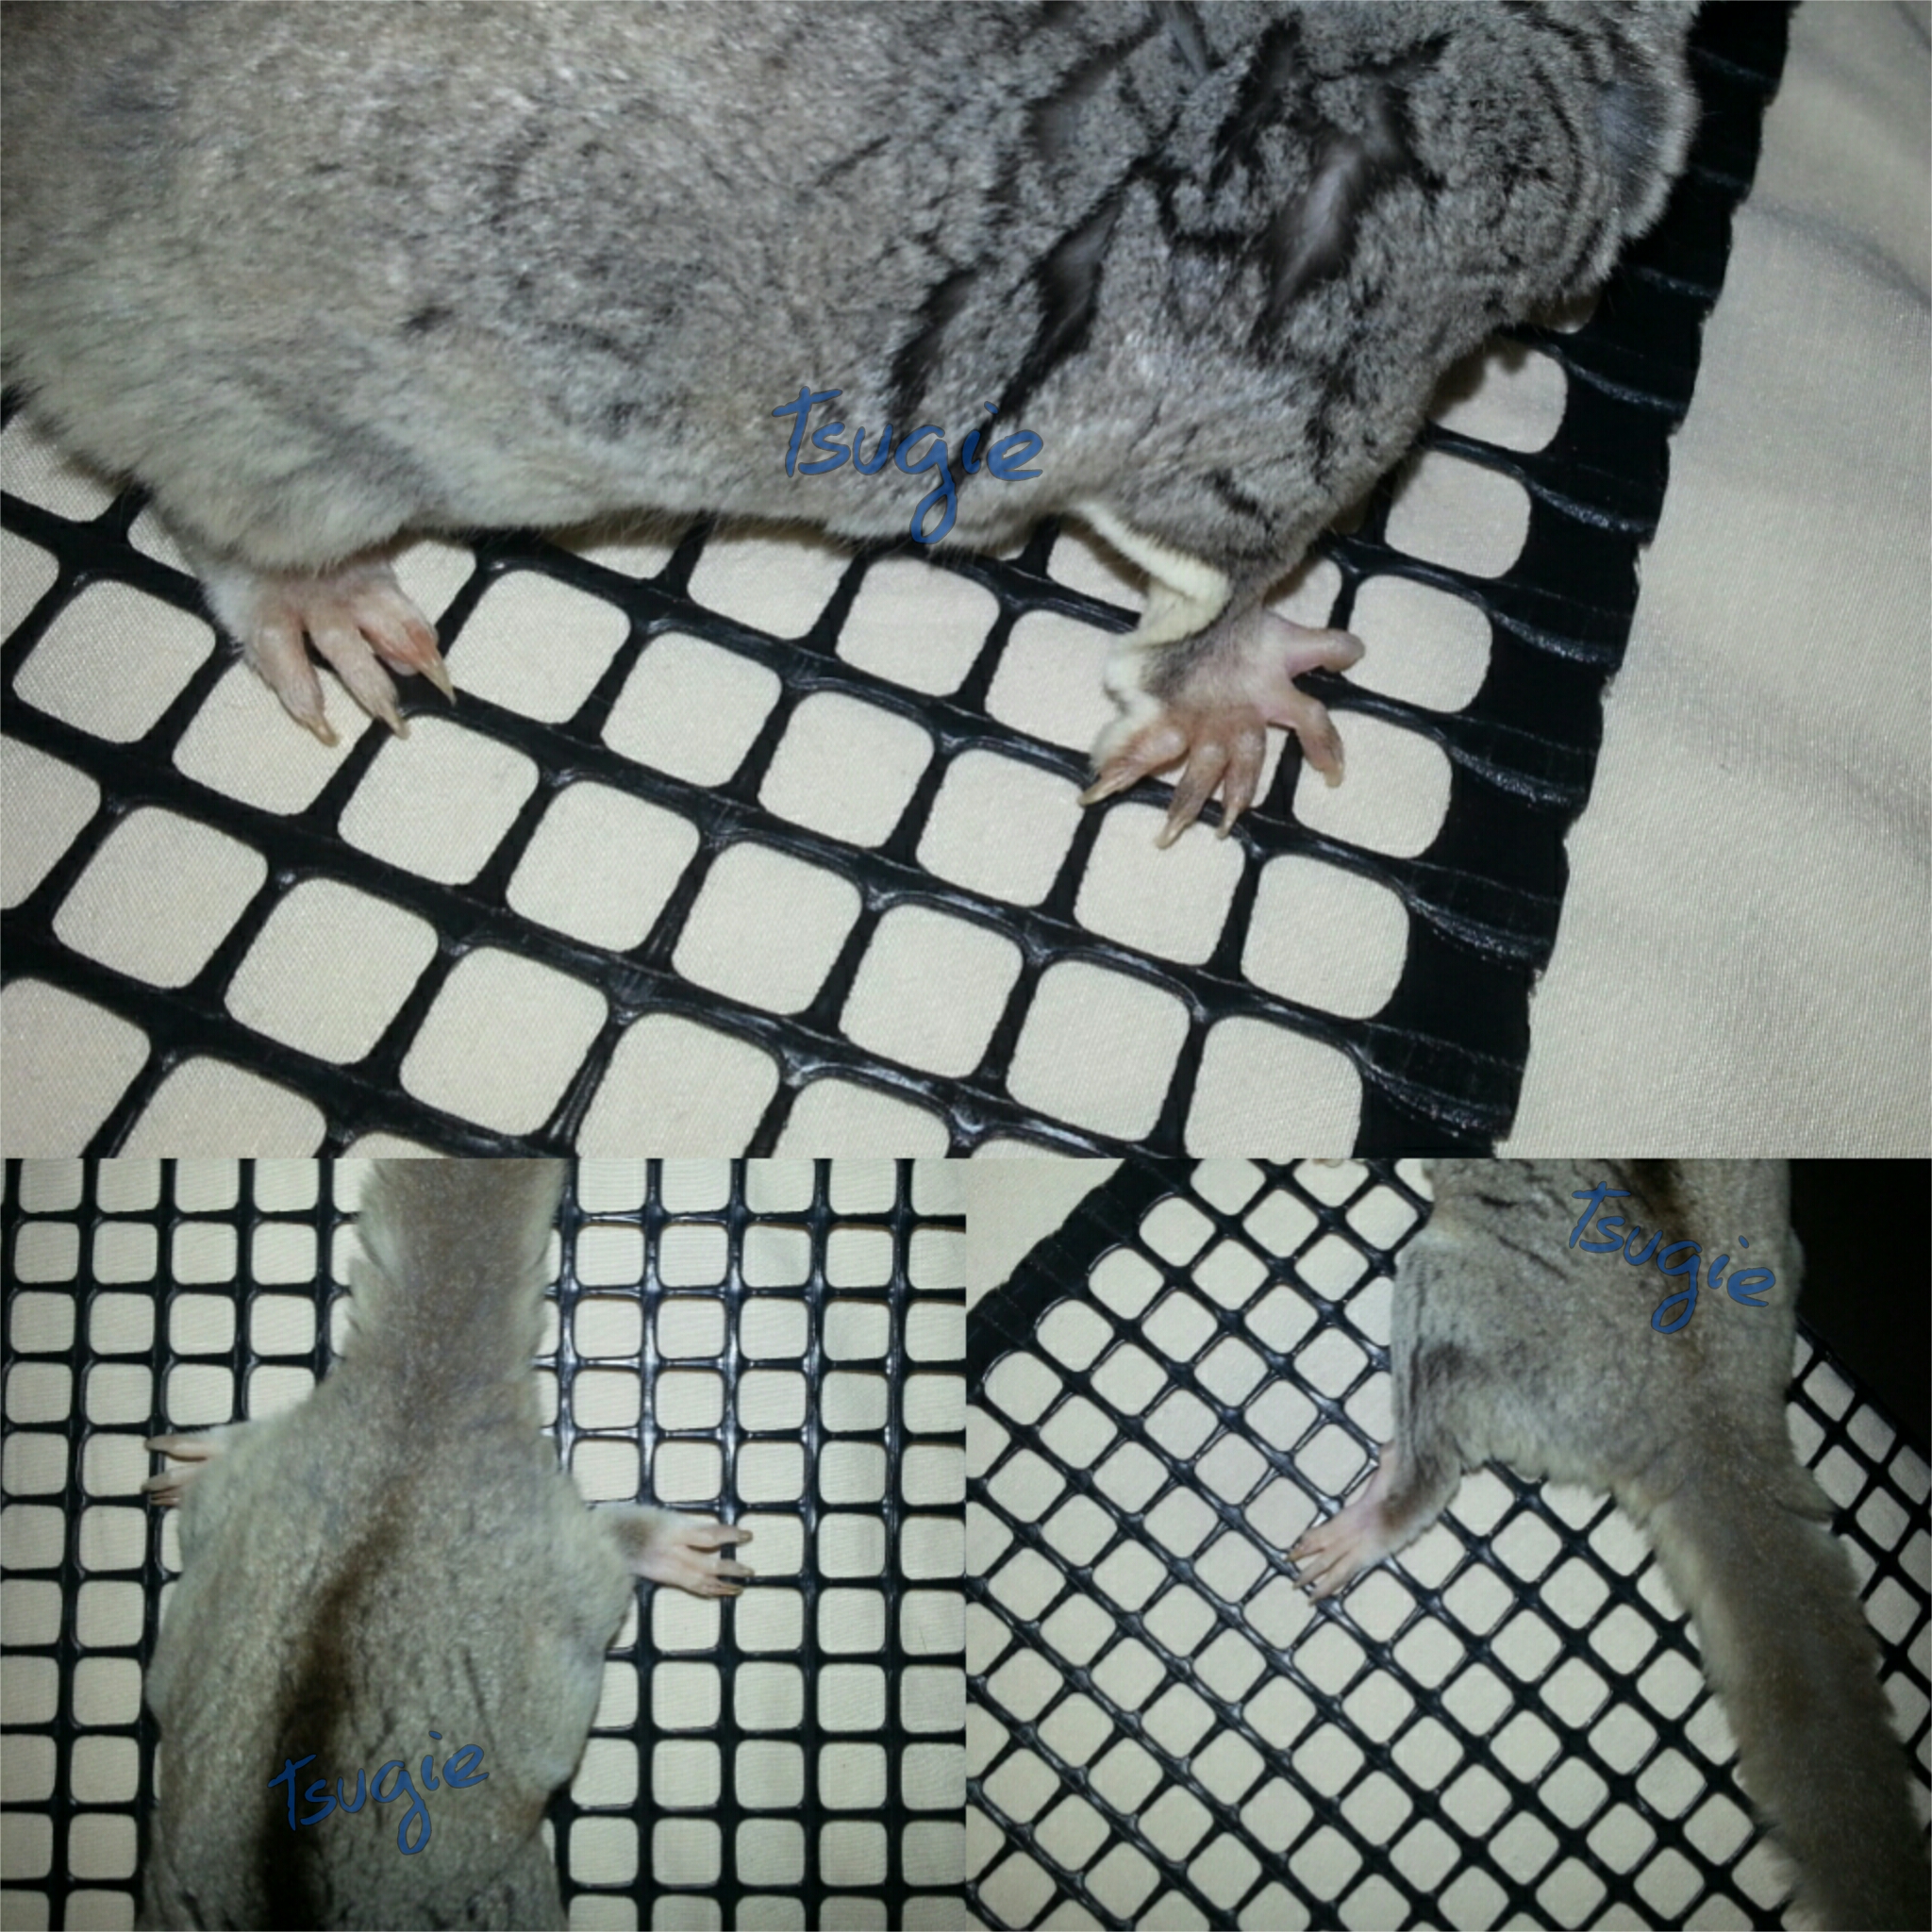
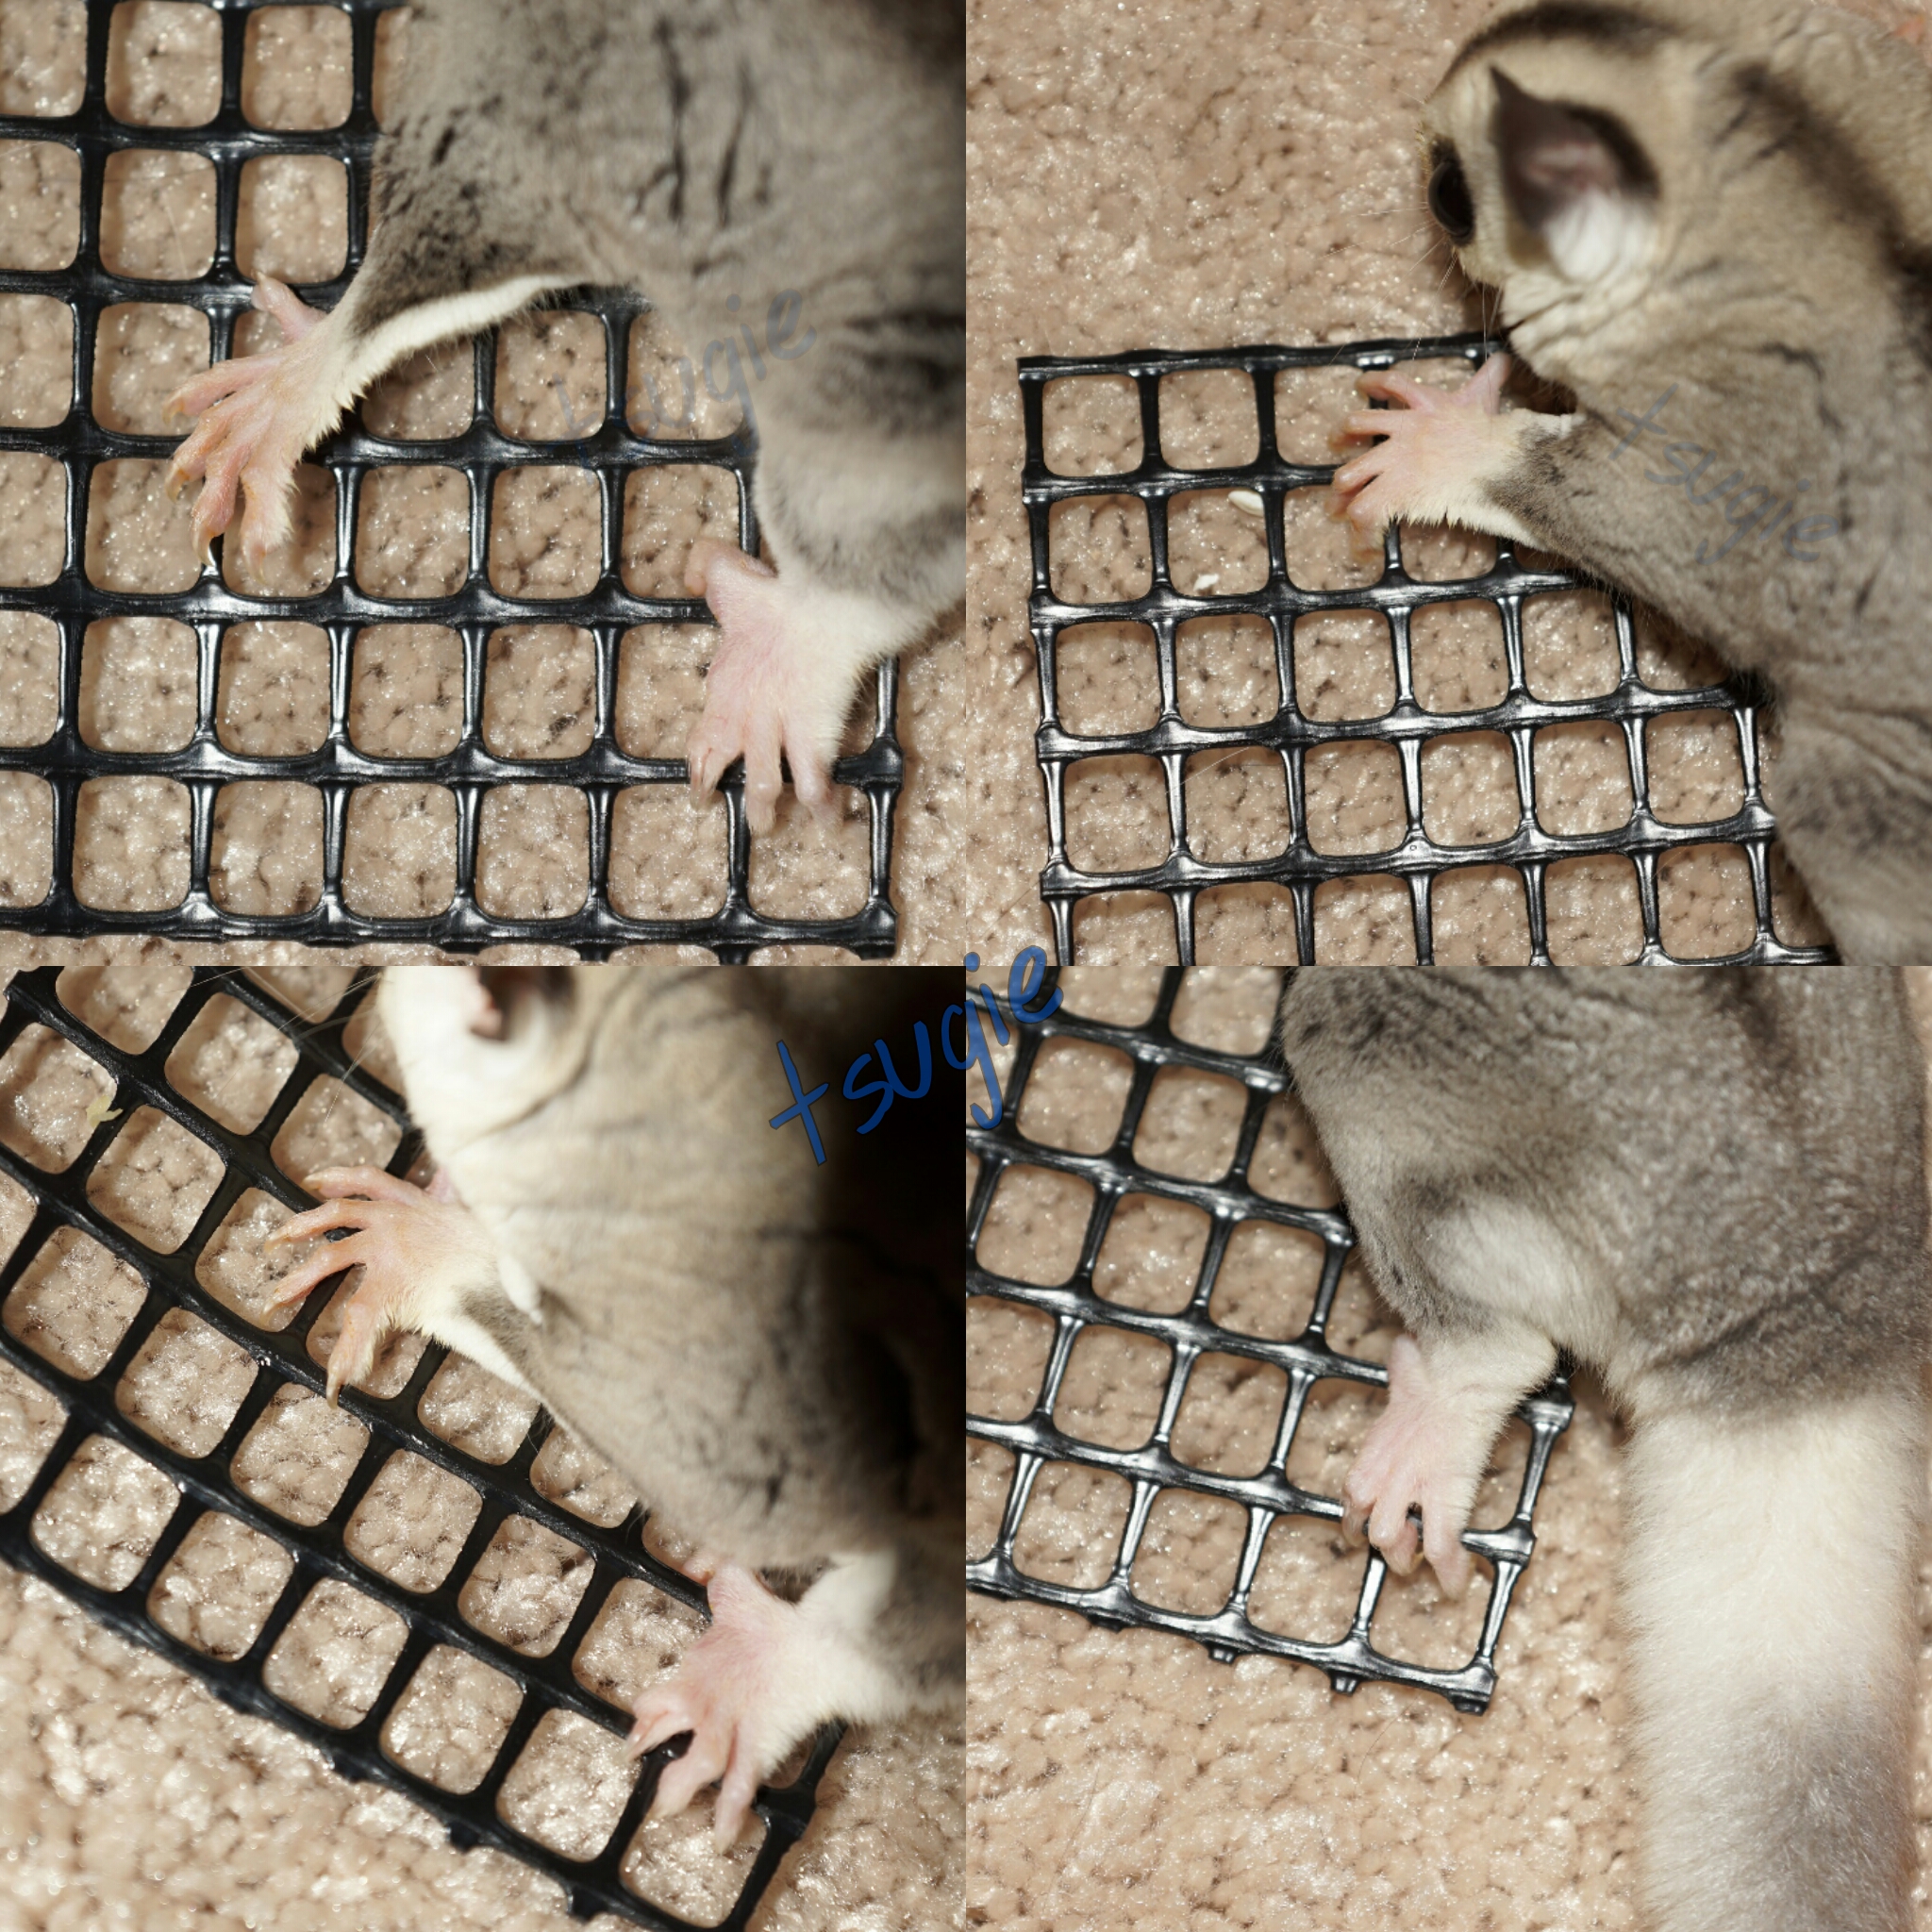
-According to some, the 1/2″ (1.27cm) opening of the squares of the hardware mesh may be too big for young joeys.
The squares are around 13/32” x 13/32 (.406” x .406”) (1.03cm x 1.03cm). However, diagonally the squares do, in fact, measure 1/2″. I don’t actually know if the openings truly are too big for when joeys first start using wheels. The youngest I have gotten a glider was around 9 weeks OOP and he had no issues with the mesh.
For older joeys and adults it’s perfectly fine, but if you are concerned you could use plastic gutter guard mesh. I have only tried the Frost King brand, so I don’t know how others will work.
The first photo is of a full-grown glider and the second photo is of a 10 week old glider.
-Some people have said that this wheel may not be safe because of the long slot on the lids and because of the bolt in the center. First, the slot is extremely unlikely to be a source of danger because of its small size.
Also, on the time I made this tutorial, safe wheels have a bolt in the middle. Including Fast Track Wheels and Stealth Wheels. So, in my opinion, it’s just pure nitpicking.
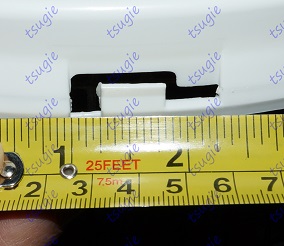
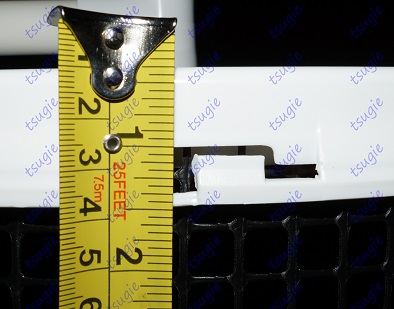
And here’s the slot. The biggest slot on the lids is 1/4″ x 3/8” (0.635cm x .9525cm). I’m not sure how exactly it’s unsafe but you can just cut off that part. Can’t get caught in it if it’s gone. If they mean the vertical slots throughout the lids, then, again, that’s just more nitpicking.
-If you want to make the wheel have some bounce to it, you can make the holes of the backing and lid off-centered. Simply measure 1/2″-1″ from the center and drill. Obviously, the holes have to match. If the hole you drilled on the lid is 1/2″ off-centered, the hole of the backing has to be 1/2″ off-centered as well.
Making the wheel off-centered/have bounce makes the gliders have to exercise a little more.
I recently (March 2016) changed out the ceiling covers of the off-centered wheel for the wall shield.
While the wheel worked fine, the ceiling covers did not provide enough support (as it is heavier on one part being that it’s off-centered) and the back lid would hit the mount or stand.
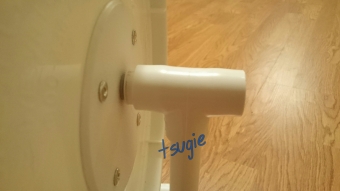
With the wall shield the lid didn’t hit the stand but I added a 5/8″ piece of PVC pipe between the PVC tee and wall shield to add a little extra space to diminish the chances of the wheel hitting the stand/mount even more.
You can probably go up to 3/4″ or a bit more but make sure the bolt you use is long enough.
I know for sure that a 3″ bolt is still long enough after adding the 5/8″ pipe. It’ll be long enough for a 3/4″ piece, too. But I’m not sure for how much longer you can make the pipe and still use the 3″ bolt. All of this is assuming that the bearing reached all the way to the end of the PVC tee.
To get a specific length that will match your wheel, measure the length between the bearing that will be facing the back of the wheel and the end of the PVC tee and add about 3/16″ or a bit more.
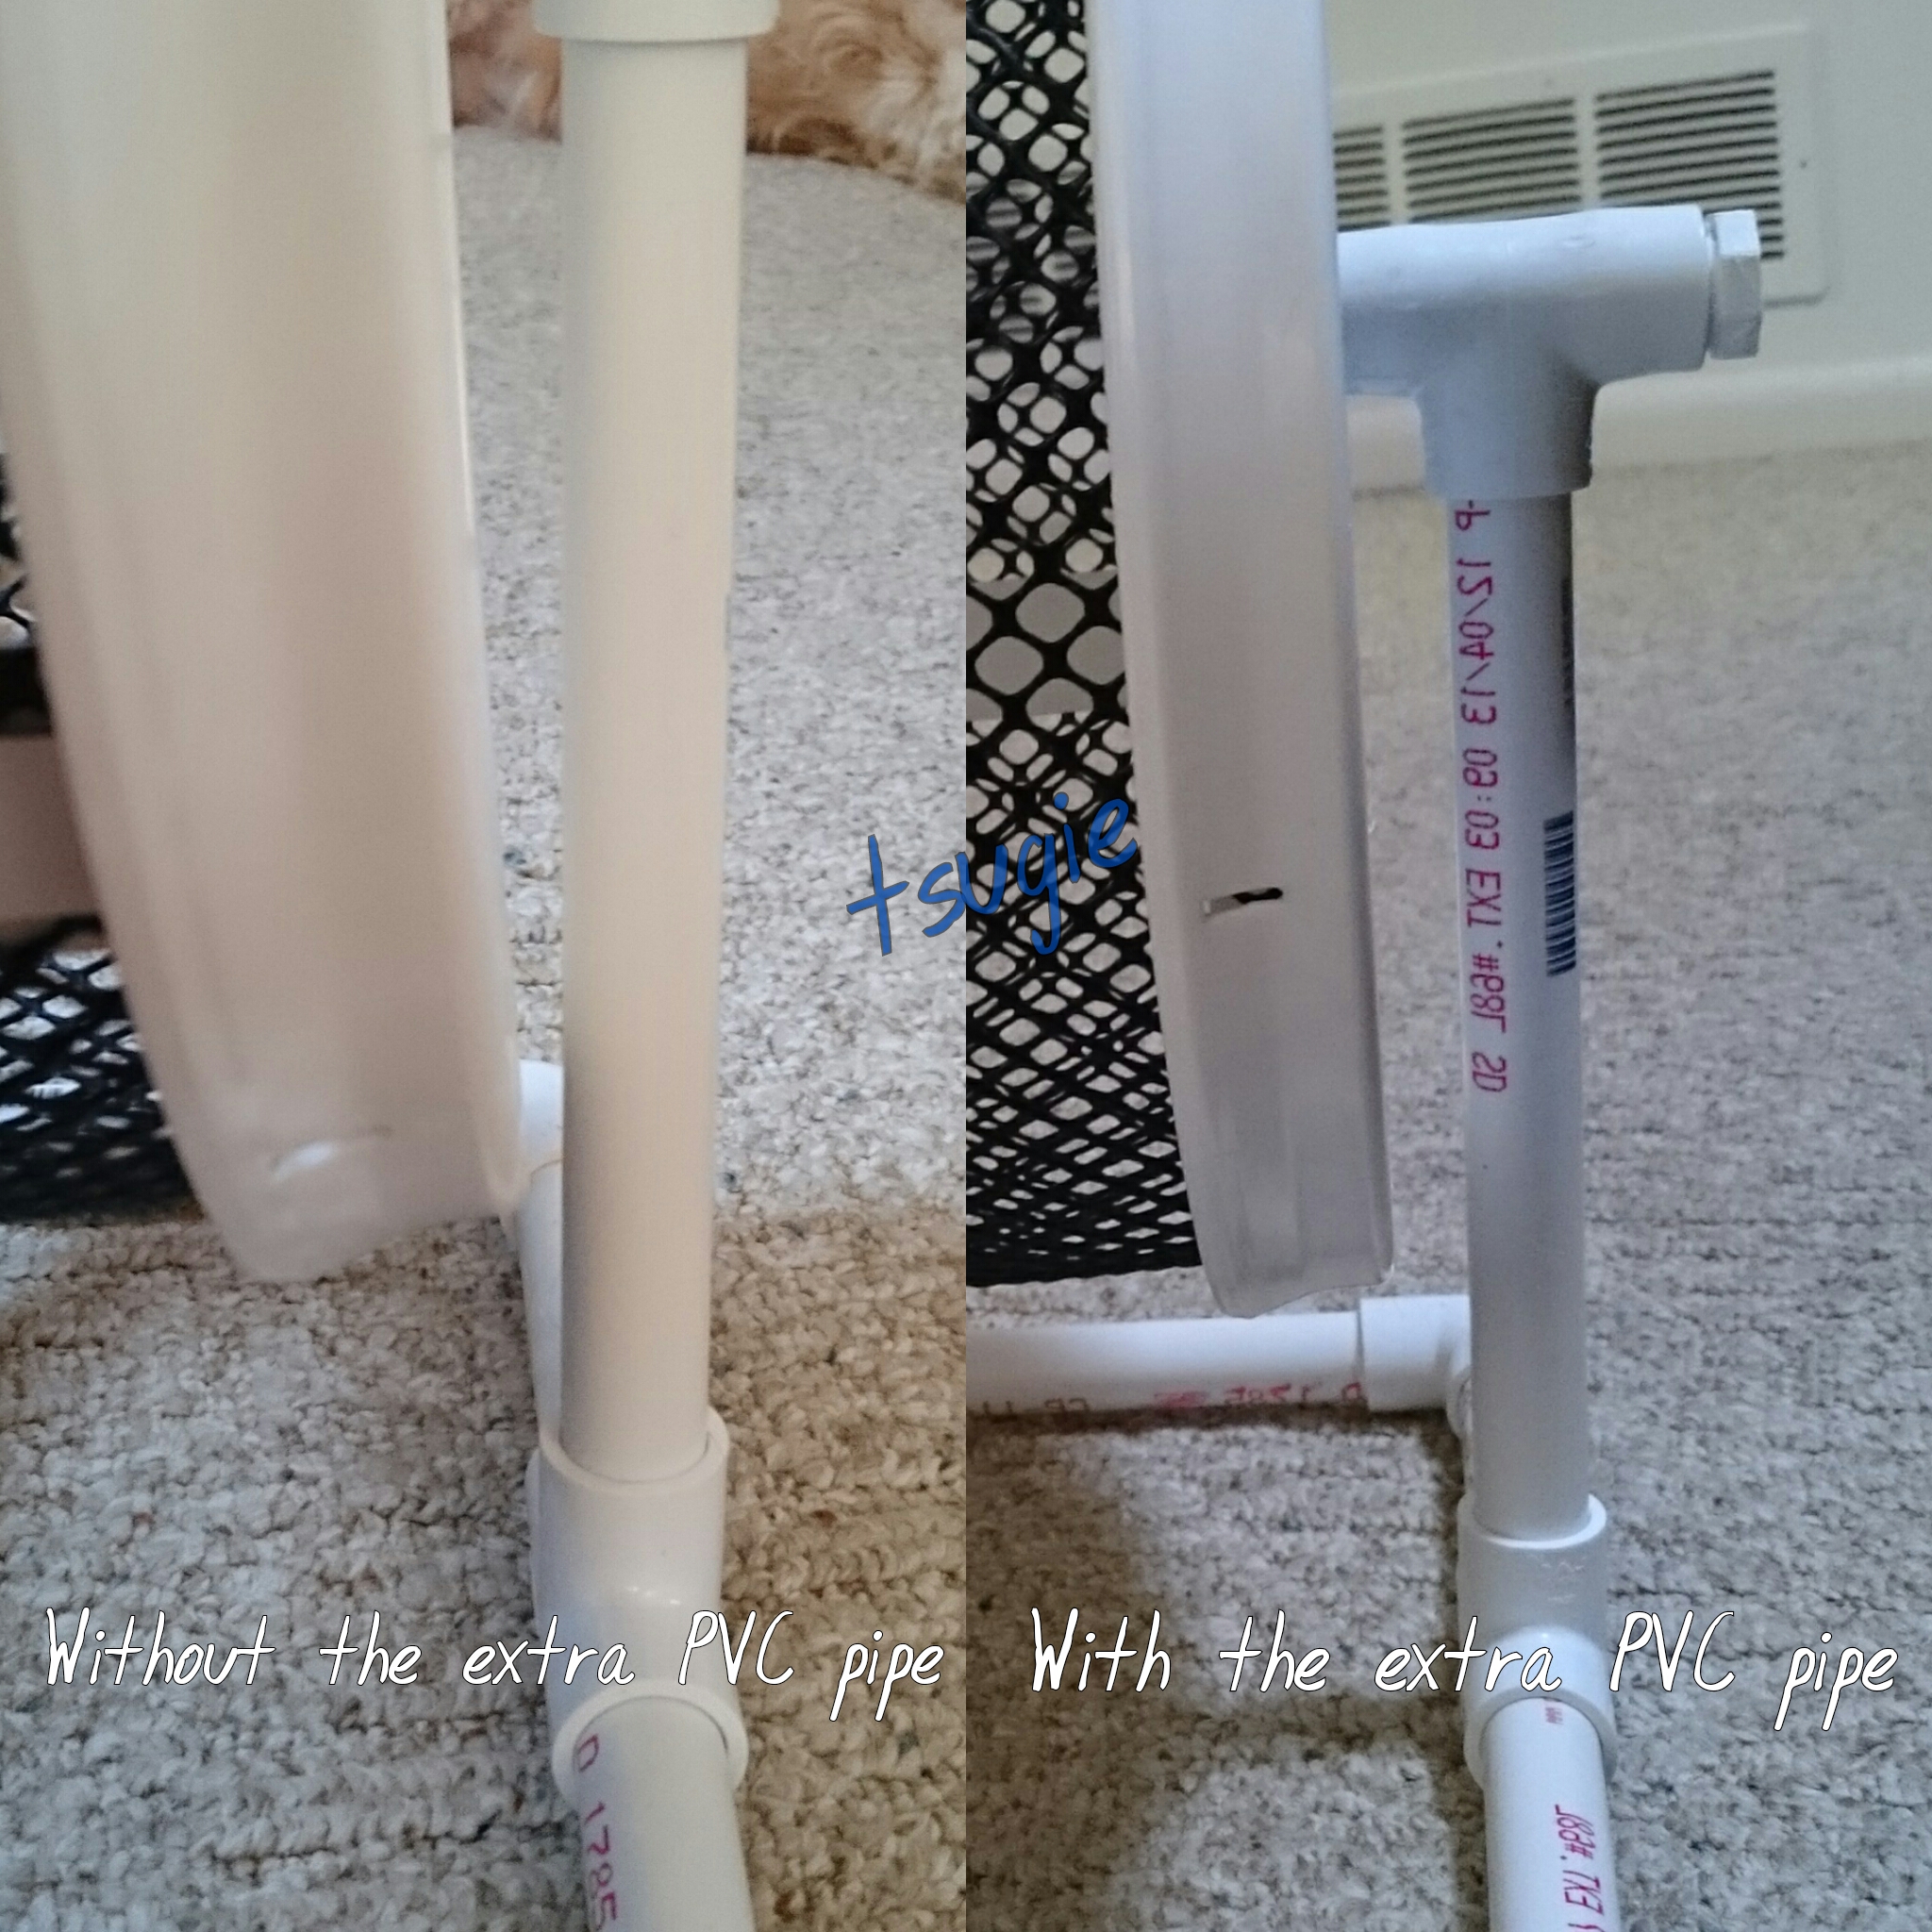
Here’s a better photo of the bearing system with the extra 5/8″ long PVC pipe. As you can see, the bolt doesn’t extend past the tee. If adding the PVC pipe piece, you cannot use the 3/8″ nylon spacers I have mentioned in this tutorial. They won’t pass through the pipe.
-Another option is using a cross tee instead of a tee. With this method the wheel and cage mount is all a single piece.
I haven’t tried it but it should work the same as the one with the regular tee.
The bearing system is installed the same way as with the regular tee.
For the cage mount:
- Insert a 5″ (12.7cm) PVC pipe on each of the other openings of the cross tee.
- Insert a 90 degree elbow on each end of the pipes.
- Insert plugs on the elbows to close them off.
*Many of the comments/recommendations for the Horizontal and Vertical mounts apply to this one as well.*
You can also use a floor stand. Just close the top opening.
*I have not bothered using this method because it would require me to remove the bolts every time I cleaned the wheel. It’s more work.*
lol great idea!
LikeLike
Thank you! Don’t know that I’ll actually make a wheel, but might try my hand at making a floor run about wheel using the same idea and a minnow bait bucket lid for one of the paint bucket lids. 🙂
LikeLike
I’m glad you found it helpful! Good luck with the run about. 🙂
LikeLike
Where did you get the bucket lids with the gaskets in them?
LikeLike
I say where I got most of the materials, including the lids, on the tutorial. 🙂
And I provided links as well. 🙂
Anyway, I got them at Lowe’s.
LikeLike
Can you get smaller lids to make like a travel wheel?
LikeLike
I know the Baby Raptor wheel exists so I know it’s doable. But I haven’t really searched to see if there are any smaller lids found locally that are suitable.
Sorry I can’t be of more help. 😦
LikeLike
No problem thank you for this great tutorial
LikeLike
Can you make a video tutorial of it? Im a highly visual person and those word makes it hard for me to understand… T__T
LikeLike
I totally understand…I’m very visual myself. Haha
My husband and I will be making a couple more wheels soon so I can try to make a video tutorial.
It shouldn’t be that hard but I’ve never done one…so I’m not making any promises.
If I do make it, it’ll take me a couple of weeks…
I think I will, though. It would be very helpful to have a video. XD
LikeLike
I finished and uploaded the video tutorial!
Here’s the link: https://youtu.be/ncqyPrjy3f8
It’s not as detailed as the written one but I’m sure the written one will make more sense after viewing the video. 🙂
LikeLike
Where did you get the acrylic shield or that nylon spacer? I’d like to change out the ceiling covers that I used on my wheel. Do you have any pics of how it looks or how it’s it put together? I have an idea but I just want to make sure. I’ve been looking for those thicker spacers but can’t really find them other than buying a round stick at 10ft.
LikeLike
Do you mean the acrylic sheet or wall shield?
Either way, I got both at Lowe’s.
But the acrylic sheet requires cutting. It’s a rectangular sheet.
I’m not sure what you mean with how it looks like or how it’s put together.
It’s the same process as with the ceiling covers. Some differences like not having to sand down the pegs…because there aren’t any on the wall shield or acrylic sheet. But besides those couple specific differences, the rest is the same.
You can see how they look on their individual posts.
I got the nylon spacers at Ace Hardware. Lowe’s and Home Depot don’t seem to carry them.
LikeLike
Is there an email address I can send you a pic? I think I may not know the name of the piece. Do you have any pics of the acrylic sheet?
LikeLike
You can see which acrylic sheet I used here: https://tsugielove.wordpress.com/2015/02/21/diy-sugar-glider-wheel-update/
You can see the post about the wall shield here: https://tsugielove.wordpress.com/2016/03/22/new-wheel-backing-option/
I’m not sure what you aren’t understanding since I have everything pictured but you can send me an email to tsugielove@hotmail.com
LikeLike
Hi I’m having trouble getting the gutter gard to be tight anything will help
LikeLike
What do you mean “to be tight”?
Do you mean you’re having trouble keeping the gutter guard in place?
You have to be pressing the gutter guard down towards the groove of the lid while you push in the gasket/tubing to assure that the gasket/tubing actually has a hold on the whole edge of the gutter guard.
LikeLike
No once I got everything together both sides the gutter gard seems to not be stretched tight
LikeLike
I’m sorry, but I’m not understanding what you’re trying to say.
Are you saying the gutter guard isn’t straight? That it’s bent?
LikeLike
I removed the gasket or tubing from the lid….put my gutter guard in place then pushed the gasket back in with a flat heat screw driver so it would hold the mesh in place. Go all the way around pushing the tubing down so it holds the mesh in place
LikeLike
I have made several wheels with the tabs you refer to. I haven’t had a problem, but I can see where it could be an issue. When cutting out the tab, it will leave an edge that can grab a patagium. Solution? US Plastics sell the lids with gaskets and no tear tabs. I just found them myself. lol
Great tutorial BTW! 🙂
LikeLike
Omg, I haven’t entered here in months!
Sorry!
I never cut the tear tab since I was never concerned with that space and I never had any issues with it. I’ve had these wheels (in use) for like 2 years now and still haven’t had any issues.
But I’m guessing that it can be cut diagonally so that the cut isn’t so sharp or abrupt.
LikeLike
I made a wheel using your instruction for floor mount and 5″ wall protecter. I did have to make modifications as I made mine for a hamster, which shouldn’t have mesh wheels. I just used the upper part of a bucket and the lid to same. It works perfect! Thank you for all the great instructions and updates.
LikeLike